For our first group client project of our second year, we were instructed to collaborate with our client to create an interactive exhibition to draw in tourists with an insight into Winchester’s history. The proejct must utilise AR and/or VR technology, with an exhibition being held on university campus.
The general tone should be fun but informative. Through the use of the augmented reality, visitors should be able to learn about the history and/or the legends and stories behind the ancient building. Inspiration for ideas could be enhancing Winchester’s history using cutting edge technology to illustrate the information in a fun and informative way that engages and involves the user.
Contribution to the group project
As the lead developer my role was to construct the entire project using Untiy to piece it together using the 3D designers assets, where I'd use a varitey of C# scripts to construct the complete the augmented Round Table project .
The concept
After discussing with our client about what they wanted the application to show, we came up with what we wanted to showcase:
An AR application that showcases the Knights of the Roundtable.
Inspired by the Roundtable located in Winchester Great Hall.
Users will scan a miniature 3D-printed model of the Roundtable, which will present them with an AR model
Users can walk around the AR model and interact with it.
By selecting a section of the table, information of the knight who sat there will be shown.
AR Inspiration
The team and I, looked at a vairety of previous projects from other developers, to get a sense of what kind of other projects had been constructed in the past.
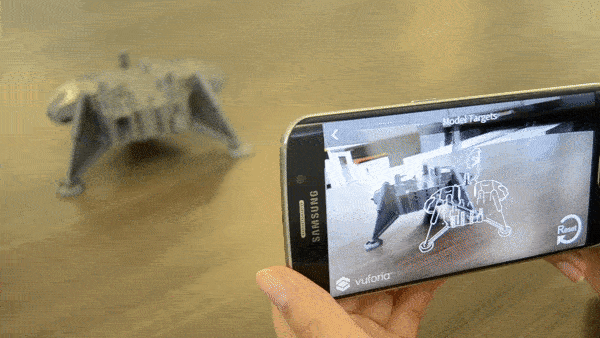
The mars model target from vuforia, gave me the inital inspiration to utilise object recognition for the project as I felt that this new technology would be perfect for the framework behind the project, due to it's unique abilty to use a 3d object as the image target.
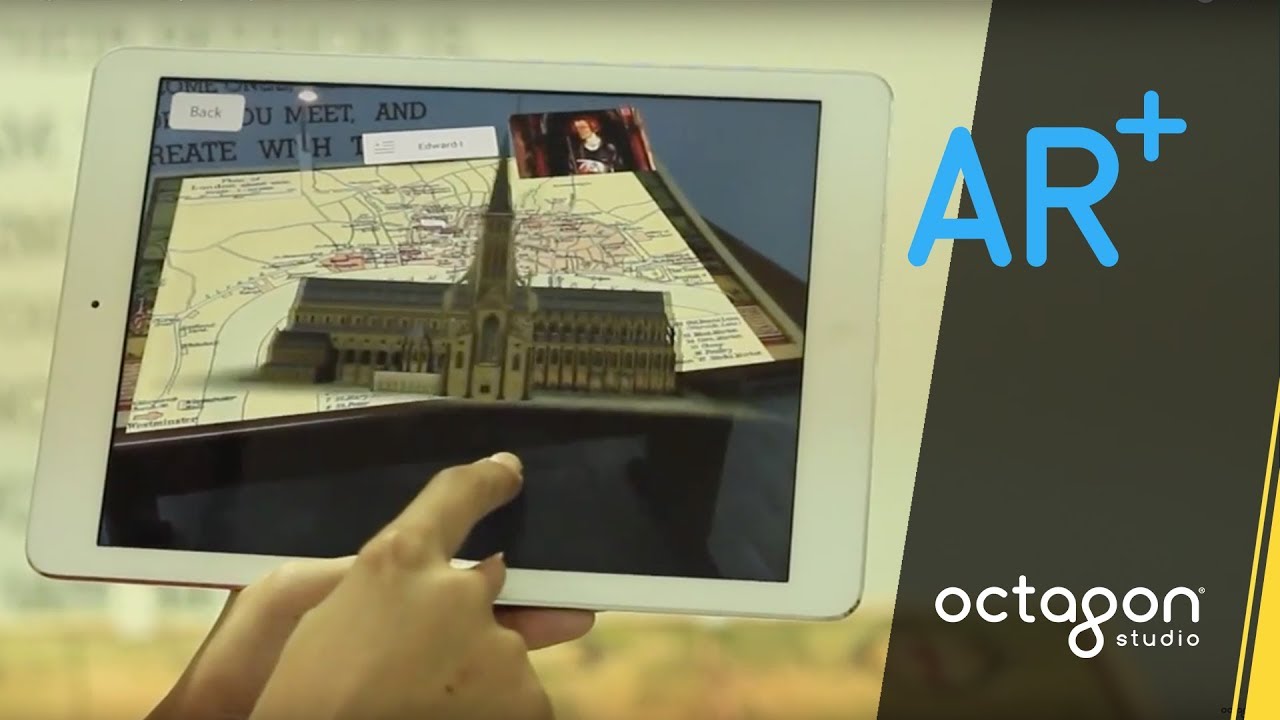
To gauge how current historical buildings are being shown in AR, i had to understand what is currently being used as an industry standard. This AR representaion of a cathedral, gave me the inspiration for the how an AR application could represent the round table in it;s finest form.
Vuforia tests
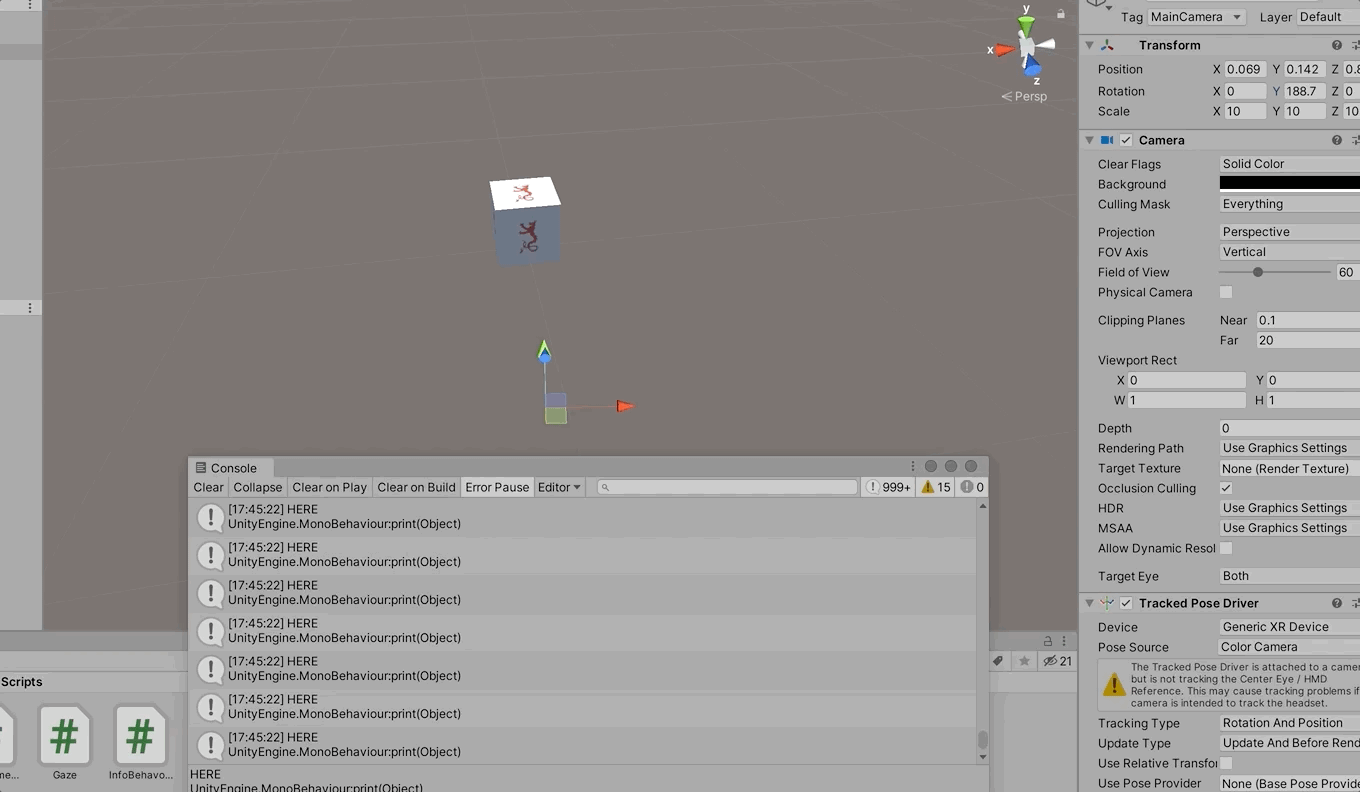
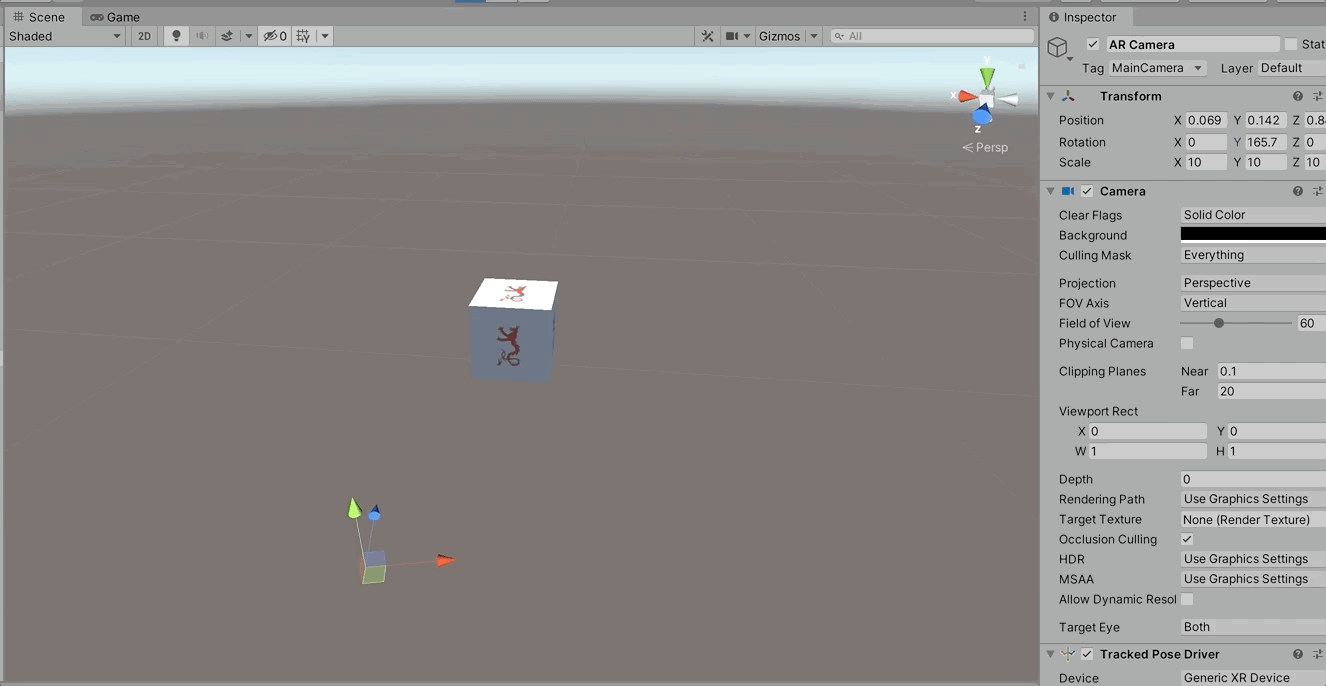
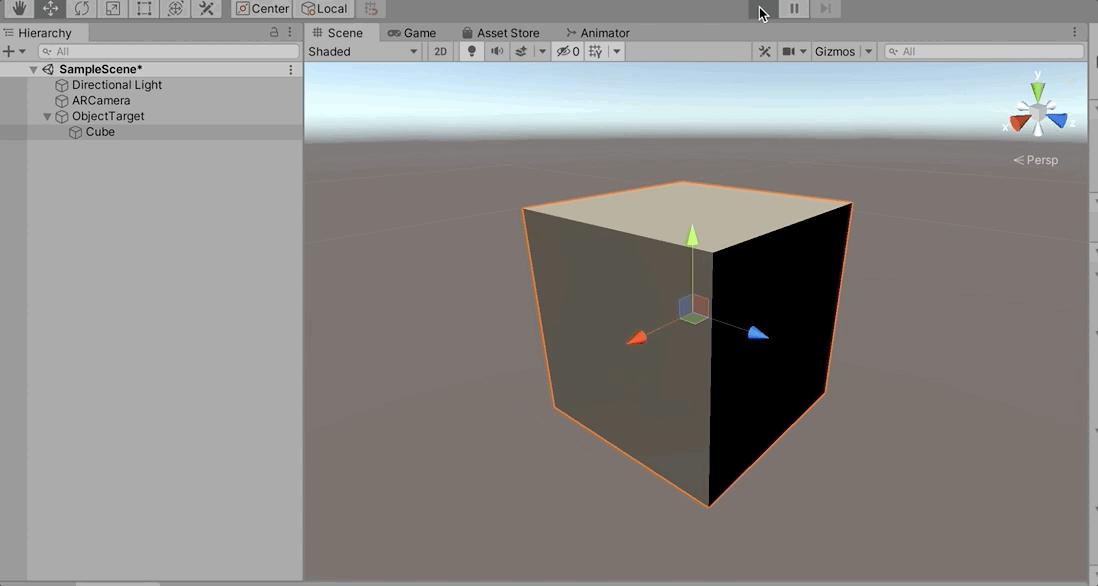
To start learning about how object recognition AR works, i decided to test the functionality of it using an ardunio i had nearby, on Unity.
I augmented a cube, which gave me a good insight into the physics of the object (when using obeject recognition) and how it would react when using the actual asset.
Intergration of the design
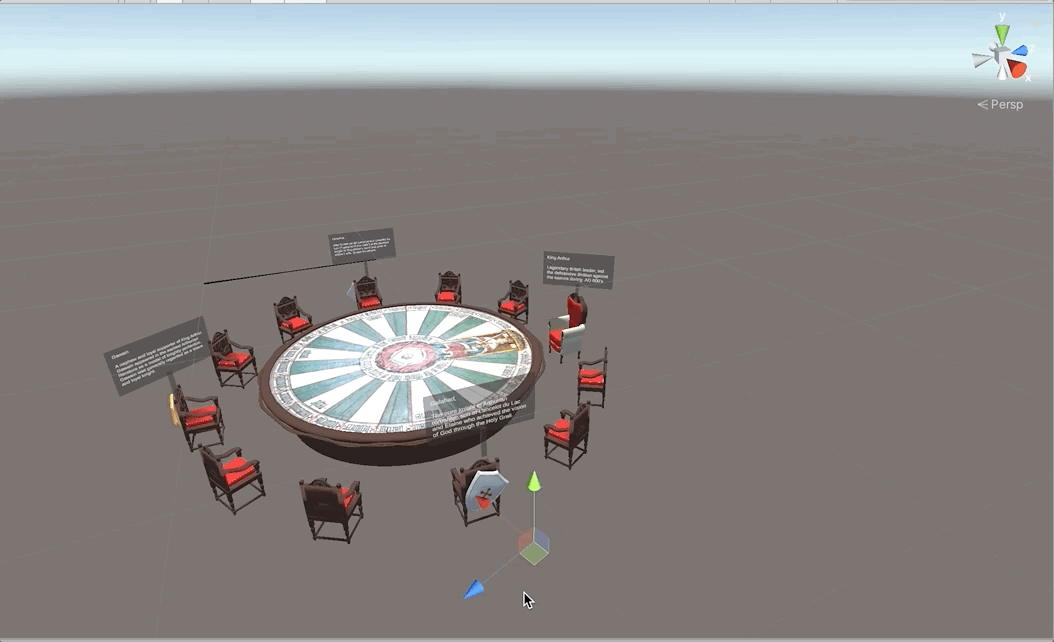
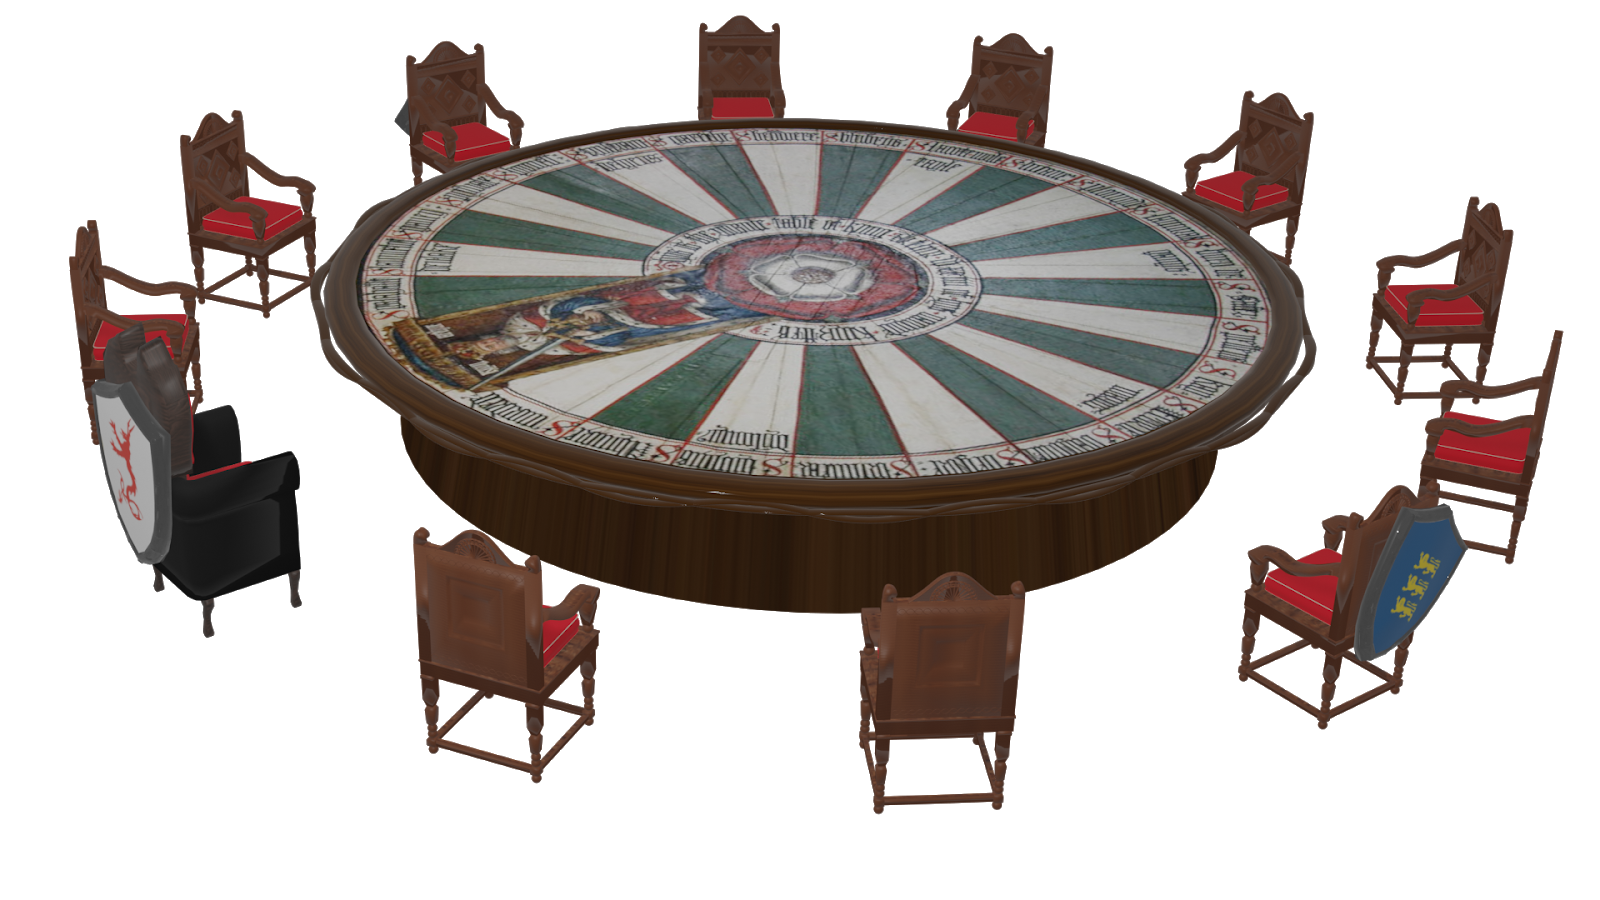
The 3D designer in our group, produced this brilliant replica of the roundtable in Winchester.
The 3D model has twentyfive places for allegedly all of King Arthur's knights. At the very centre of the table is the Tudor Rose, which was implemented by Henry the eighth, as so is the portait of him at the top of the table.
As a group, we decided after long debate and meetings with our client that we would only feature 12 seats situated around the table, as we did not want to over clutter the aesthetic of the table and to allow for people to walk freely in between the chairs, where twentyfive chairs would crowd up and defoucus the user from the focus point, the table.
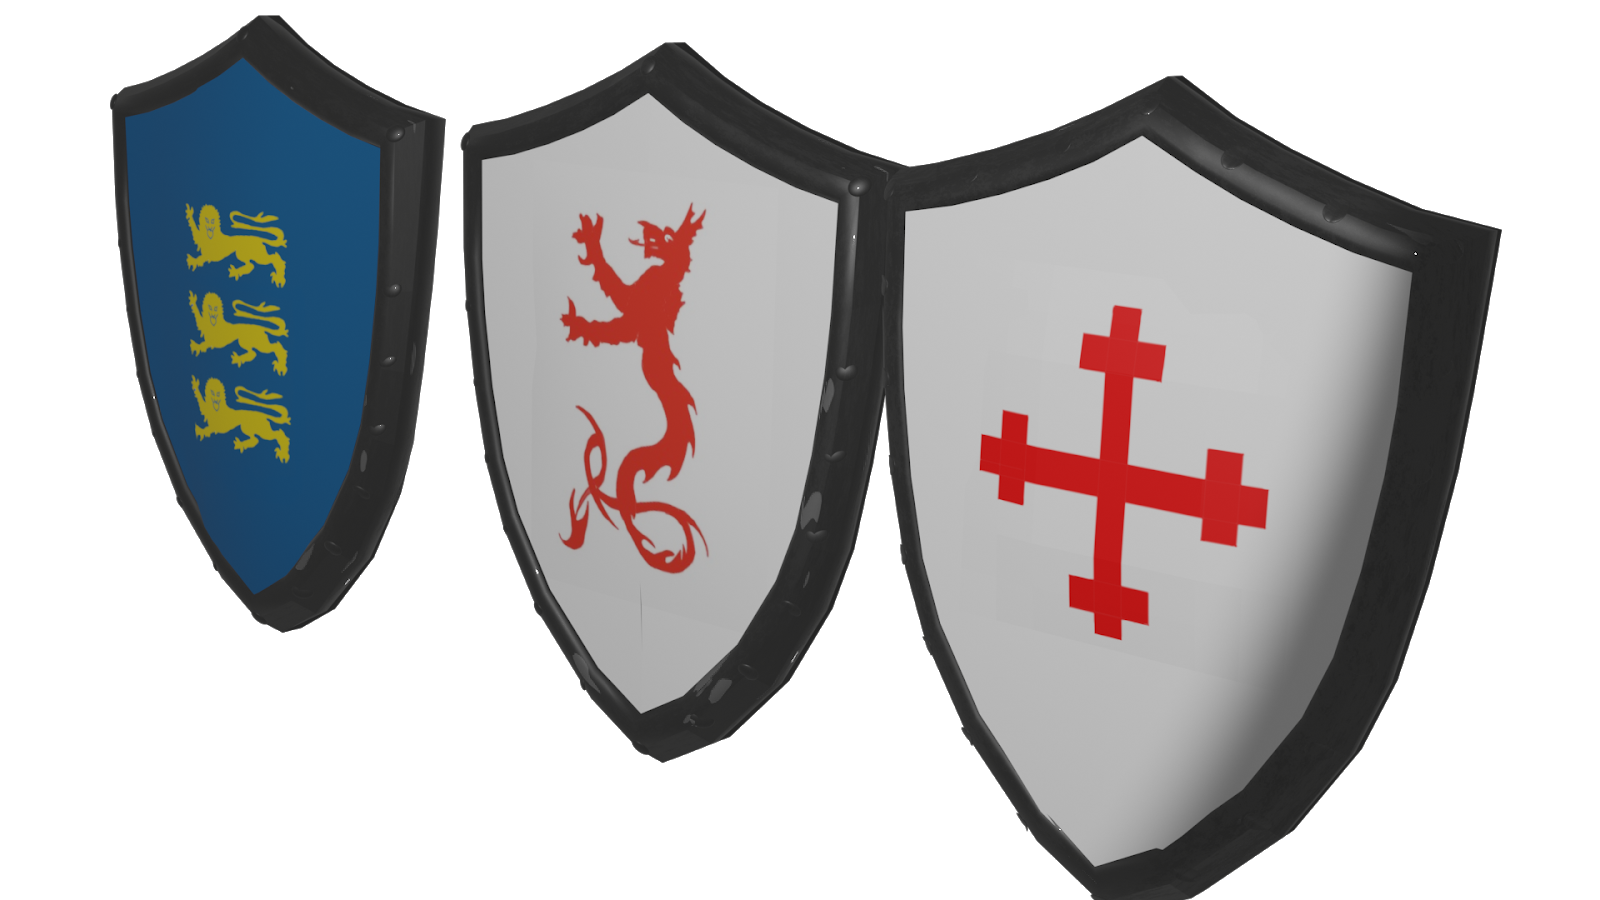
We decided as as group that we'd make four chairs at every quaterly point of the table, a seat for the four key knights, one of whom being Launcelot and of course King Arthur, where their unique crests on their sheilds would identify where they would be seated.
The total list of knights are:
Galahad
Gawain
Lancelot
King Arthur
To emphasise the royalty of King Arthur, our 3D designer created a throne to emulate his superiority over the other knights.
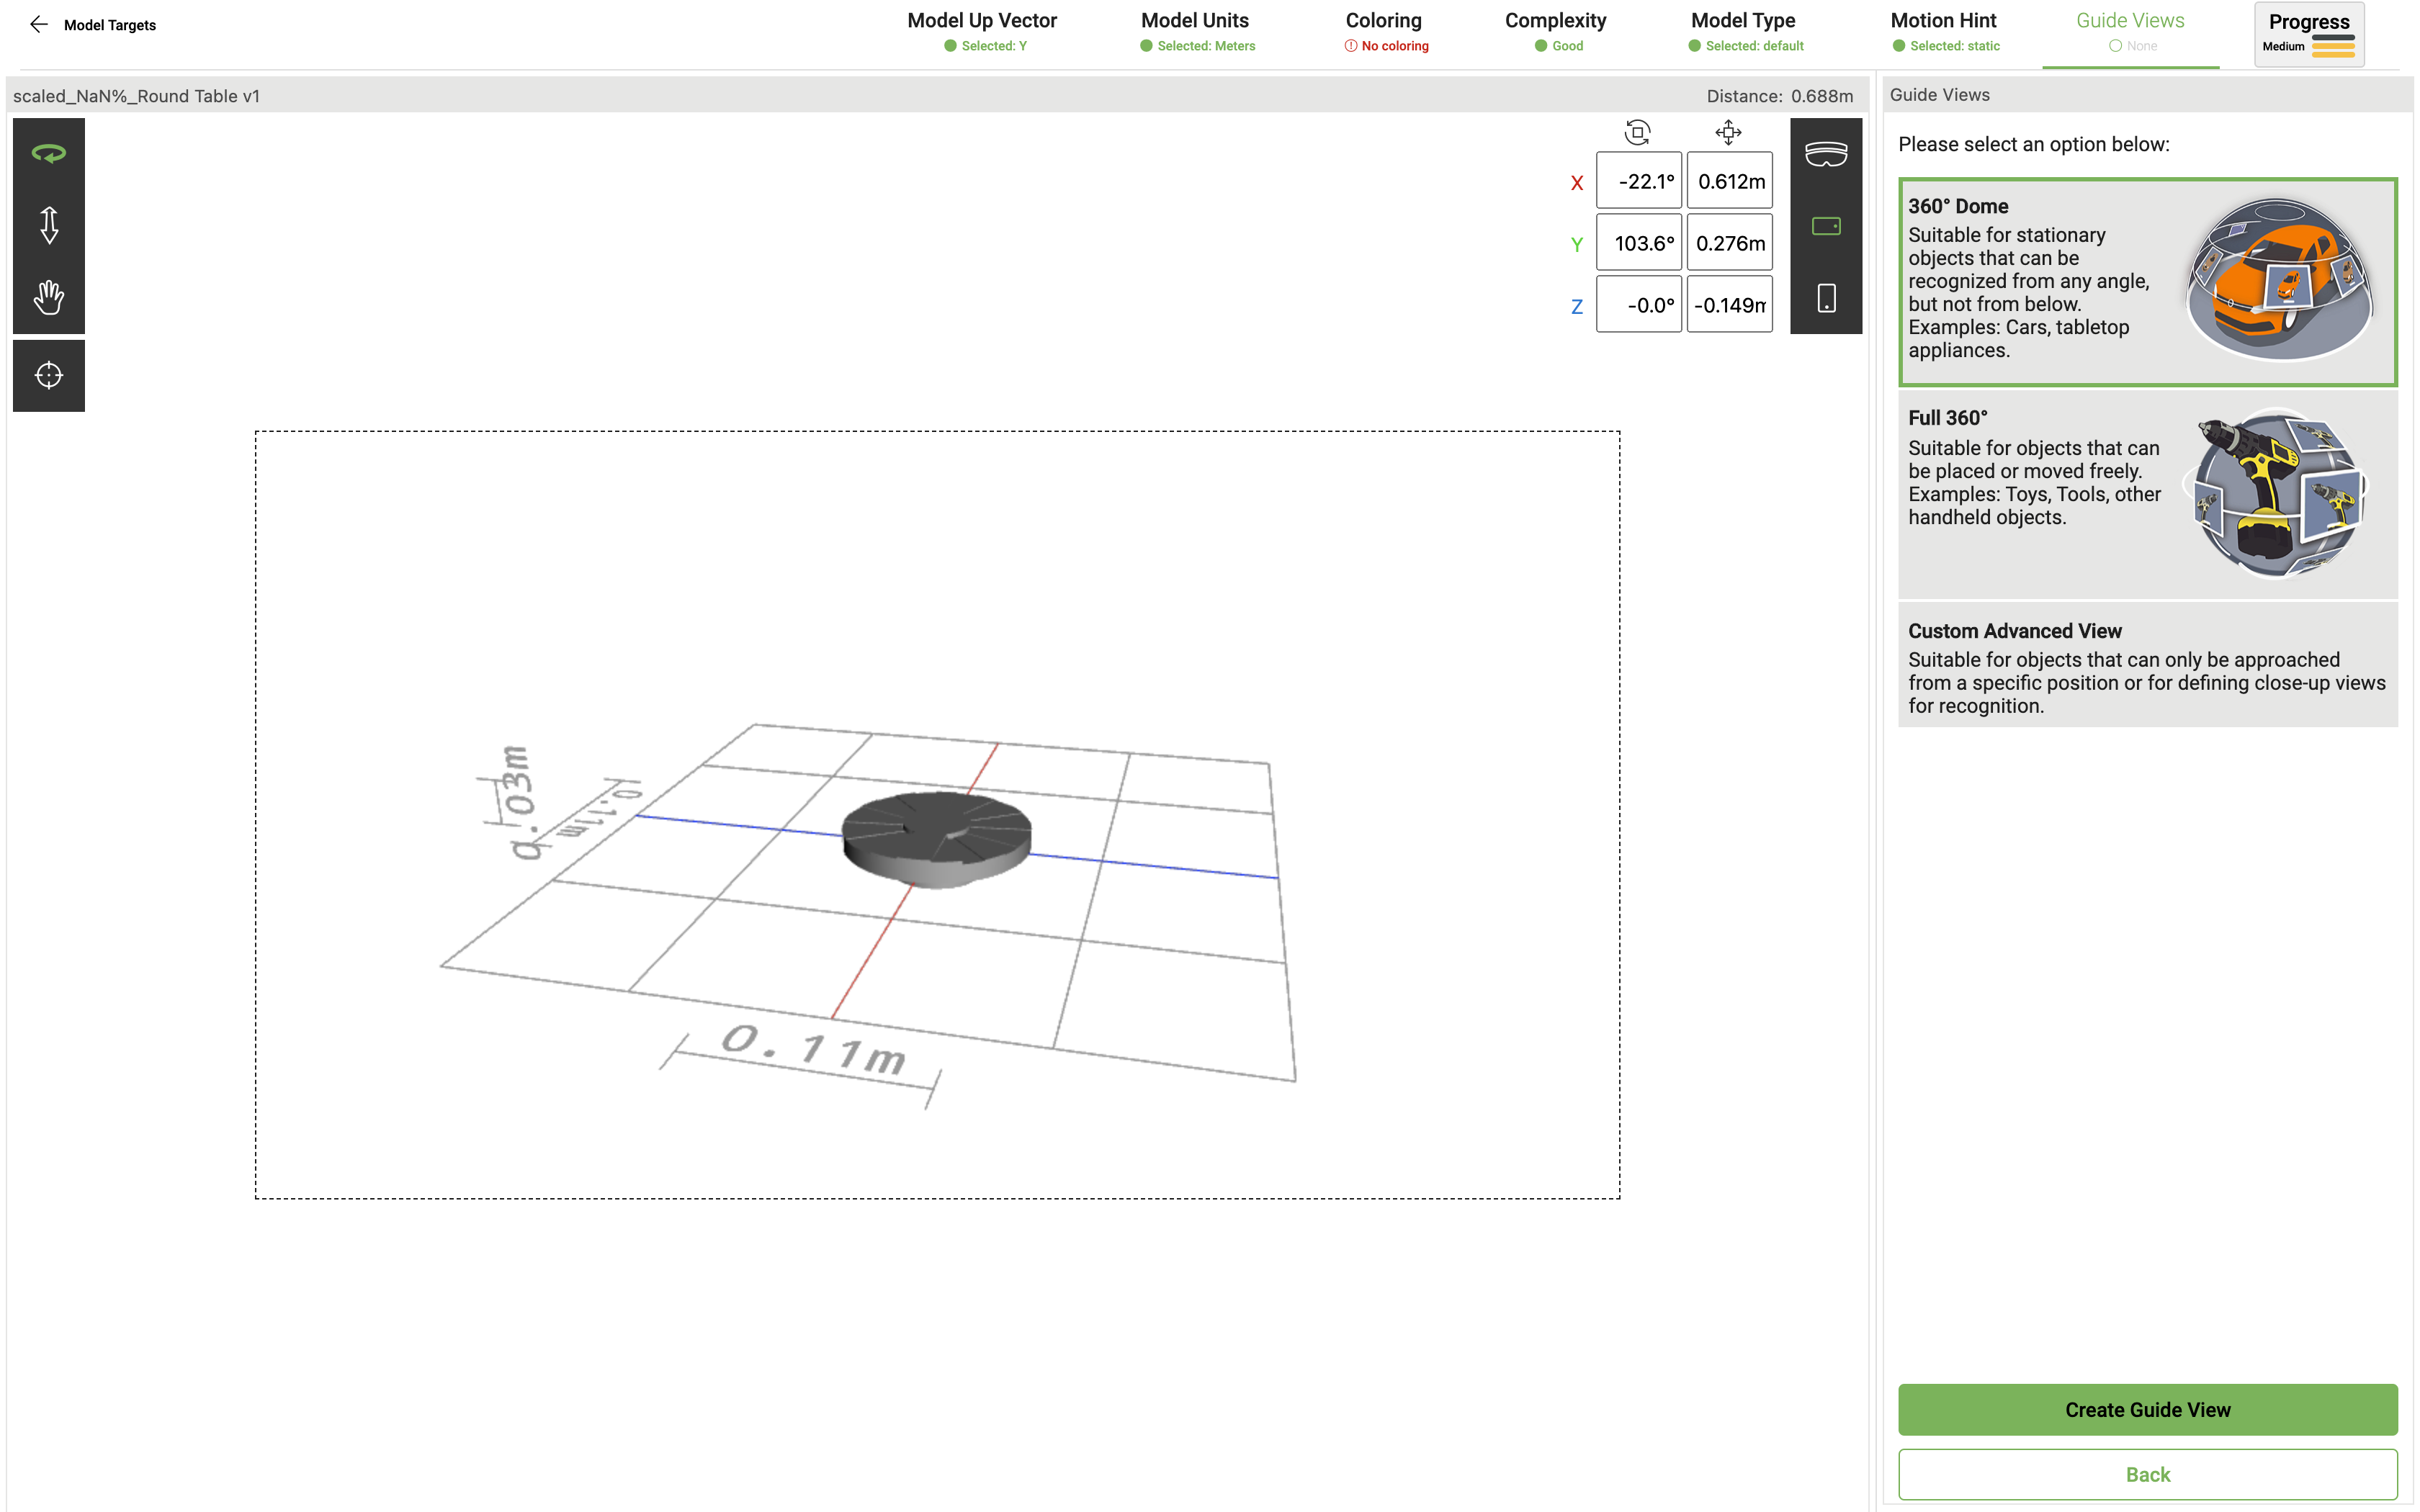
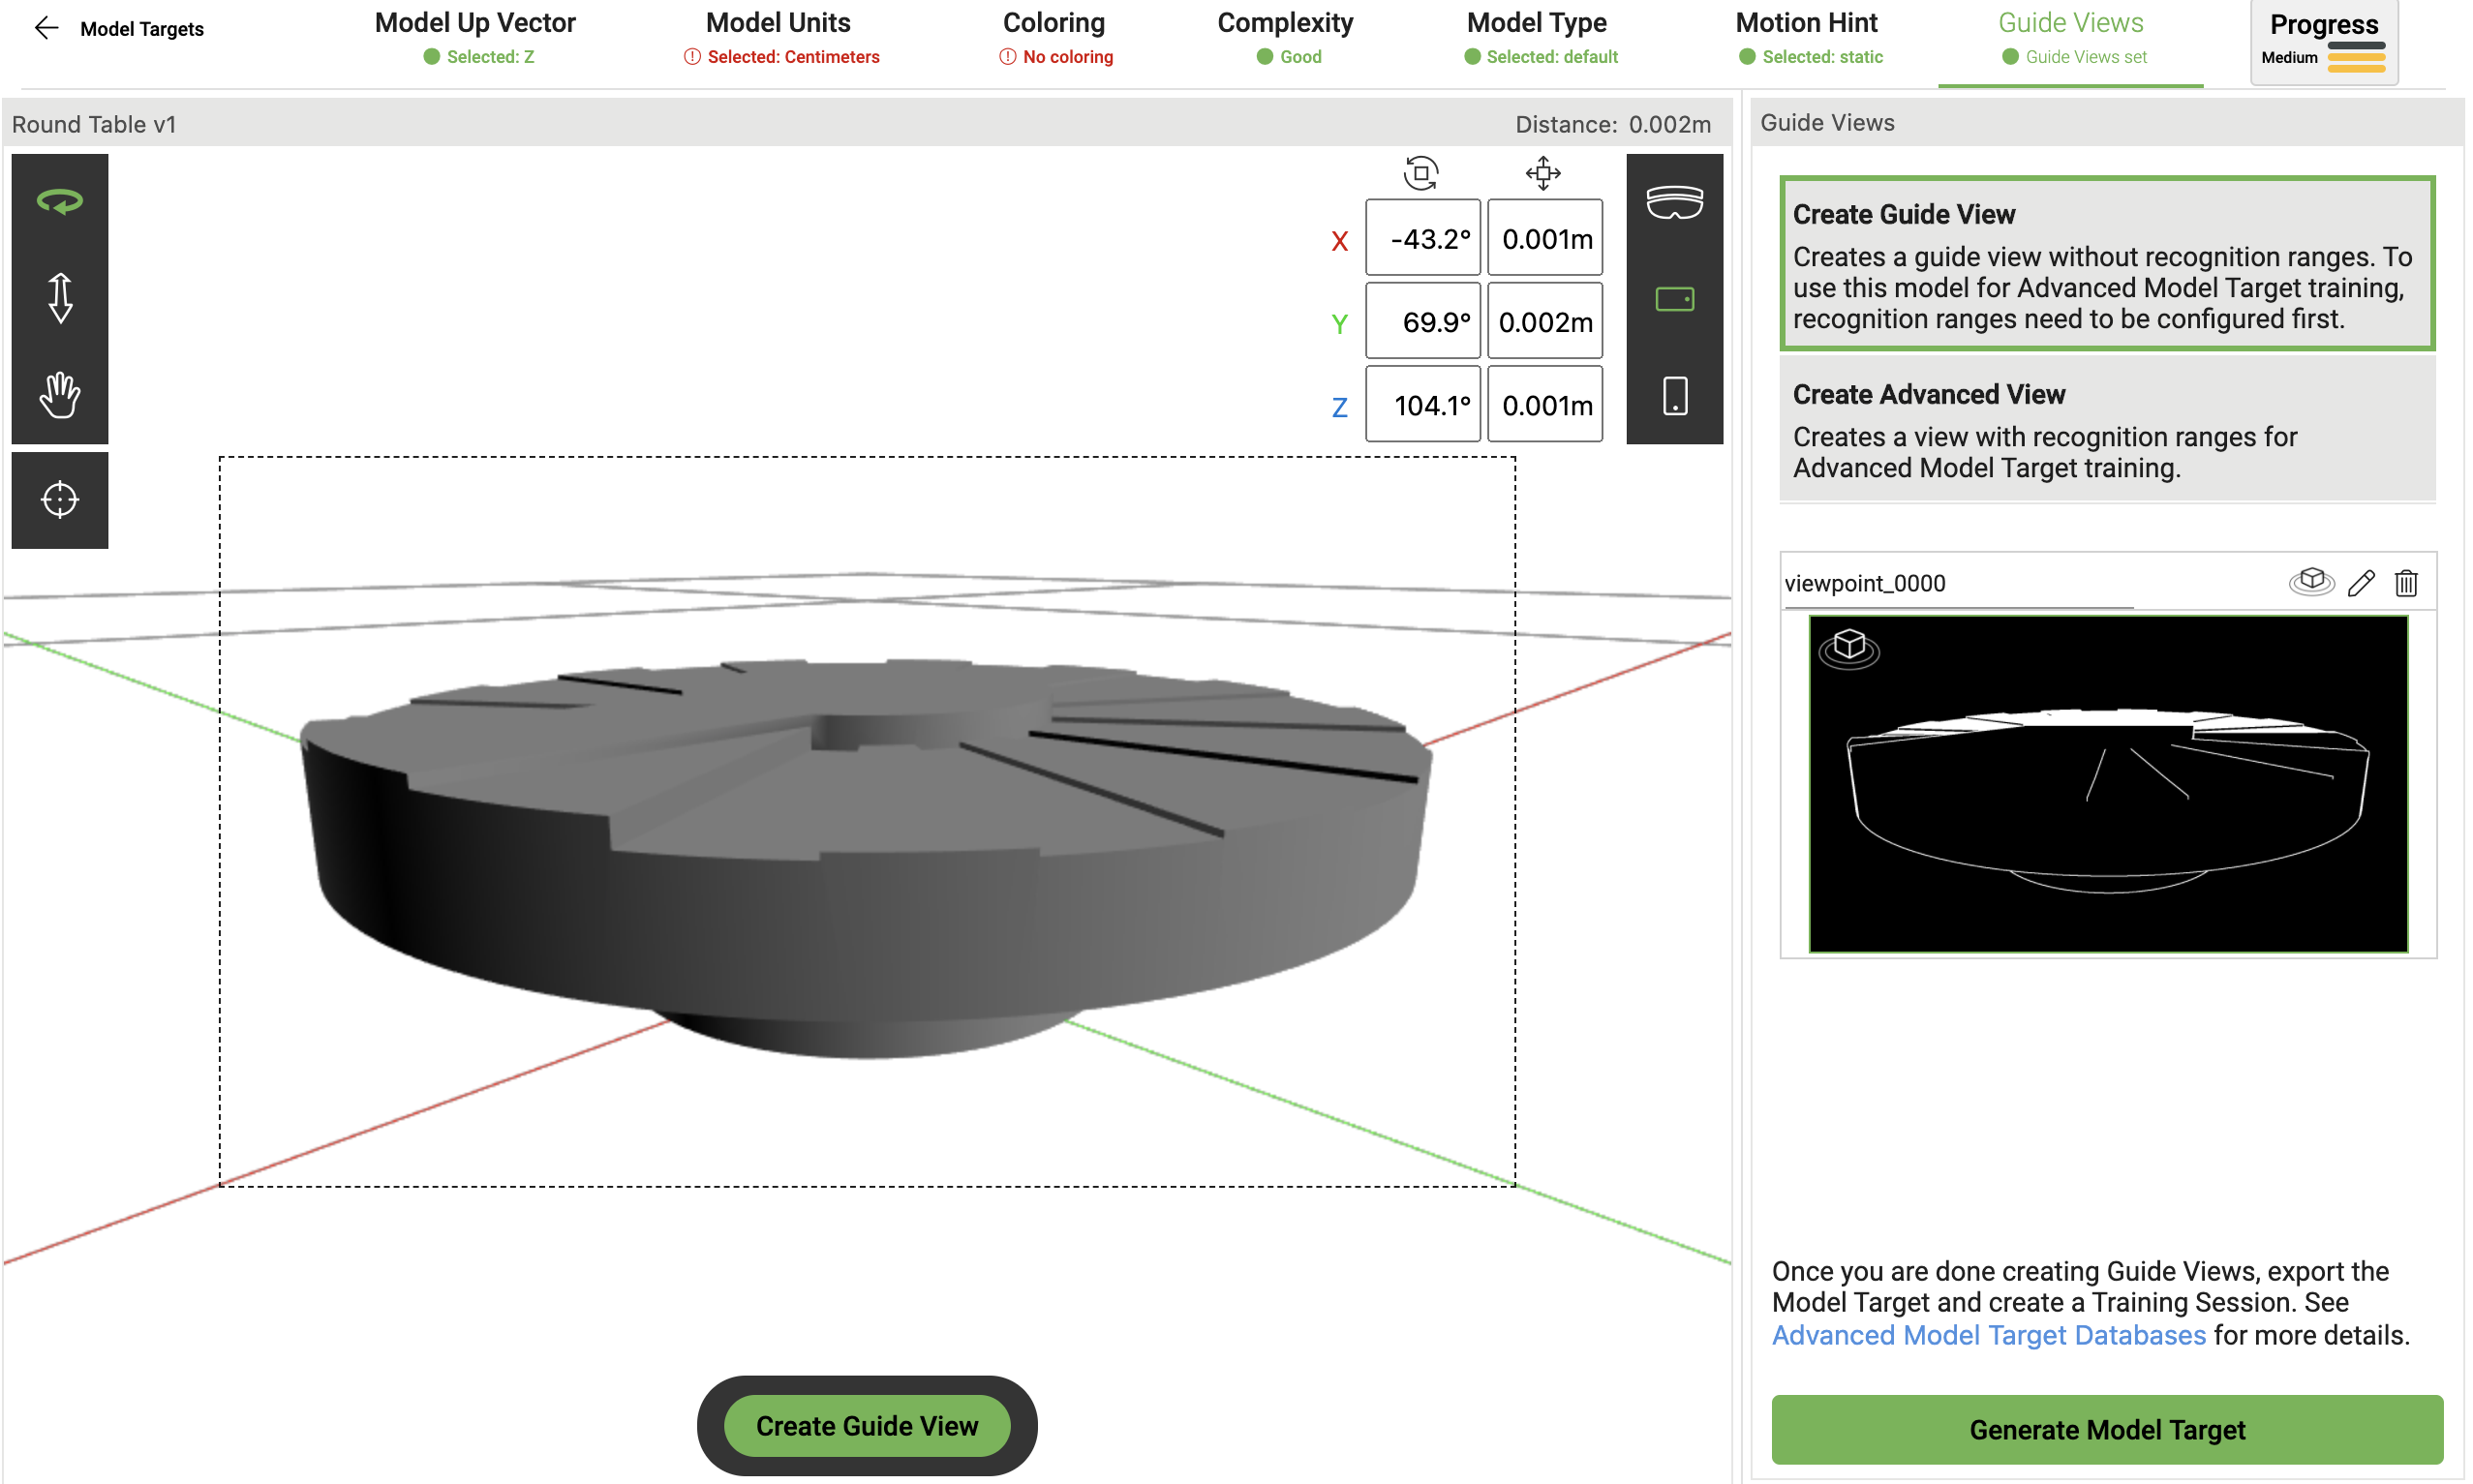
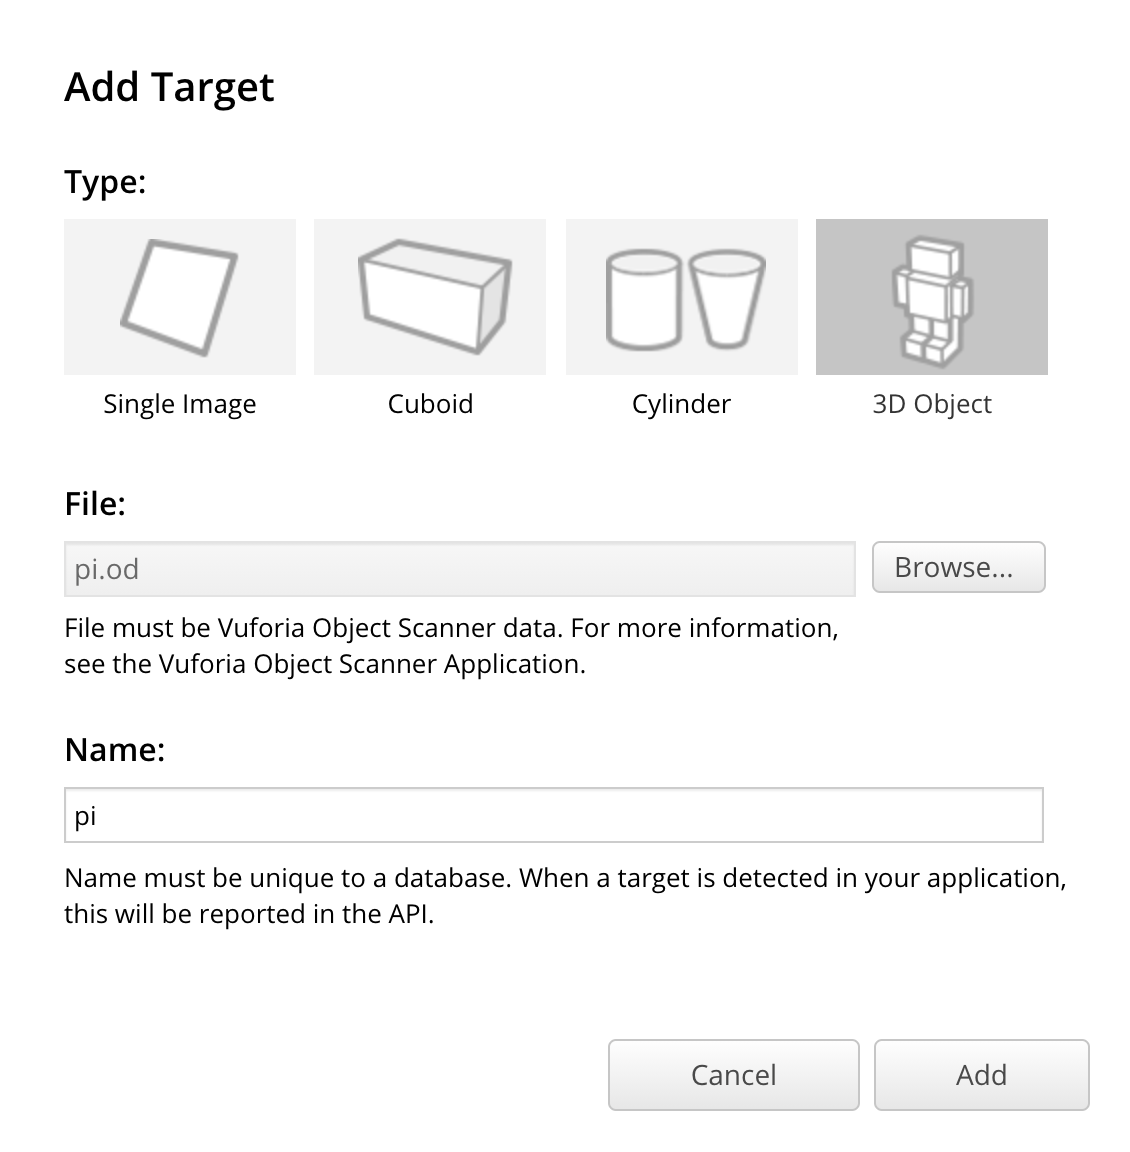
Development one, Vuforia Model Target Generator
In order for the round table to become a scannable object, i had to first create an .od file of the obeject.
The 3D round table was created by our 3D designer creating the round table on CAD, where we were then able to tell the device what type of 3D obeject target we wanted, with either a '360º Dome view' or a 'full 360º'.
In this case, i chose the 360 dome view due it being a table top appliance.
2. I then chose the guide view that i wanted, for the recognition ranges to occur in, which then allowed me to generate the model target.
After generating the 3D cad file, i was then able to create the .od file and assign it in the unity database as shown later on.
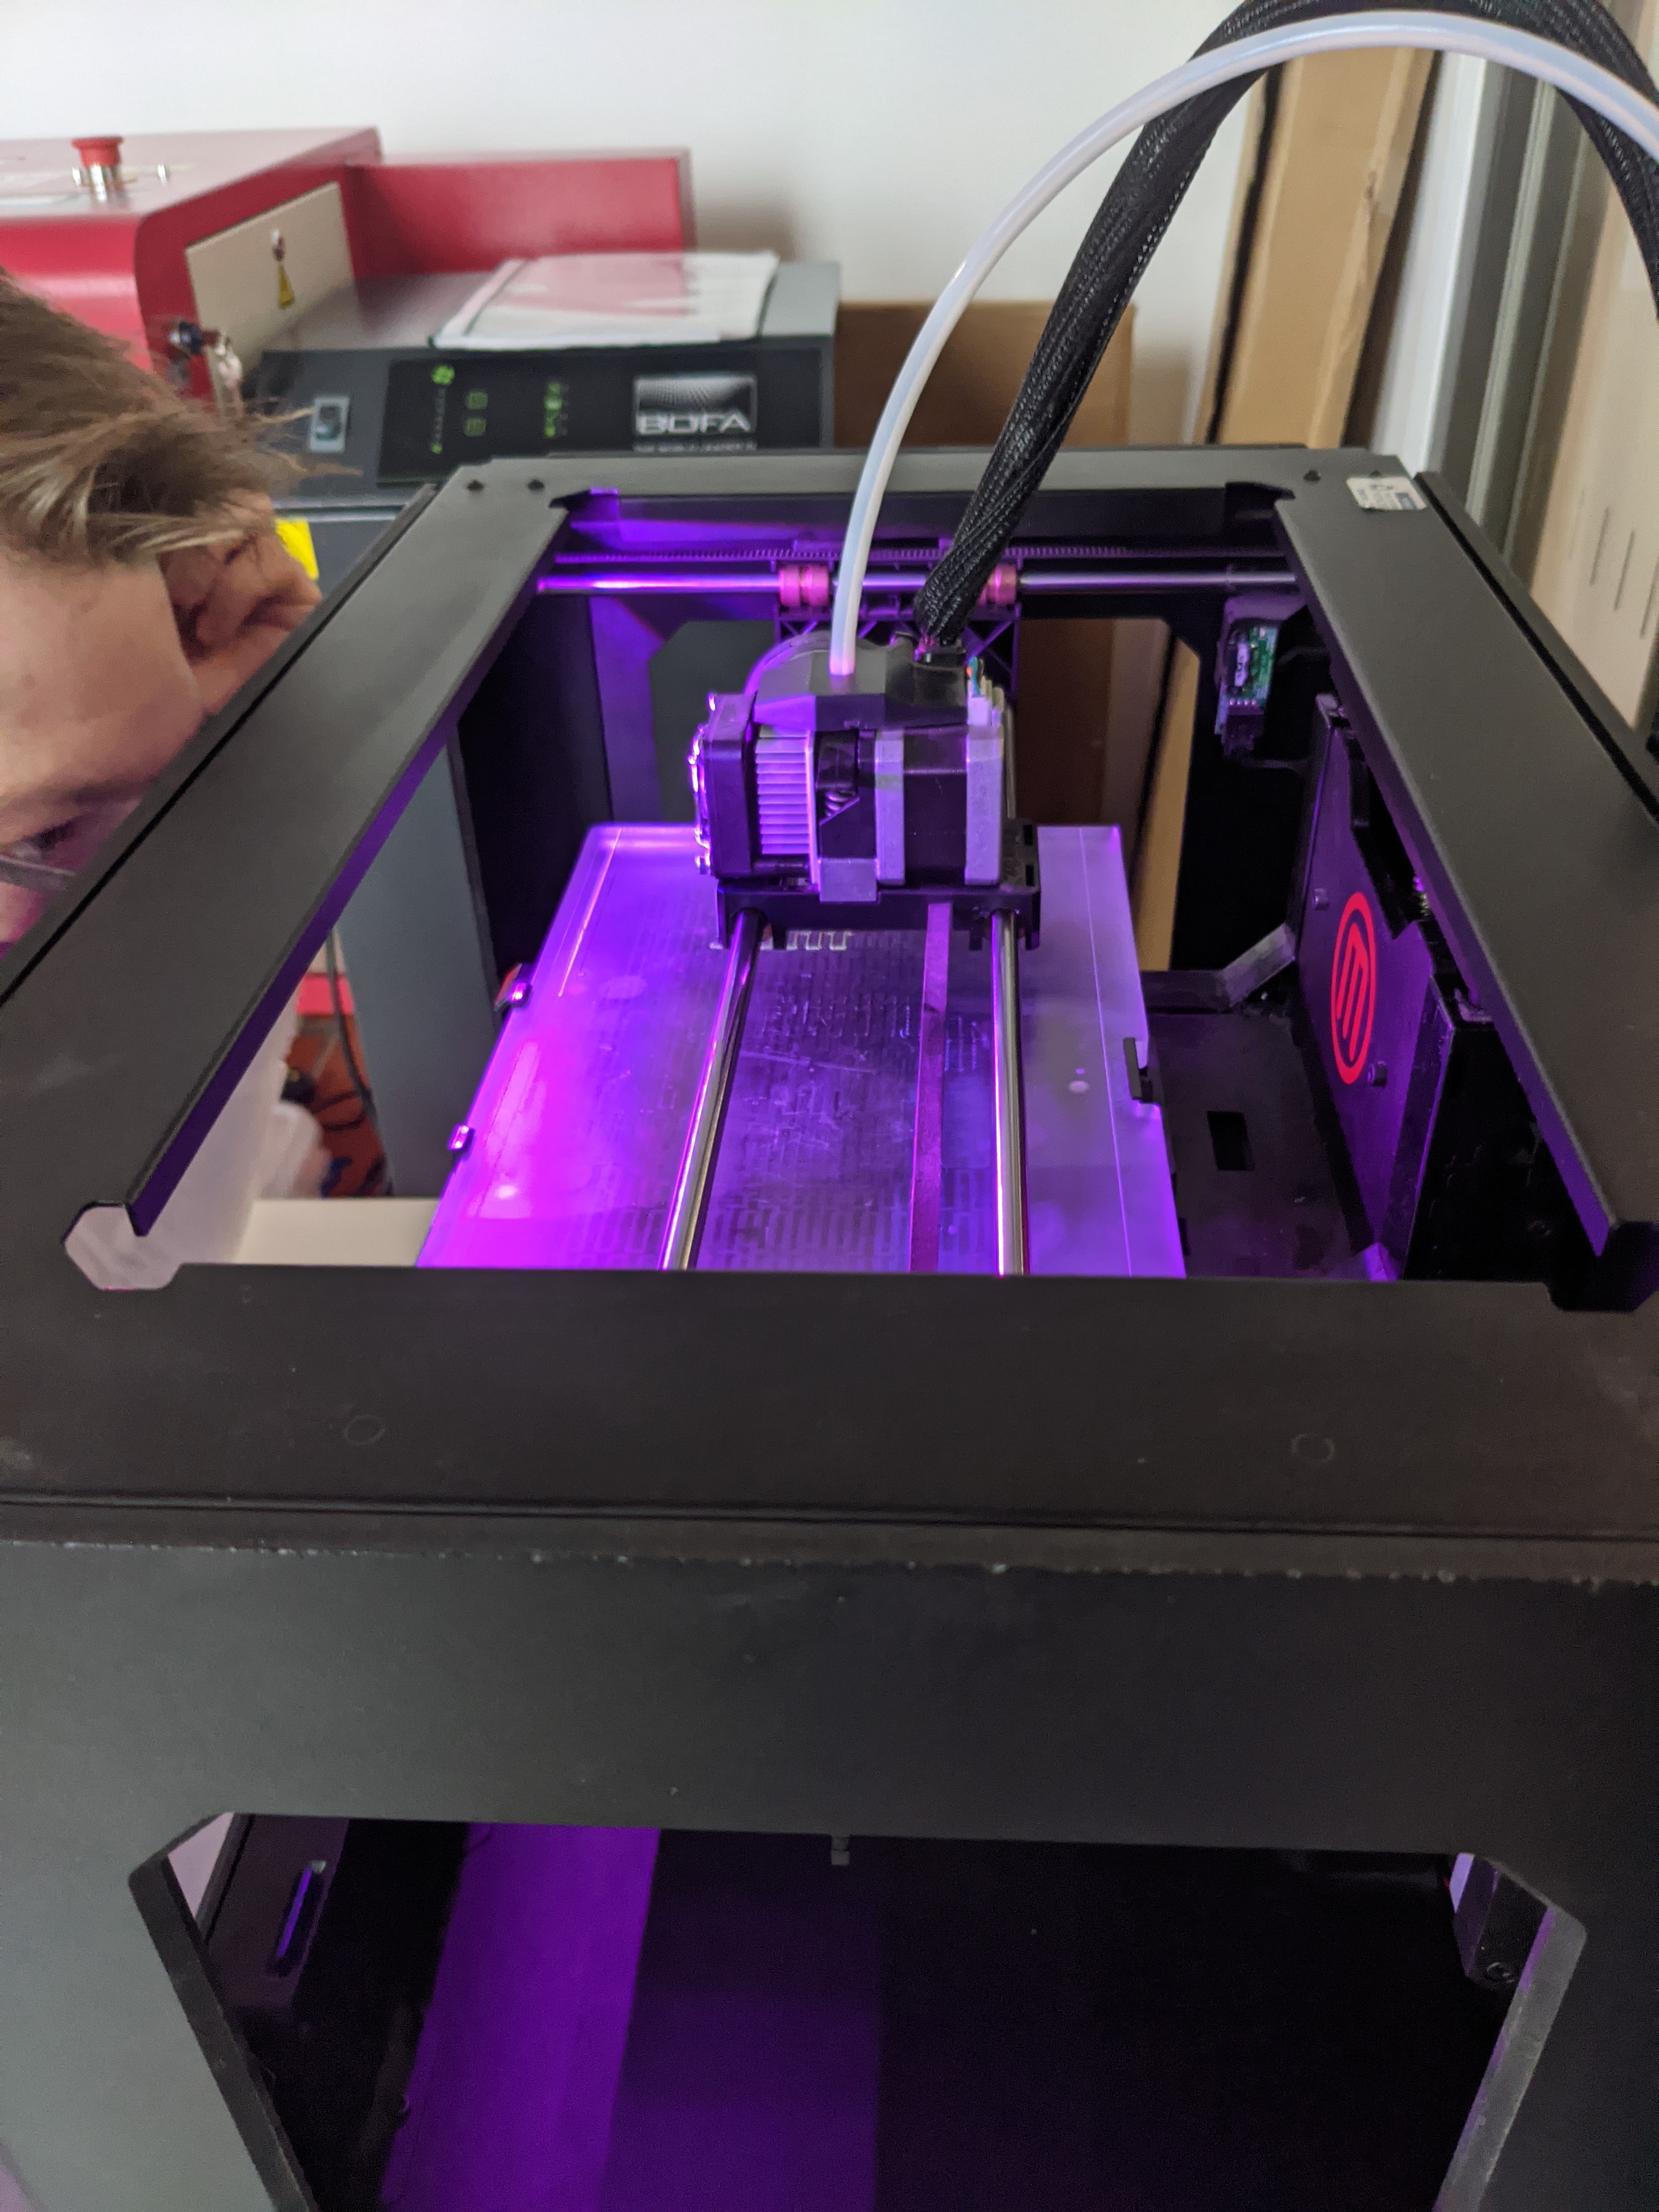
In order to generate the 3D obeject, we then 3D printed the roundtable which did take a few tries with a variety of colours in the end, but the final model is printed with a red filament .
Development two, Vuforia Object Scanner
The video above shows the process of scanning the round table, via the Vufoira Scanner app. This was accomplished by placing the 3d roundtable on the unique scanning target sheet, where it is able to learn about the exact dimensions of the application.
Scanning the object creates numerical data points in a 3d space, allowing it to be recognized via the object tracking on Unity, as shown by the green dots patterned around the round table.
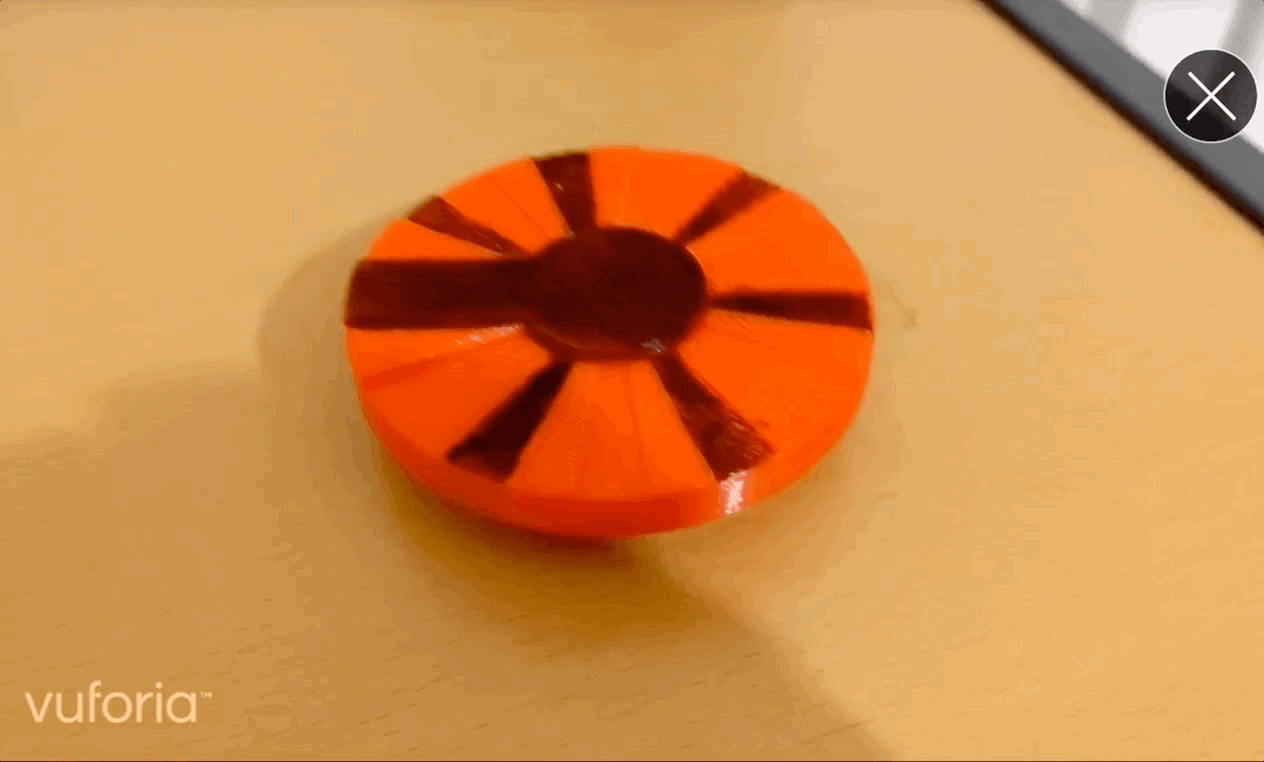
After scanning the model, i found that the plain red round table did not give enough target recognition. Therefore i coloured in the round table with black strips on it and then rescanned the obeject.
After successfully scanning the obeject, i then tested the recognition of the table. This was demonstrated by the green rectangle following the rotation of the table, highlighting the recognition that scanner has with the roundtable.
Finally i decided to add stickers onto the 3D table to add further recognition. Here i'm showing the numerical data points analysing the roundtable.
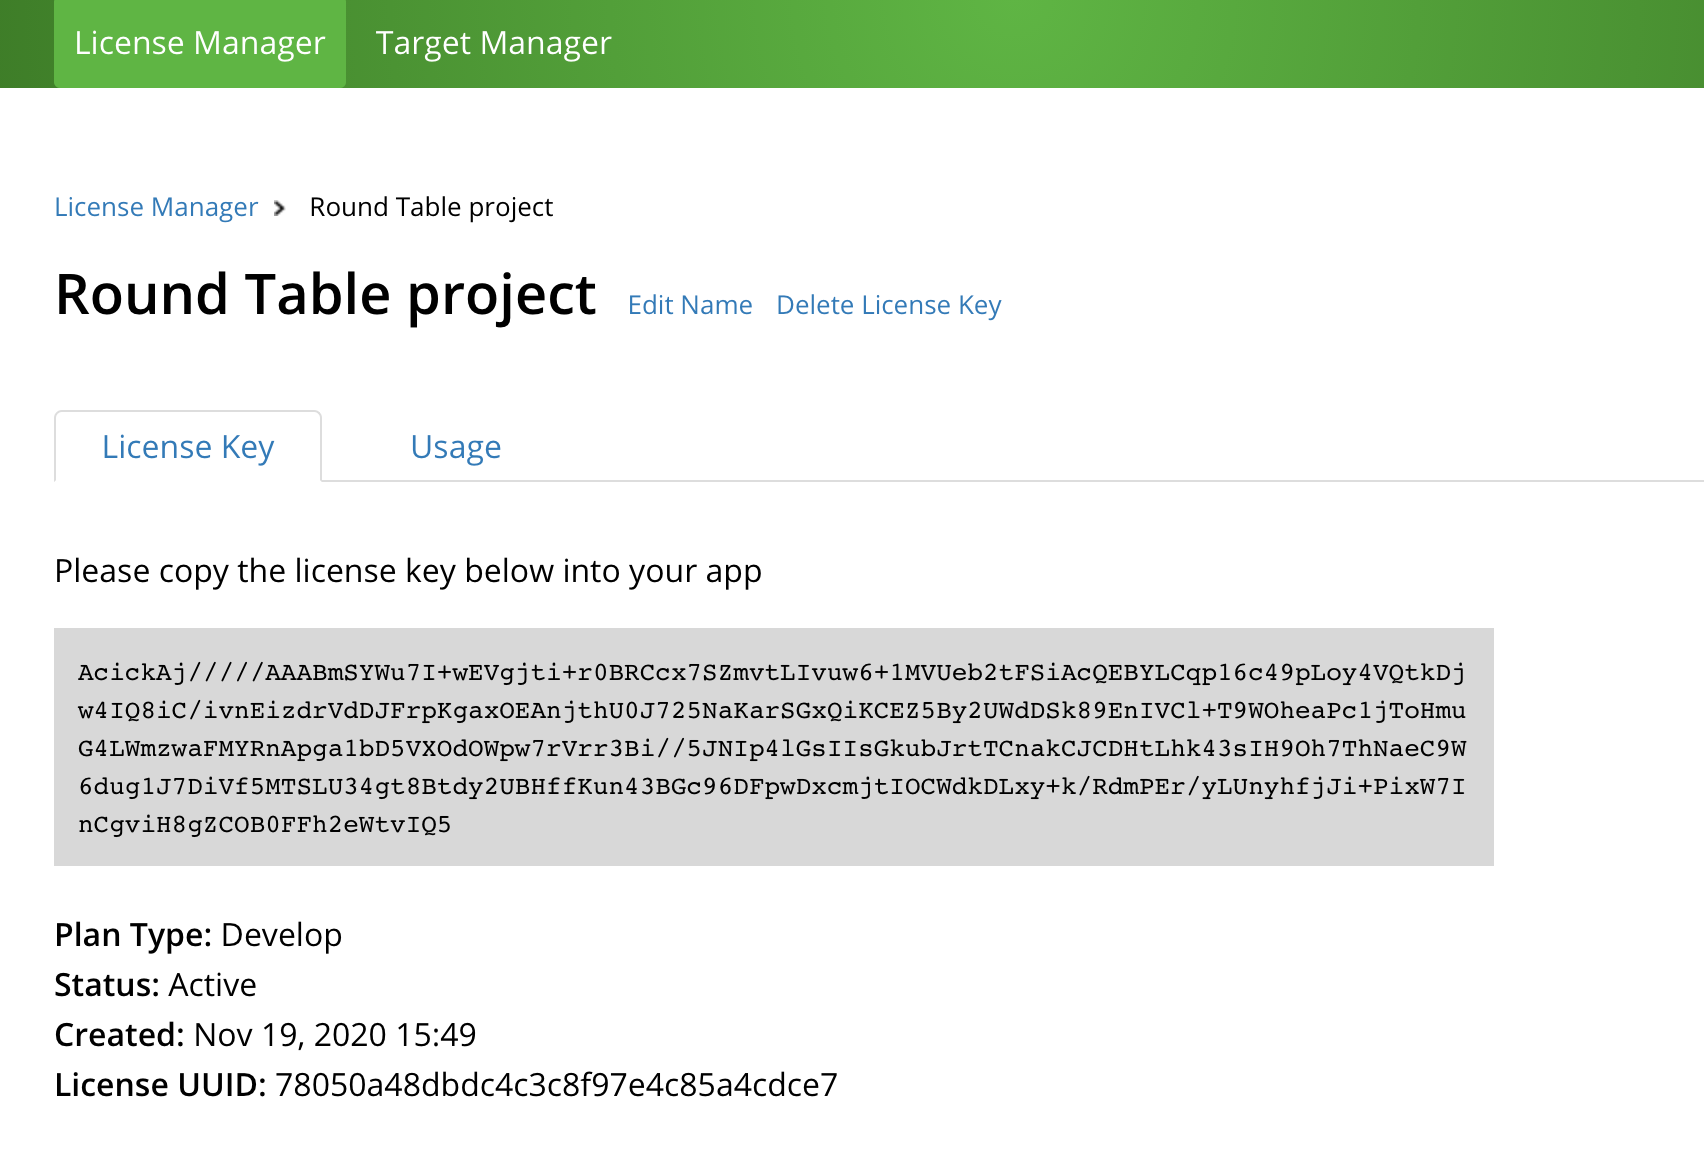
2. I then created a free vufoira devleopers license account where I copied the license key (that Vufoira provides for any AR project), into Unity to enable the image target to link with unity.
I then created a development license key, which allows vufoira to be used in unity.
After creating the license key, i copied and pasted it into vuforias development portal in unity. The license key is the identification for the project, where i can assign a variety of targets with the one target license.
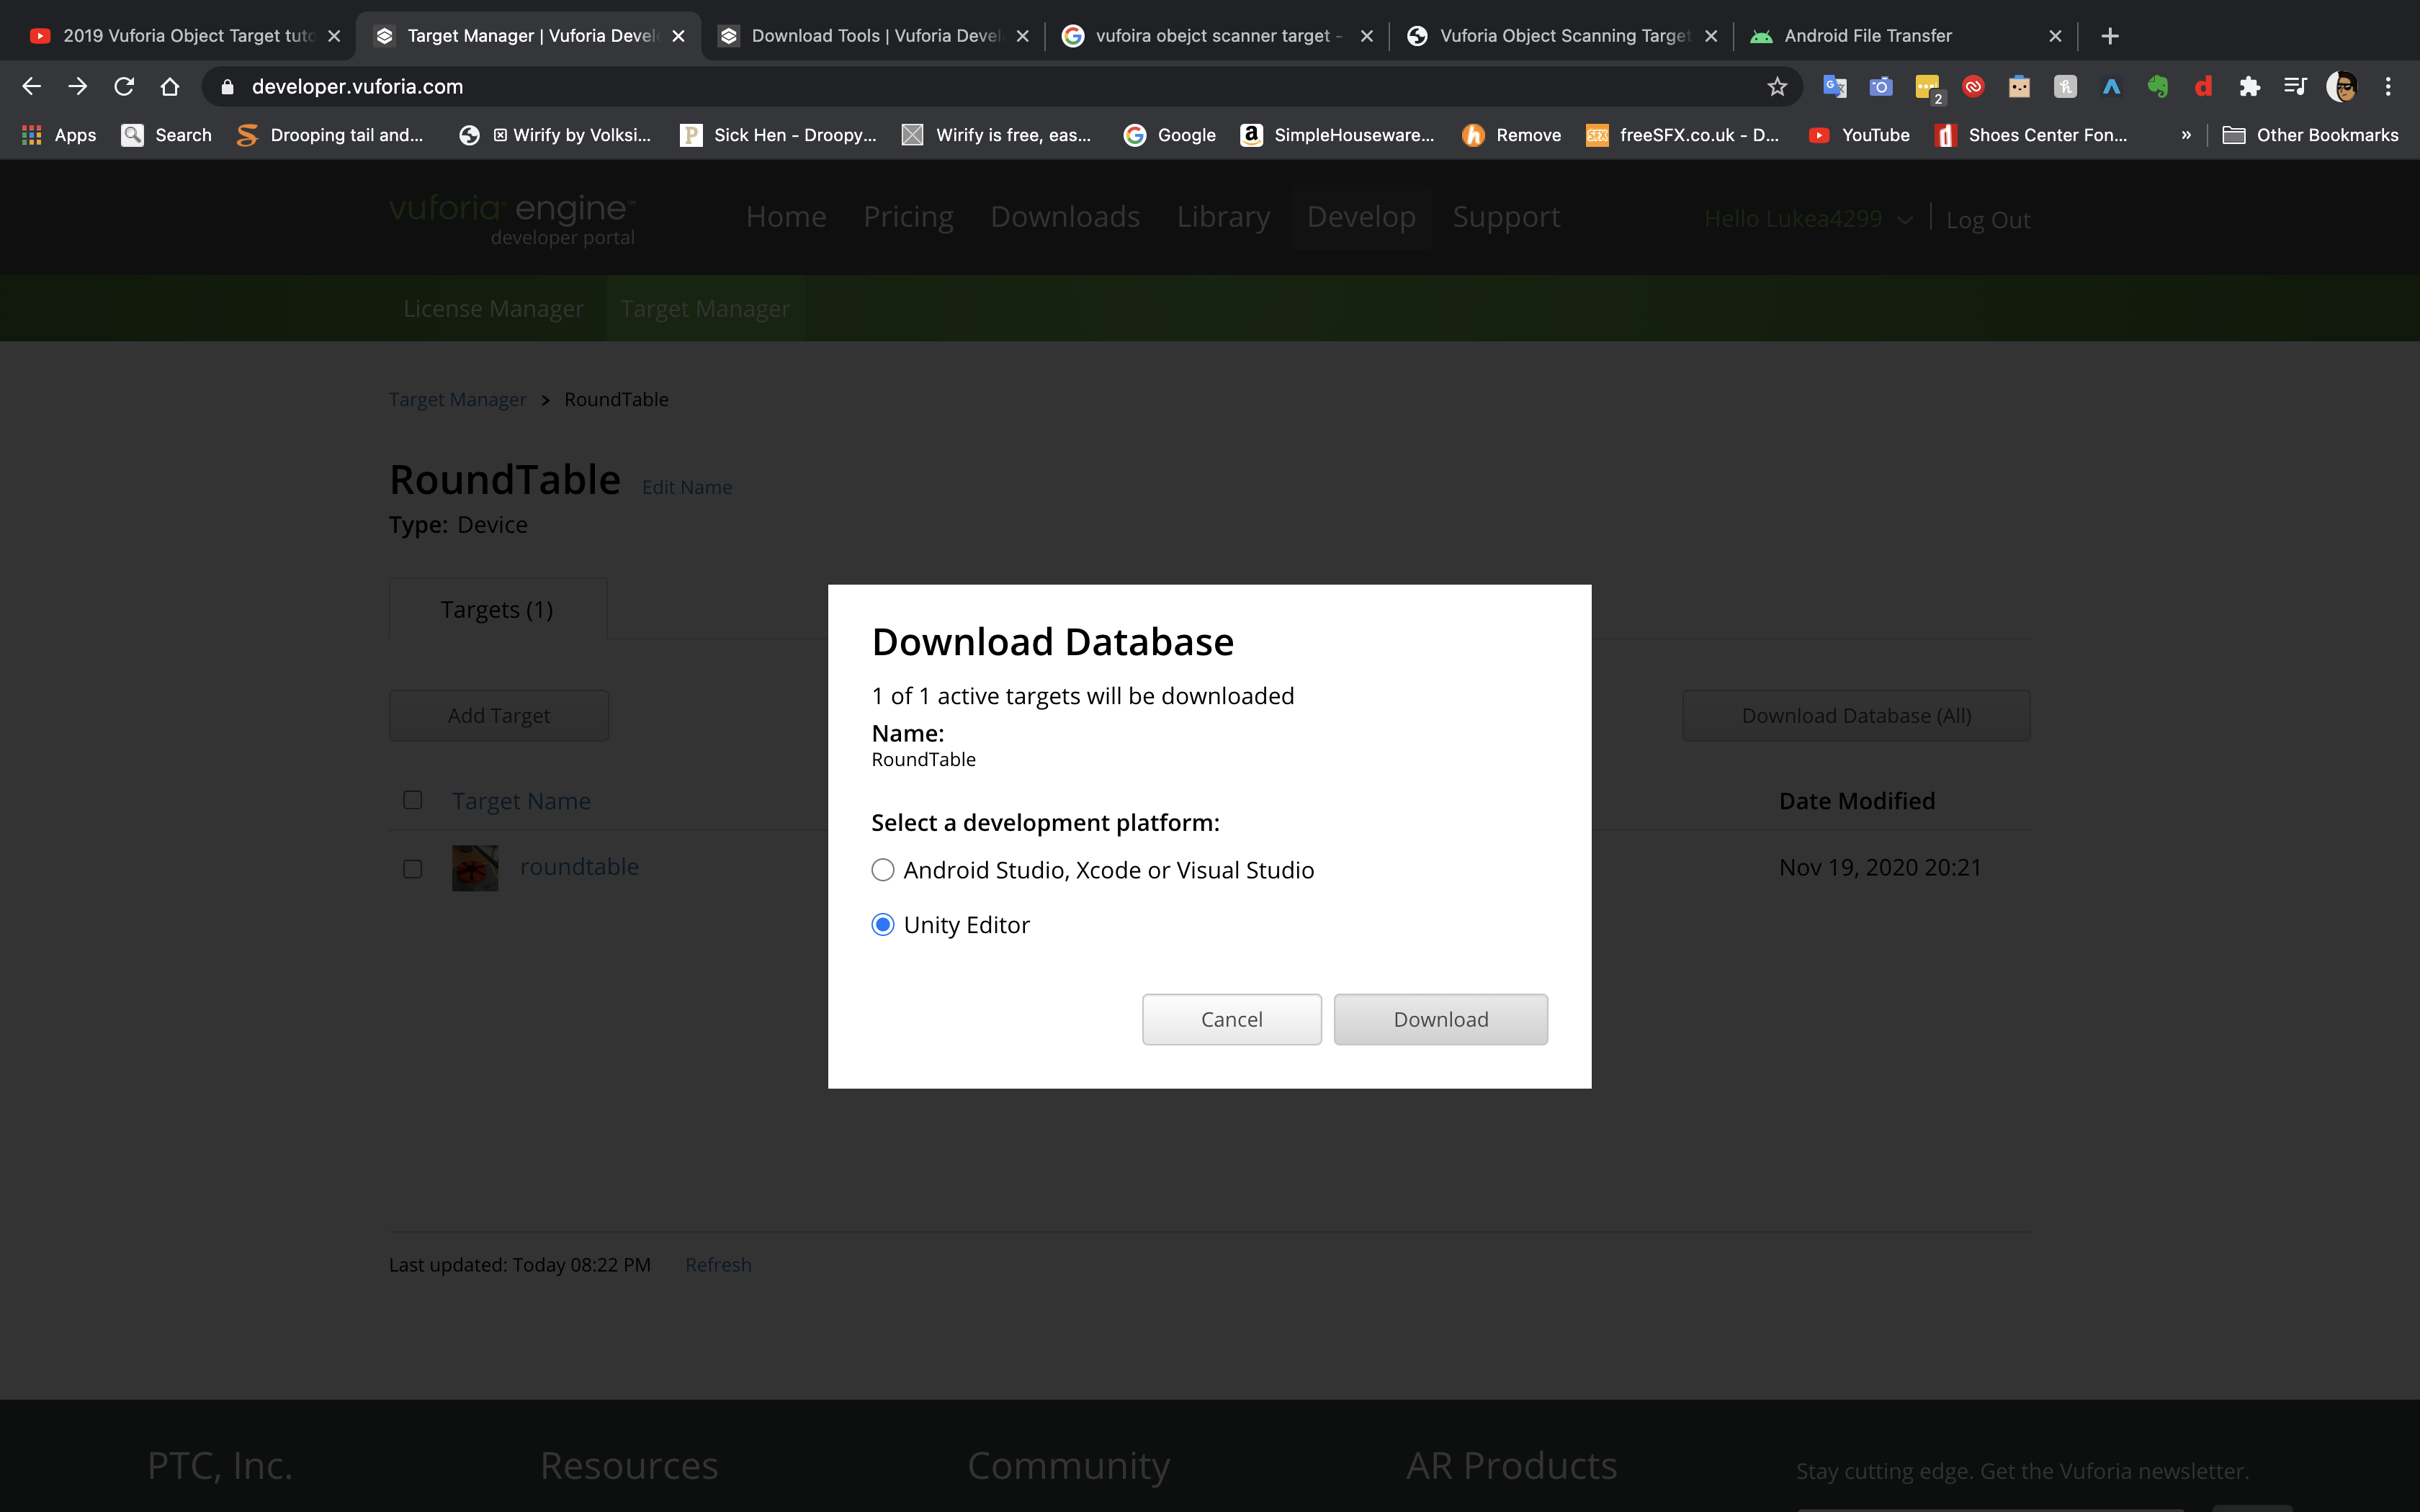
I then downloaded the database of the target onto unity, which allows the for object target to be augmented via vuforia.
The sped up video on the left, shows the full process of downloading the data base onto unity from vuforia's developer portal. After downloading the vuforia object target, i then chose the required obeject target from the list, with that being the round table.
I decided to augment a cube on top of the roundtable as a test, which was successful.
Interactivity with C# coding
To build the application, i chose unity due to it's abilty to work seamlessly with Vuforia's frame work.
I began by writing out the basic code for the first script, which is focused on it's interaction with box collider and the information arising from the object.
I also began writing the script for the facecamera, where the information signs follow the AR main camera when arisen.
The three scripts written below are the backbone with regards to the funcitonality and interactvity of the application.
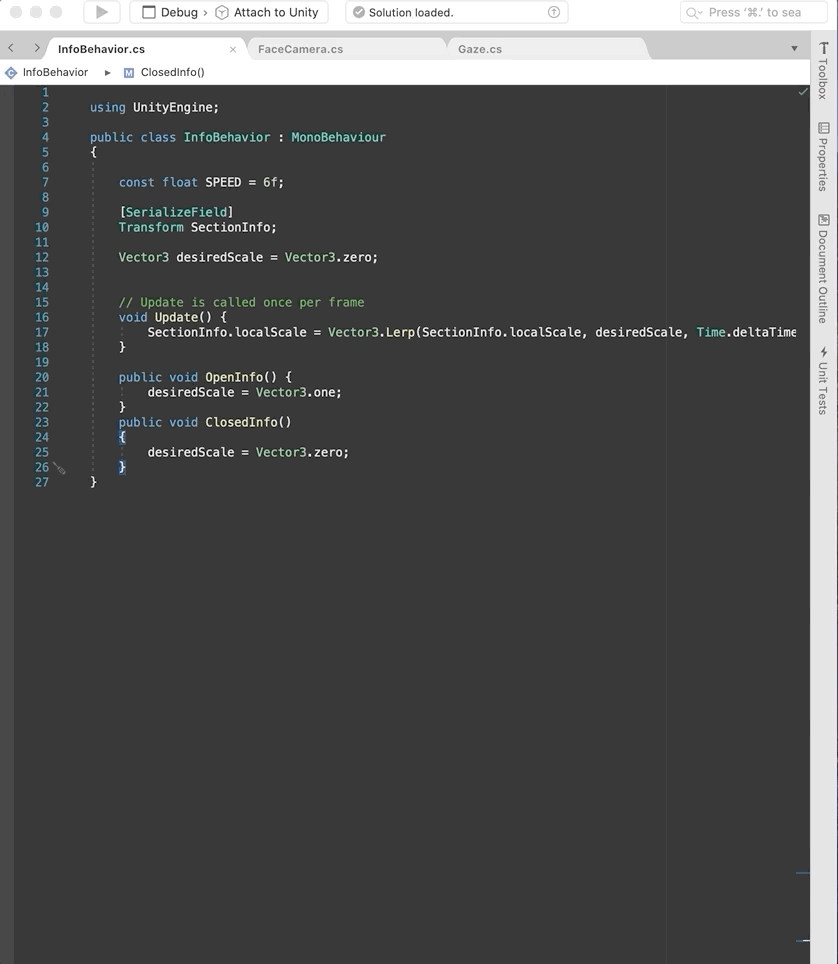
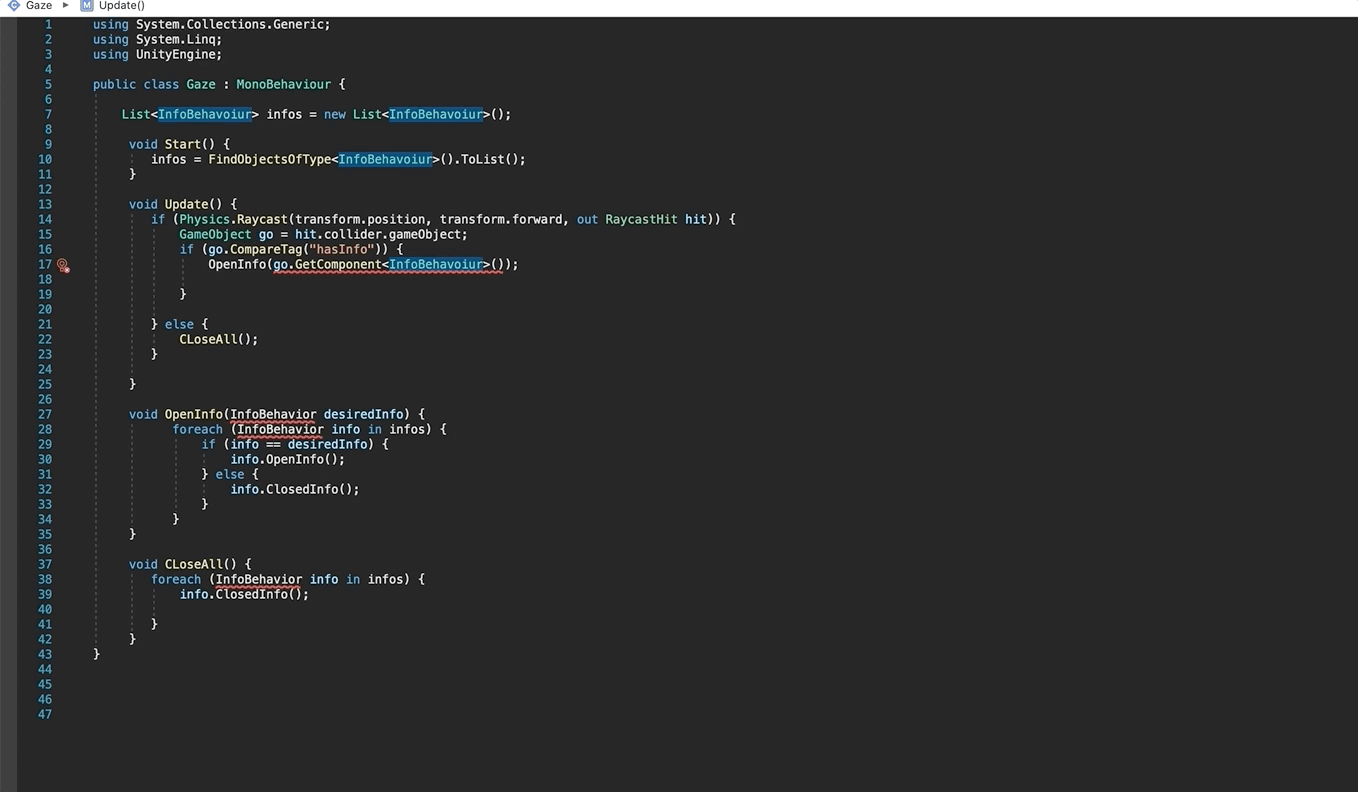
After learning some C# coding skills and help from online resources from developers, I wrote 3 C# scripts.
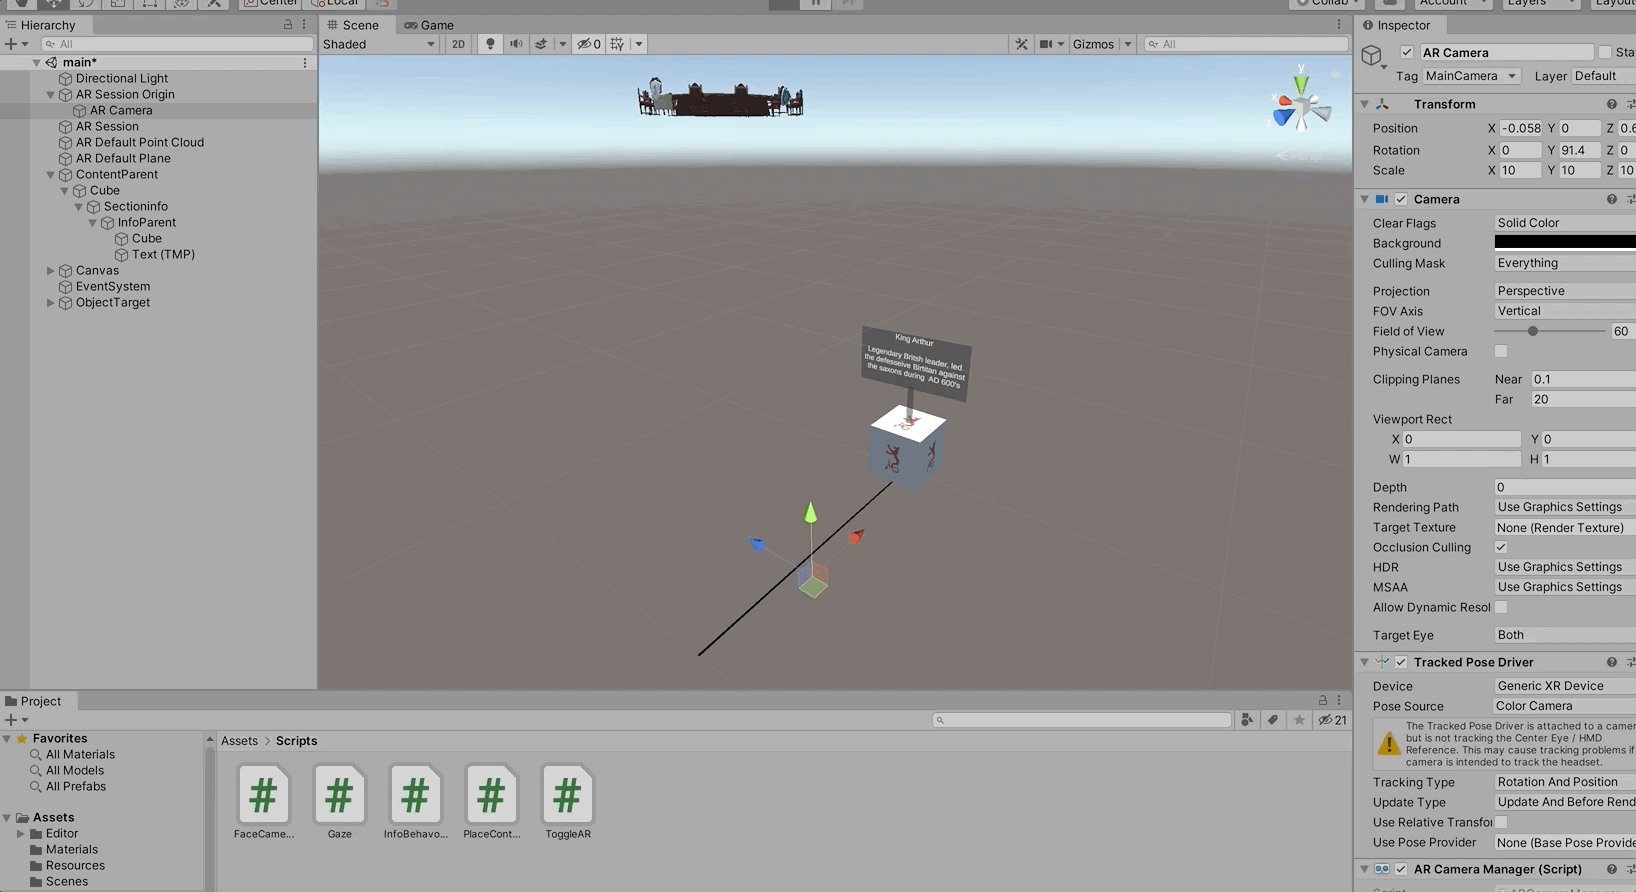
InfoBehavoir: The Infobehavoir script, ties its self with the obejct, in this case the cube has a box collider where will interact with the "Gaze" script. From here, the code "Open info" and "Close info" will run whenever the AR camera faces the cube, due to the Gaze script being the main sript for the AR camera.
Facecamera: The facecamera script enables the sign post infomation to move to look at the main AR camera, wherever it it positioned in world on the Y axis.
Gaze: The gaze script enables the rayacsting to occur, whenever the forward vector of the camera (blue arrow in the editor) hits the cube. The infobehavoir script then links with the Gaze script, allowing the infobehavoir to open and close whenever the camera faces or does not face the cube.
All three of the scripts enable the camera, the object and the information to all harmoniously work in unison.
This gave me an insight on how i could utilize the object target to augment the roundtable.
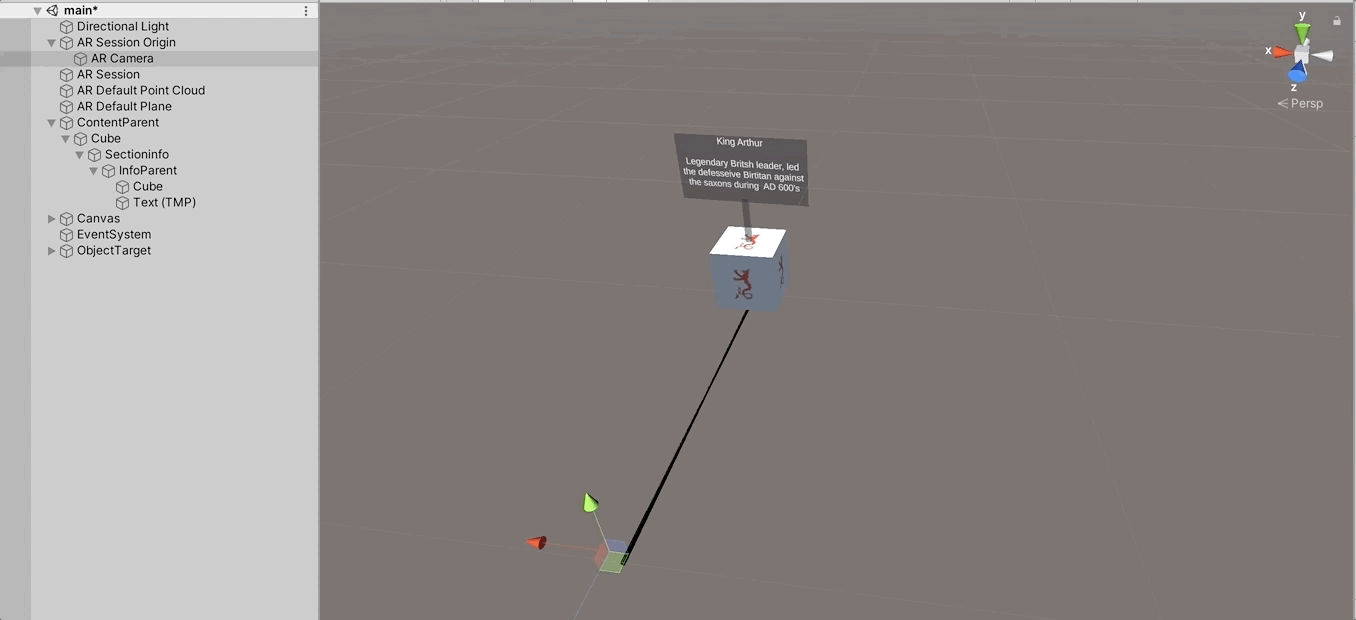
On the right is a demonstration of how the ‘infobehavoiur’ and ‘facecamera’ script work, with the cube and the AR camera works together.
As you can see the ‘hasinfo’ is written into the Gaze script (on the far left) for the AR camera, which makes it link with the asset.
Afterwards I tagged the cube to have the value ‘hasinfo’, enabling the camera to trigger the data (information about the asset) to emerge.
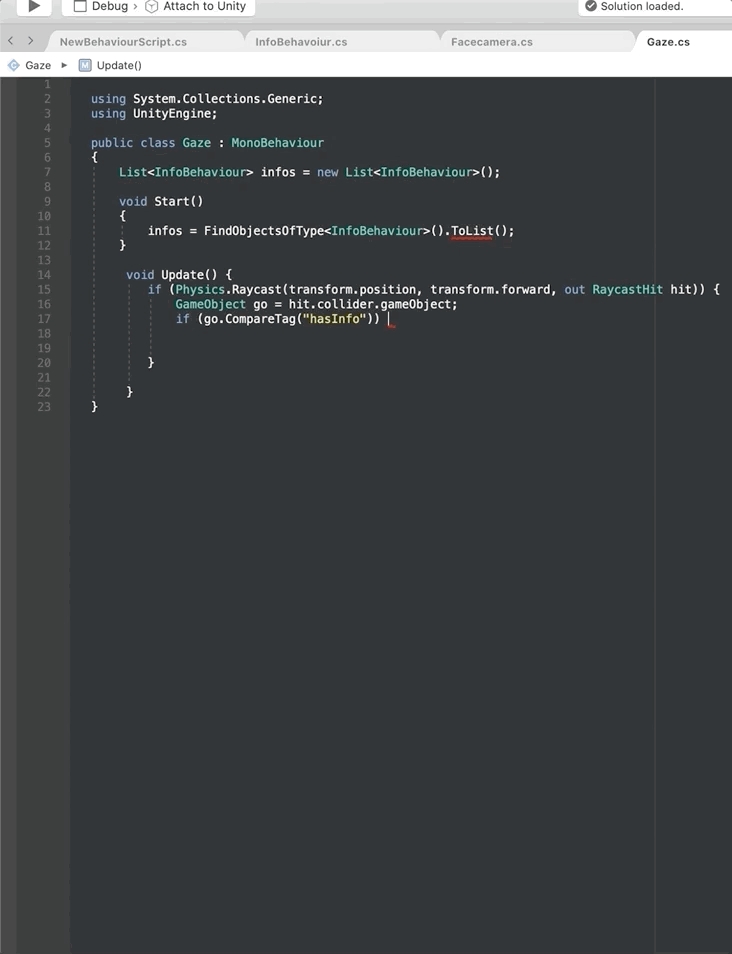
Below is the complete version of the cube, with the ‘Here’ being displayed below whenever the Y rotational axis looks towards the face of the cube.
This shows that the ‘Gaze’ script that identifies the object, is in full functioning order and can therefore be complete for the final step.
Testing one
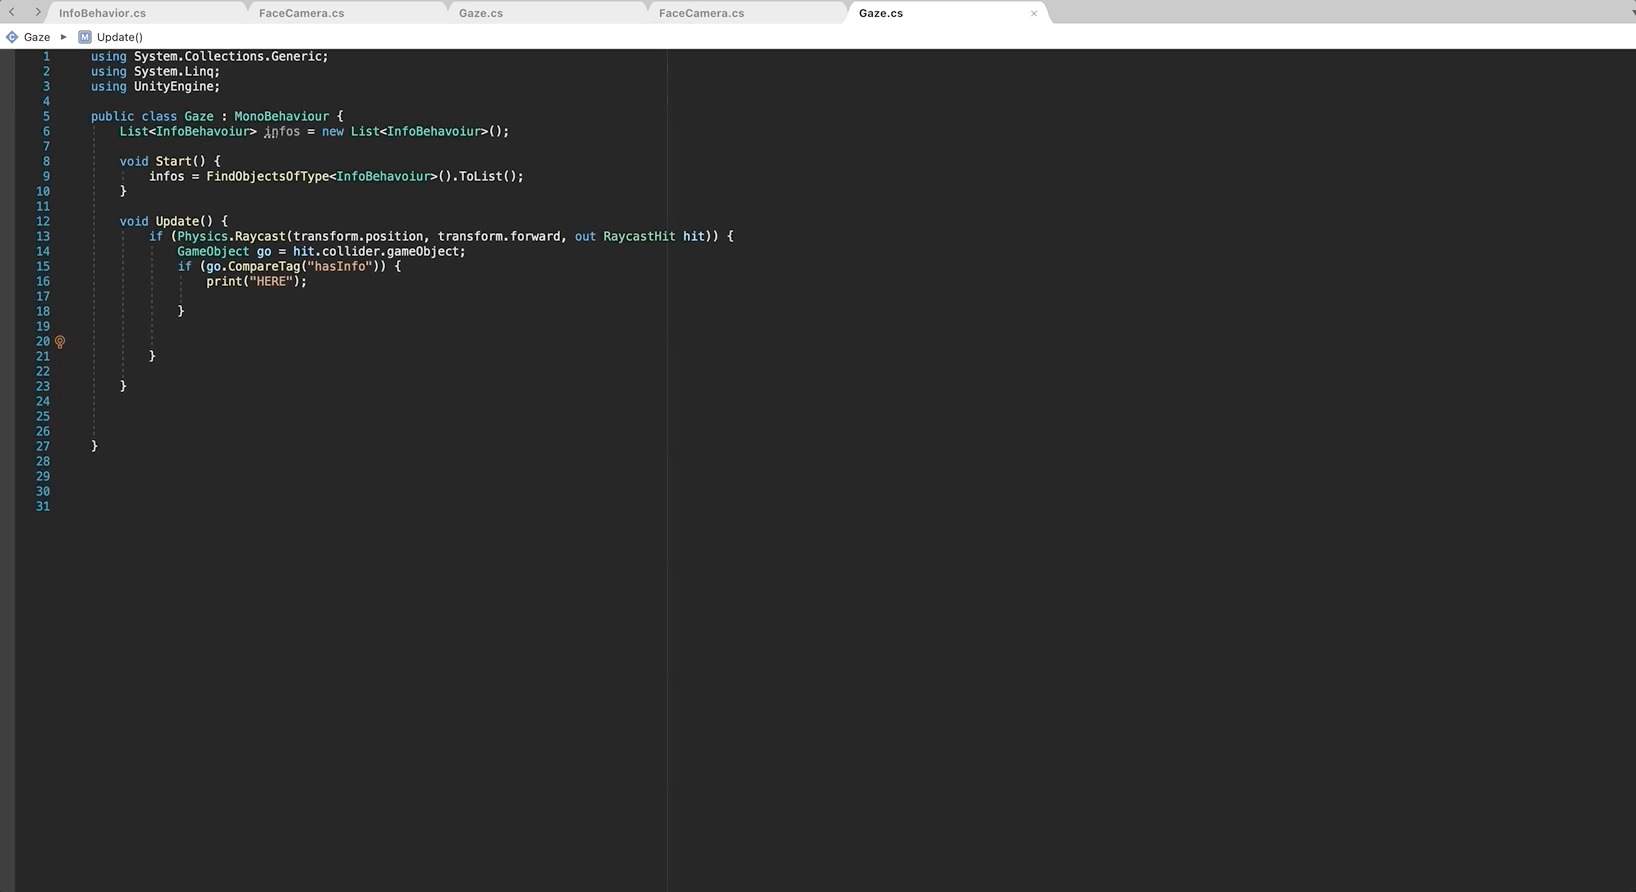
After testing the above, i then demonstrated a step further, with the AR camera interacting with the cube, causing the infomation to pop up. This is due to gaze script interacting with the infobehaviour script.
This is due to specific line in the Gaze script code: OpenInfo(go.GetComponent InfoBehavoiur>; this allows for the maincamera to interact with the box due to the line in the code "GetComponent". Therefore the gaze camera is able to get the infobehaviour information from the cube and interact with it.
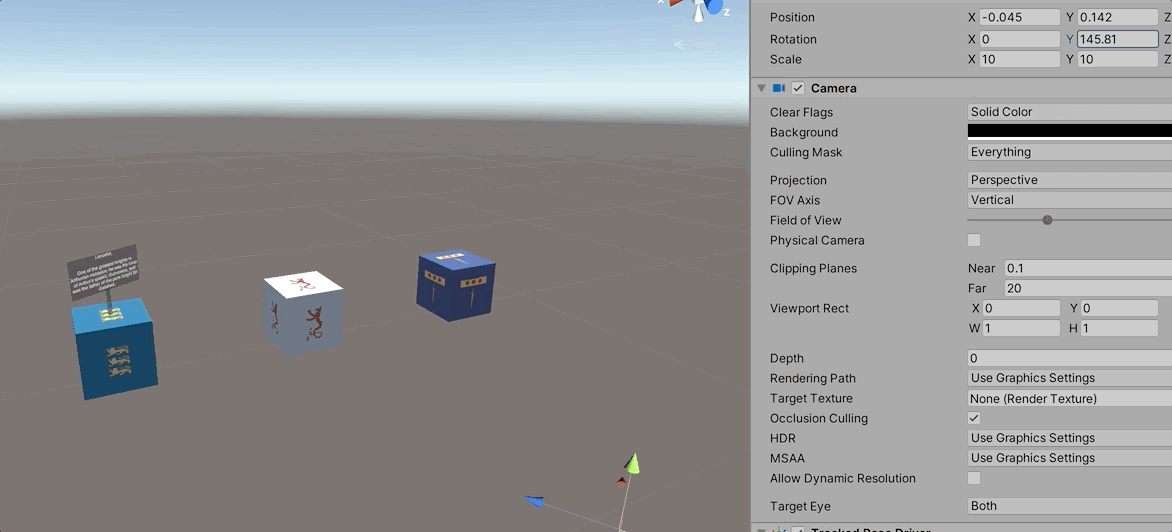
After demonstrating the interactvity wiht one of the cubes, i then decided to test all three of the cubes, coloured with three of the knights shield colours.
Trouble Shooting
Throughout the coding of the scripts, I often ran into many issues with the C sharp coding which I coded using Visual Studio.
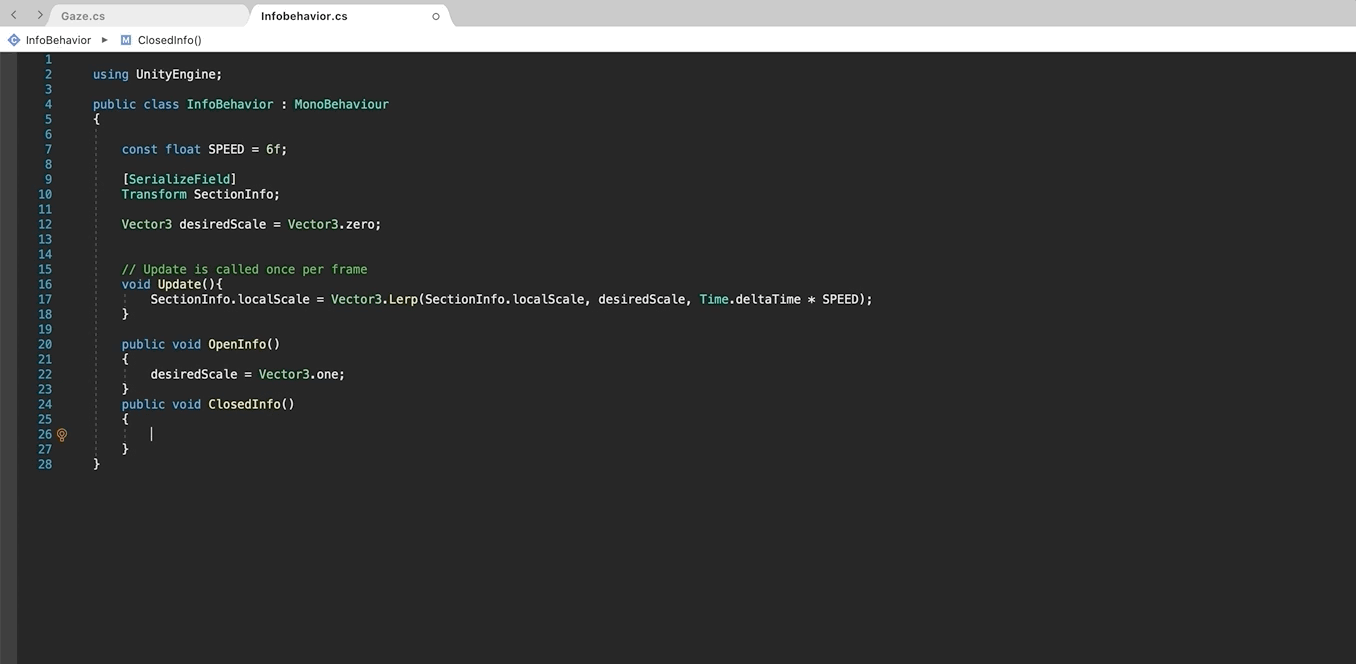
This required me to analyse in the C sharp code what I could have possibly done wrong, so therefore I had to amend any potential bugs. The console would notify me if there were any major errors, by producing a large red ! Symbol.
In this case it was a simple spelling mistake with InfoBehavoiur, as shown on the left.
Here I had an issue with the playmode of the application, where the AR camera would for some reason cause a glitch and input the live webcam into the scene.
This was solved eventually by implementing a second AR camera into the hierarchy.
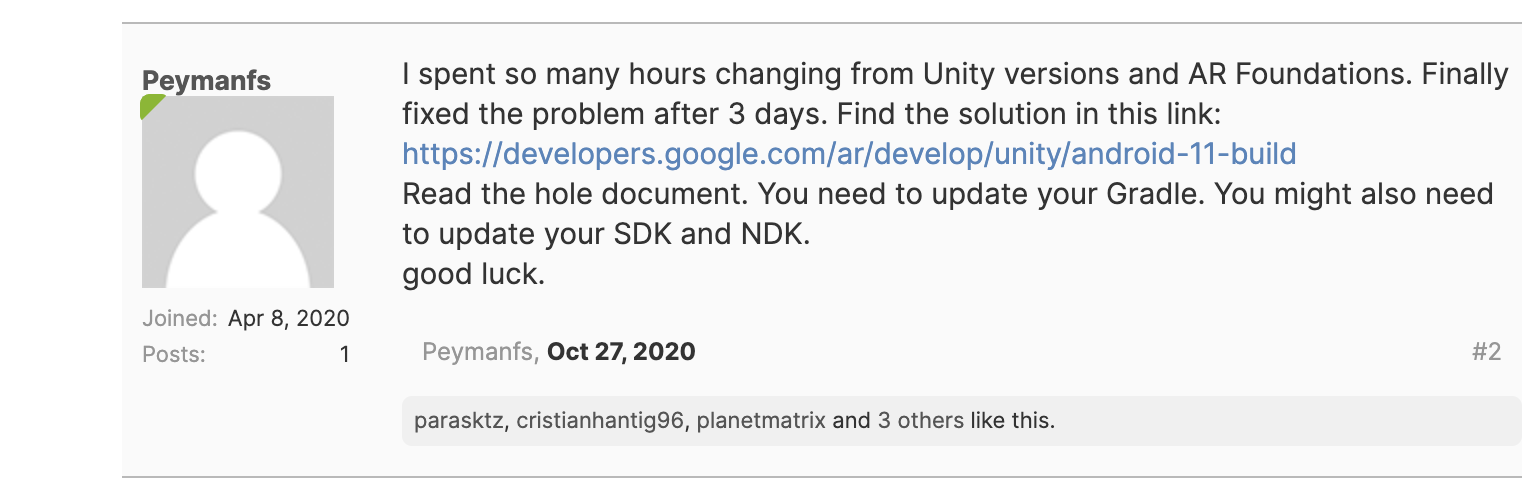
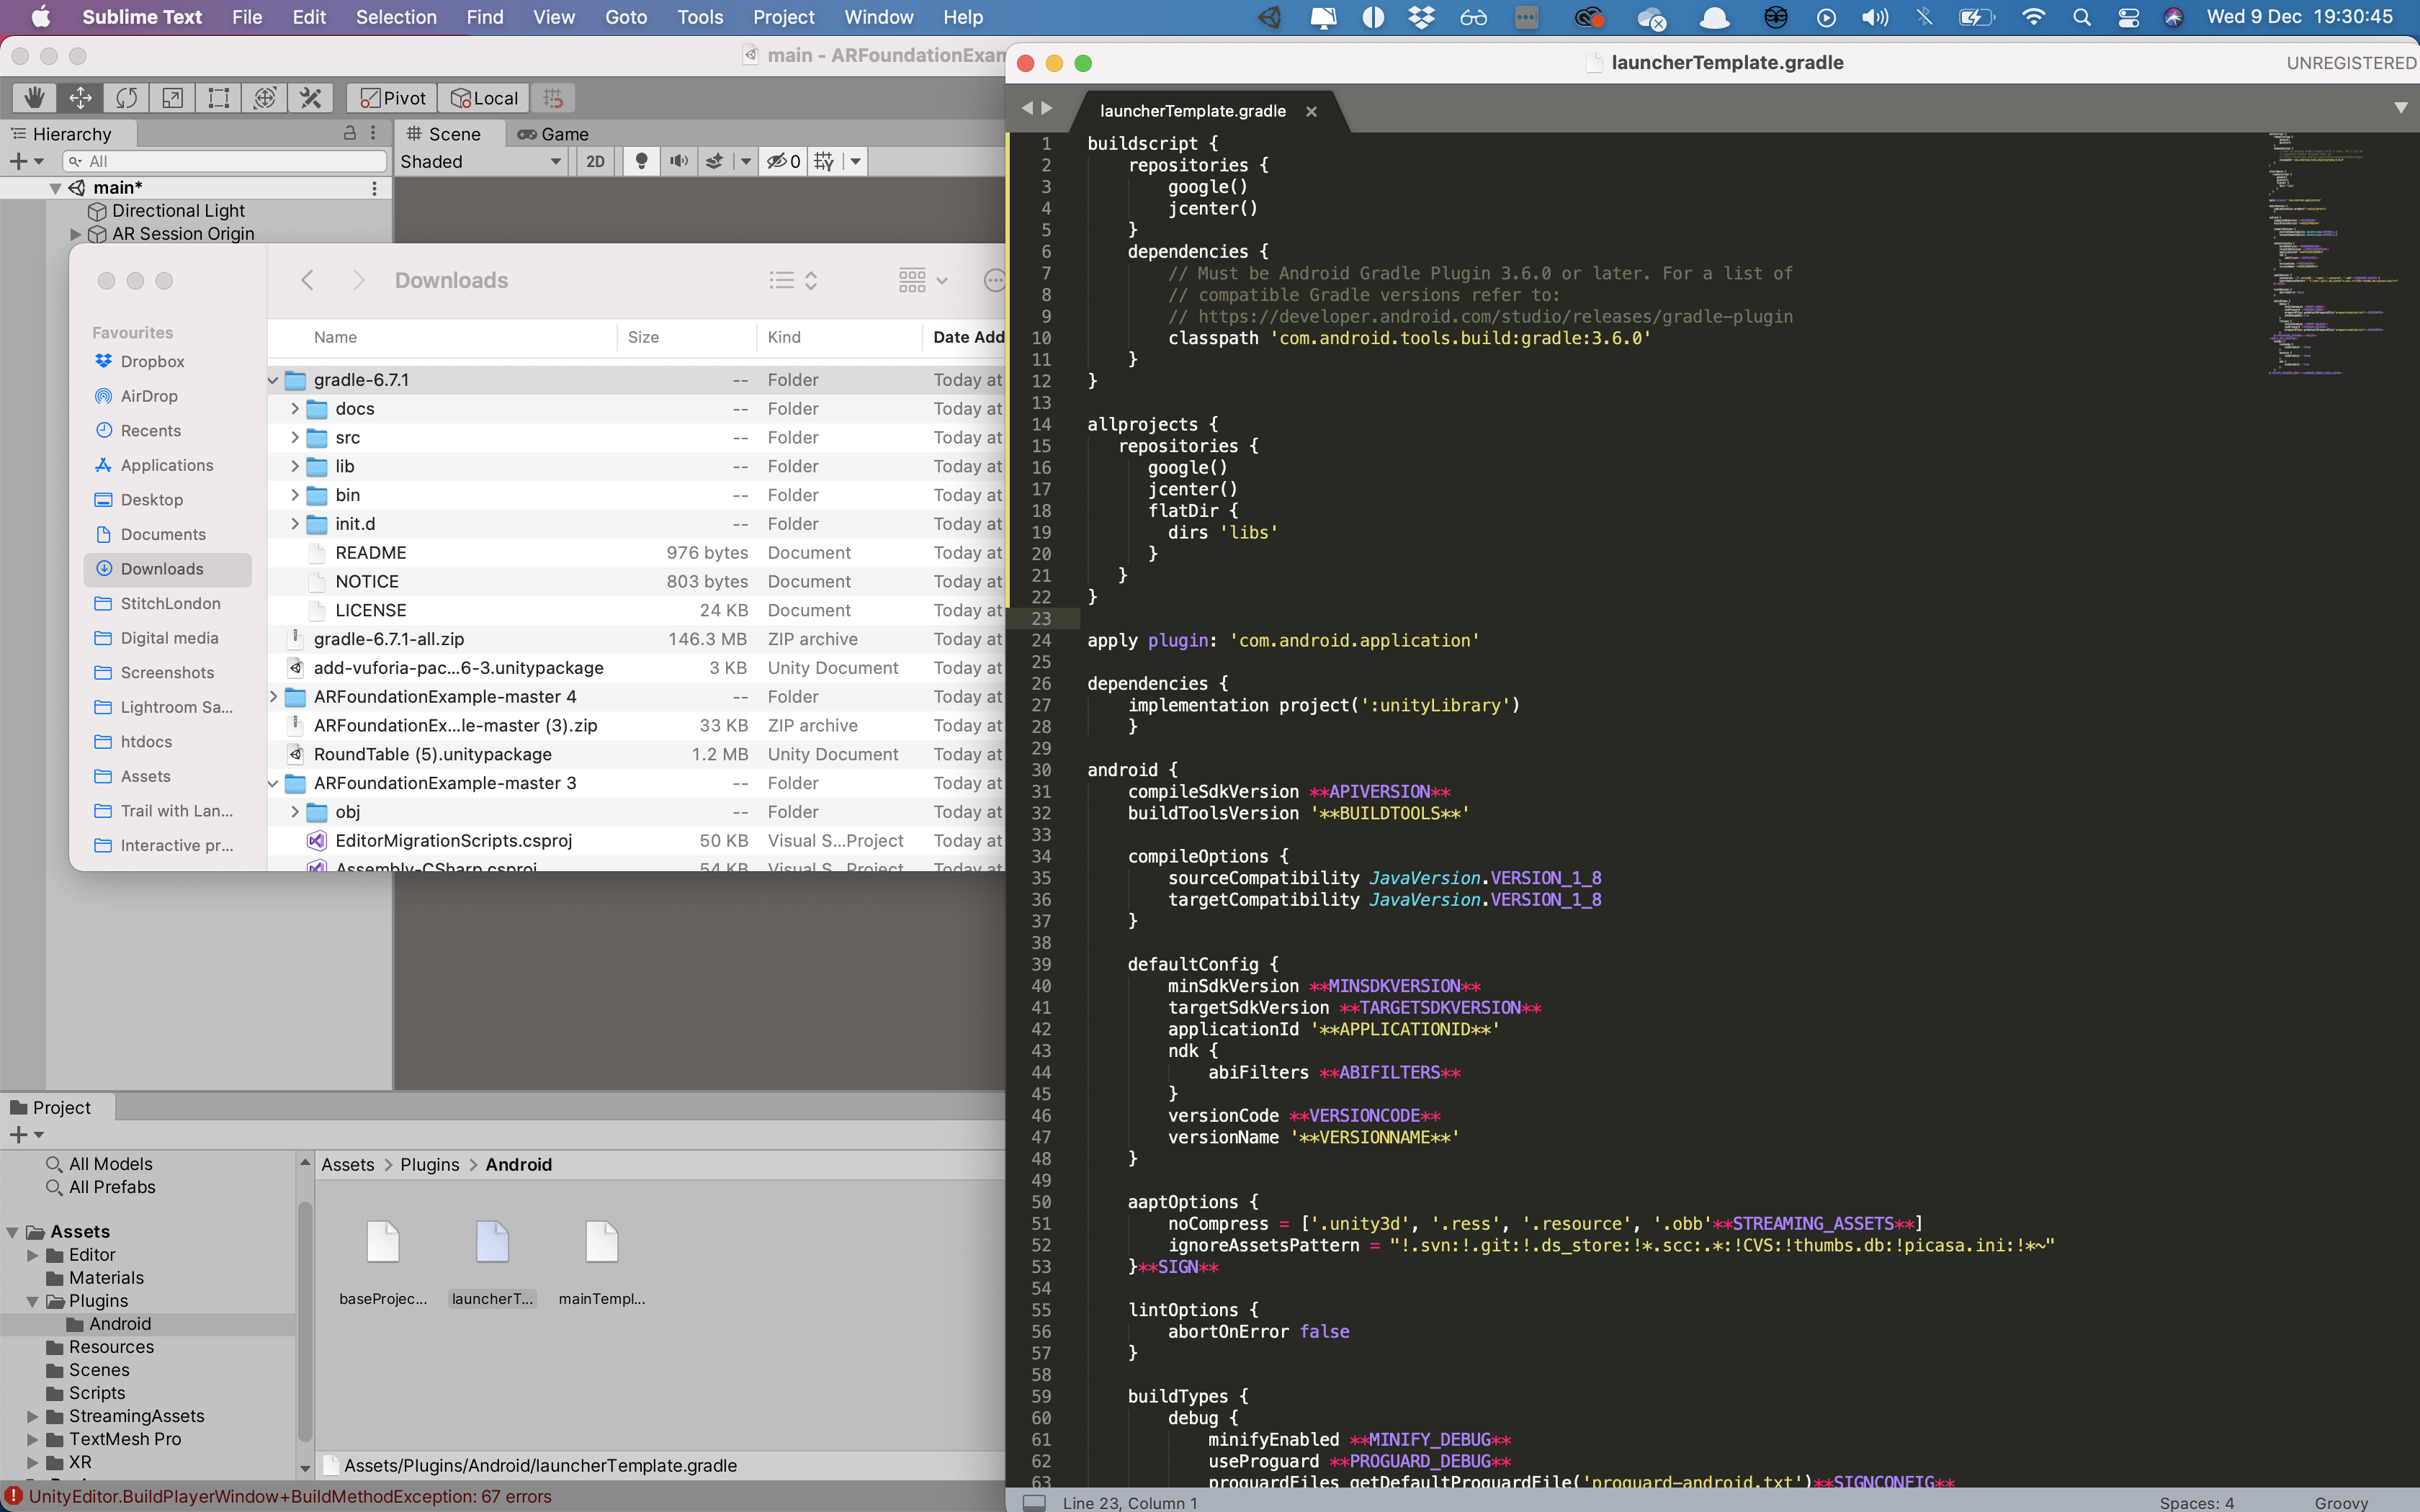
Another major troubleshooting issue i had during the build out of the application, was that the gradle build version was incorrect and i had to download the correct gradle build version in order to build out the application
After doing multiple bits research, i discovered a forum where someone had the same problem and forwarded the link onto the group.
In order to fix the issue, i had to open the launch template of the andriod plugin within gradle and insert a line of code that matched the class path of the build.
Much to my surprise after altering the launcher template vai sublime text, i was able to build out the application onto my Android phone.
Assets merging with C# scripts
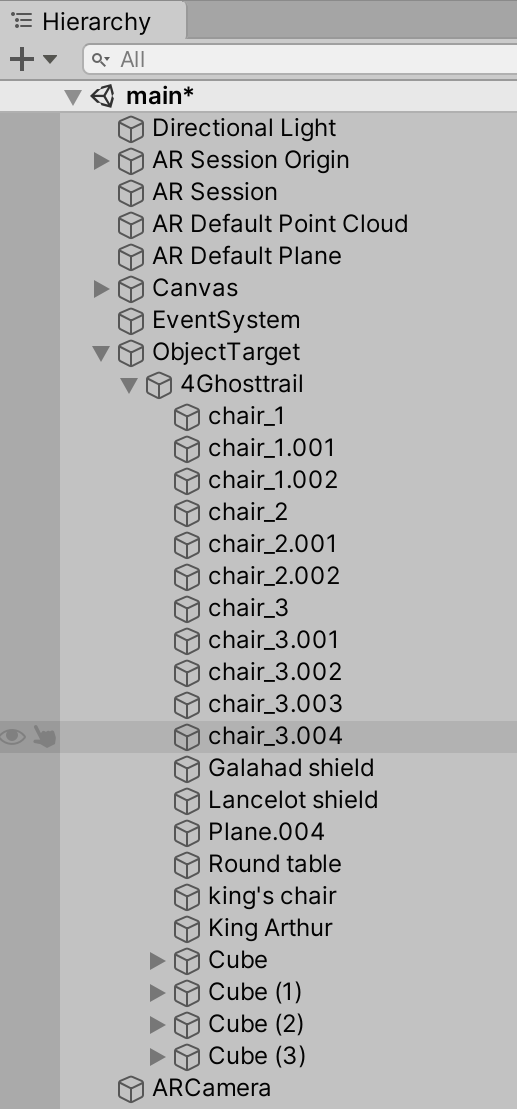
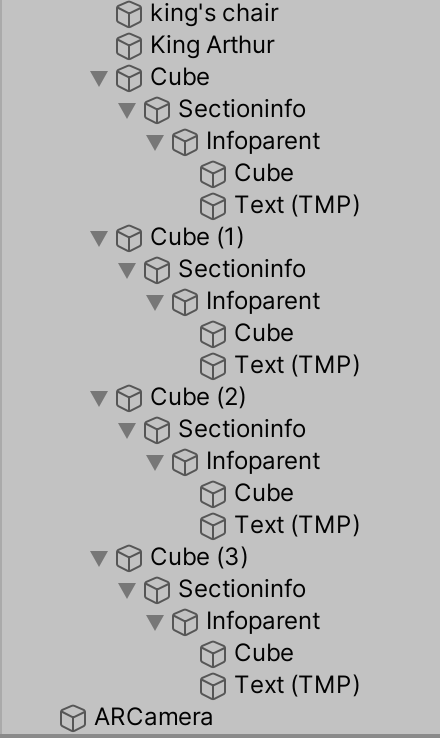
The hierarchy is where the individual assets are placed in order to construct the full model. For example, the content parent is the main parent for all of the individual models and assets.
This therefore means that any of the assets are children of the content parent, which will determine how the model is interacted.
In order for the roundtable to be augmented, I had to place the roundtable and all sof its assets such as the chairs and shields, as a Child to the object target shown on the hierarchy. As you can see where it says 4ghosttrail, it is underneath the object target with an arrow to the left.
This indicates that the object target is the parent of the ghost Trail which means that anything that occurs with the object target will occur to the 4ghosttrail assets.
The four cubes at the very bottom of the hierarchy is where the info parents and sectioninfo's are located with the interactvity of the application. The section info then contains the C# ‘facecamera’ script as mentioned earlier and the quad, text mesh pro and cube for building the info sign.
When implementing the signs on top of the chairs, were issues where I could not attach the information post on top of the assets, causing the info post to immediately go horizontal whenever the info behaviour script was added, which was due to the way which it was created.
I overcame this by adding a 3D dimensional cube on top of the assets, which enabled me to produce and scale the quad for the back panel of the sign.
After adding the ‘facecamera’ script into the cubes, it allowed for the sign posts to face the camera no matter which area the camera is located. This is caused by the bottom post of the sign to rotate on top of the asset.
Finally I'm testing the gaze interaction on the round table, seeing if it works with the roundtable in play mode.
When the camera hits the invisible cube, the top of the sign emerges.
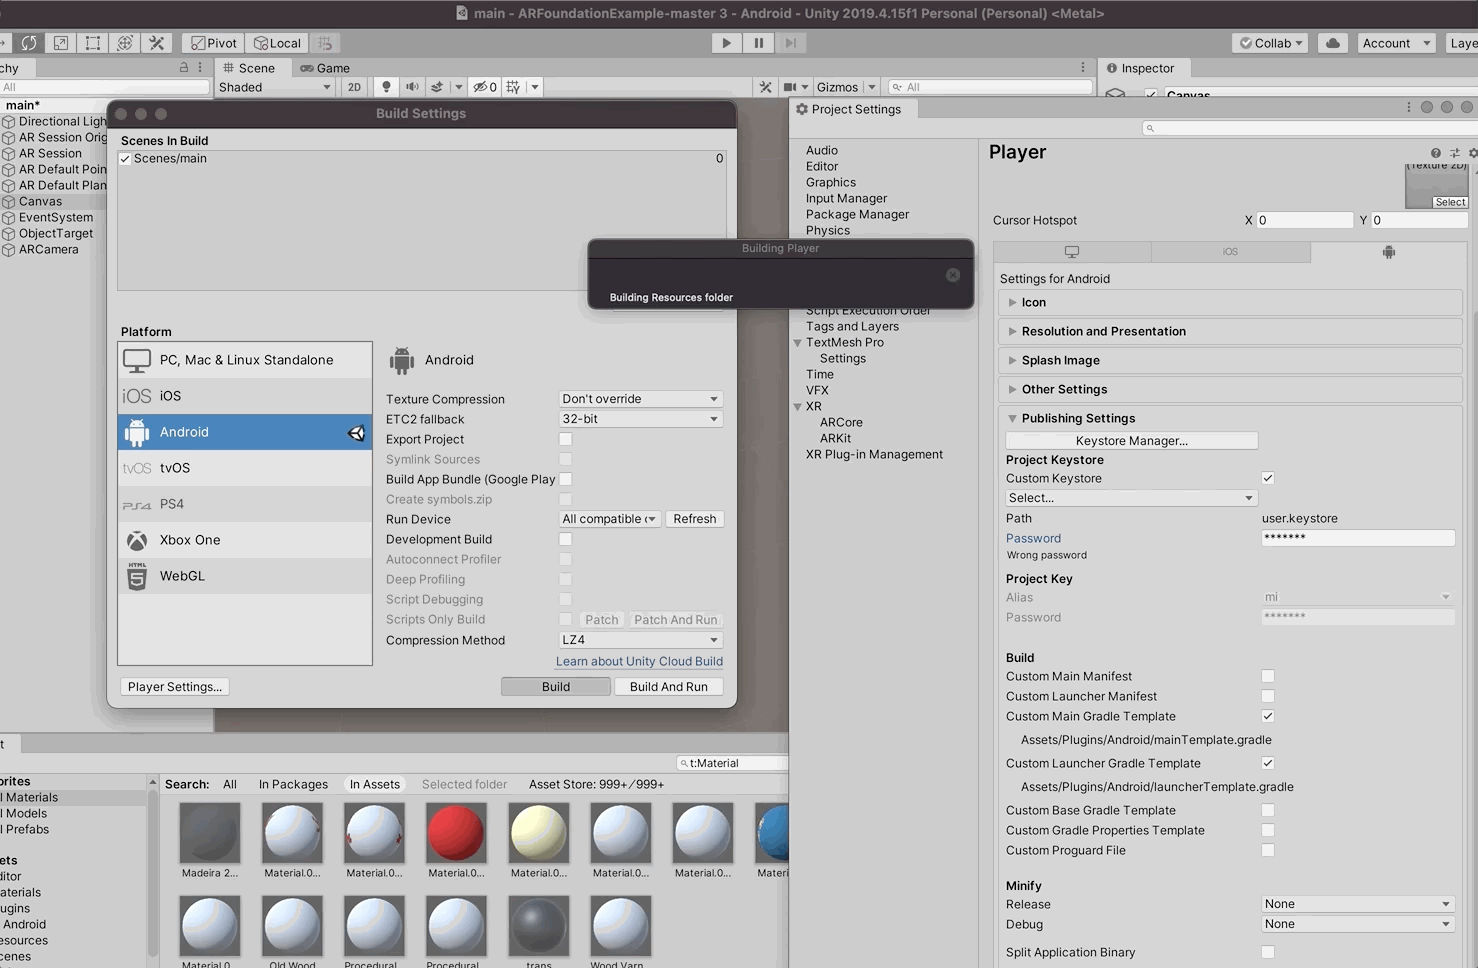
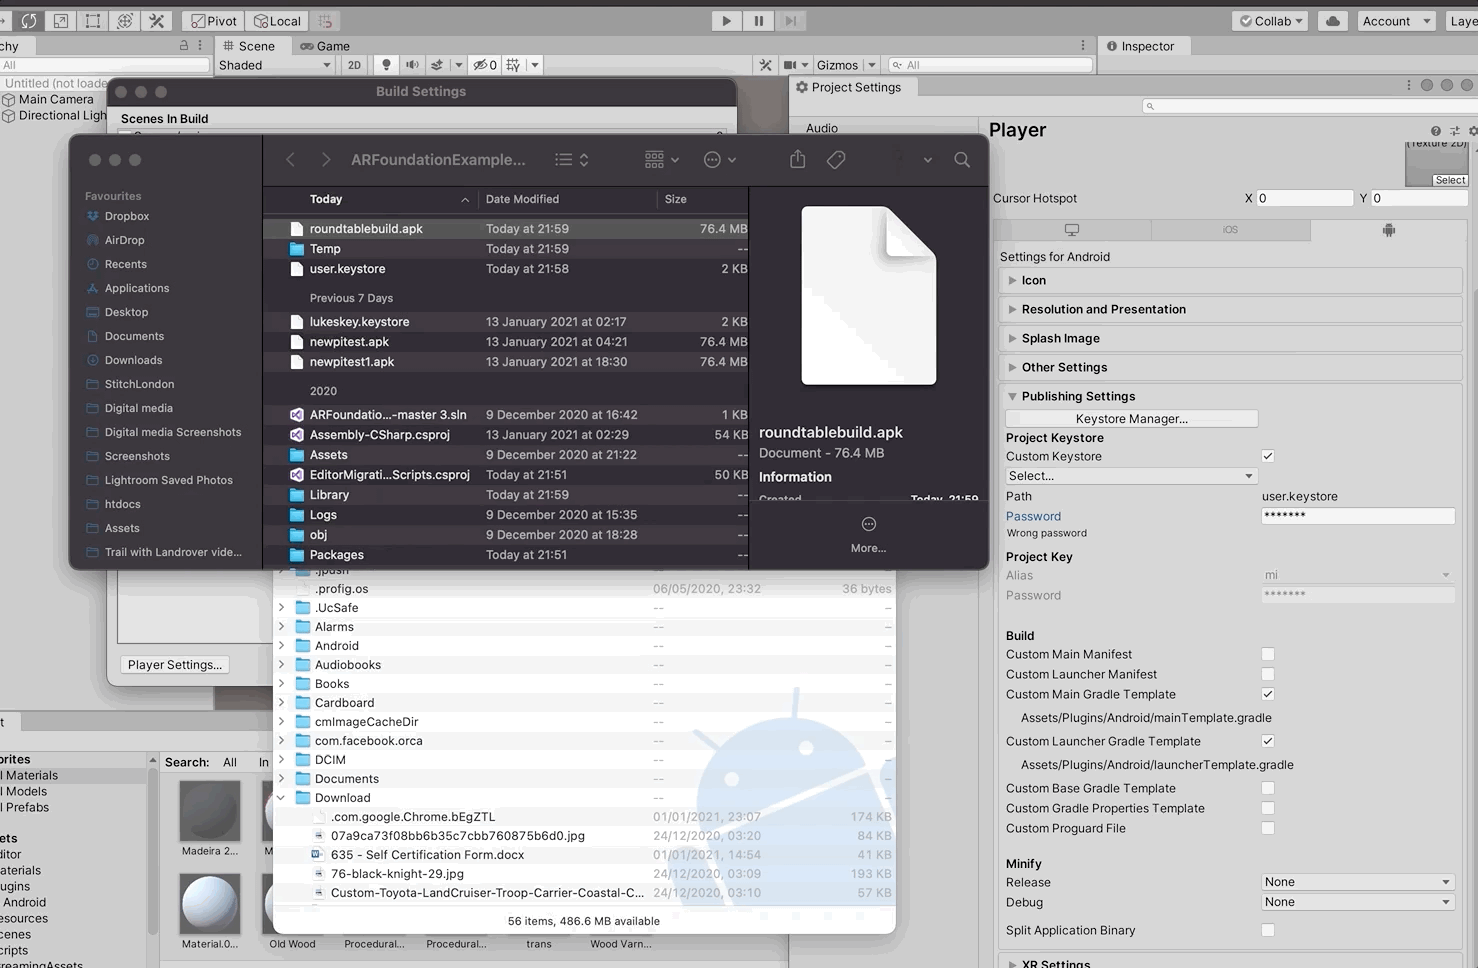
Building and uploading to mobile device
In order to build for Android, i had to first switch the platforms over from IOS and PC and covert the system to Android. Afterwards i was able to build out the project for testing.
Before building out the application, i had to log into my keystore infomation on unity to save the log file of the project, then i was able to build it out.
Initally i had issues with Gradle as mentioned previously, but these were ironed out by updating the software allowing me to progress with testing the application.
After building out the application, i was able to connect me phone to my mac and transfer the APK file over to my android phone, as shown on the right. This then allowed me to open it and install it as a third party application.
Augmented Reality Testing
Test one.
In this clip, i was able to get the camera to identify the object, as the object target for the augmention. This worked well as all of the assets were present.
Unfortunately however, the infobehaviour wasnt making the signs pop up when the camera was focused on.
Final test
Below is the final AR test. I was able to fix on two of the cubes with the infobehaviour and the gaze script. Here i was a able to showcase the gaze script interacting with the invisible cube, which causes the infobehaviour script to appear when prompted.
Unfortunately there was two issues with regards to the interactivty failing to augment.
1. Two of the cubes did not augment when the camera was poised above them.
2. The sign posts unfortunately did not follow the camera around, which i belive to be an issue with the facecamera script.
Despite further trouble shooting, i couldnt remove the issues highligted above, which is very fustrating.
Analysis
To conclude my project, i belive i have successfully show cased the round table in full augmention, where i haev been able to highlight the full potential with the interactivity of the project. I was able to show my enthusiasm with augmented reality, and the range of skills that can be used with it.
.jpg)