HumHub frontend and backend interface
After installing a pub I then looked into the backend side of Home hub which gave me a good indication of how we could use it for the application. There was plenty of settings that we could've used including the display names the appearance the email accessories, plenty of featues that we could have used.
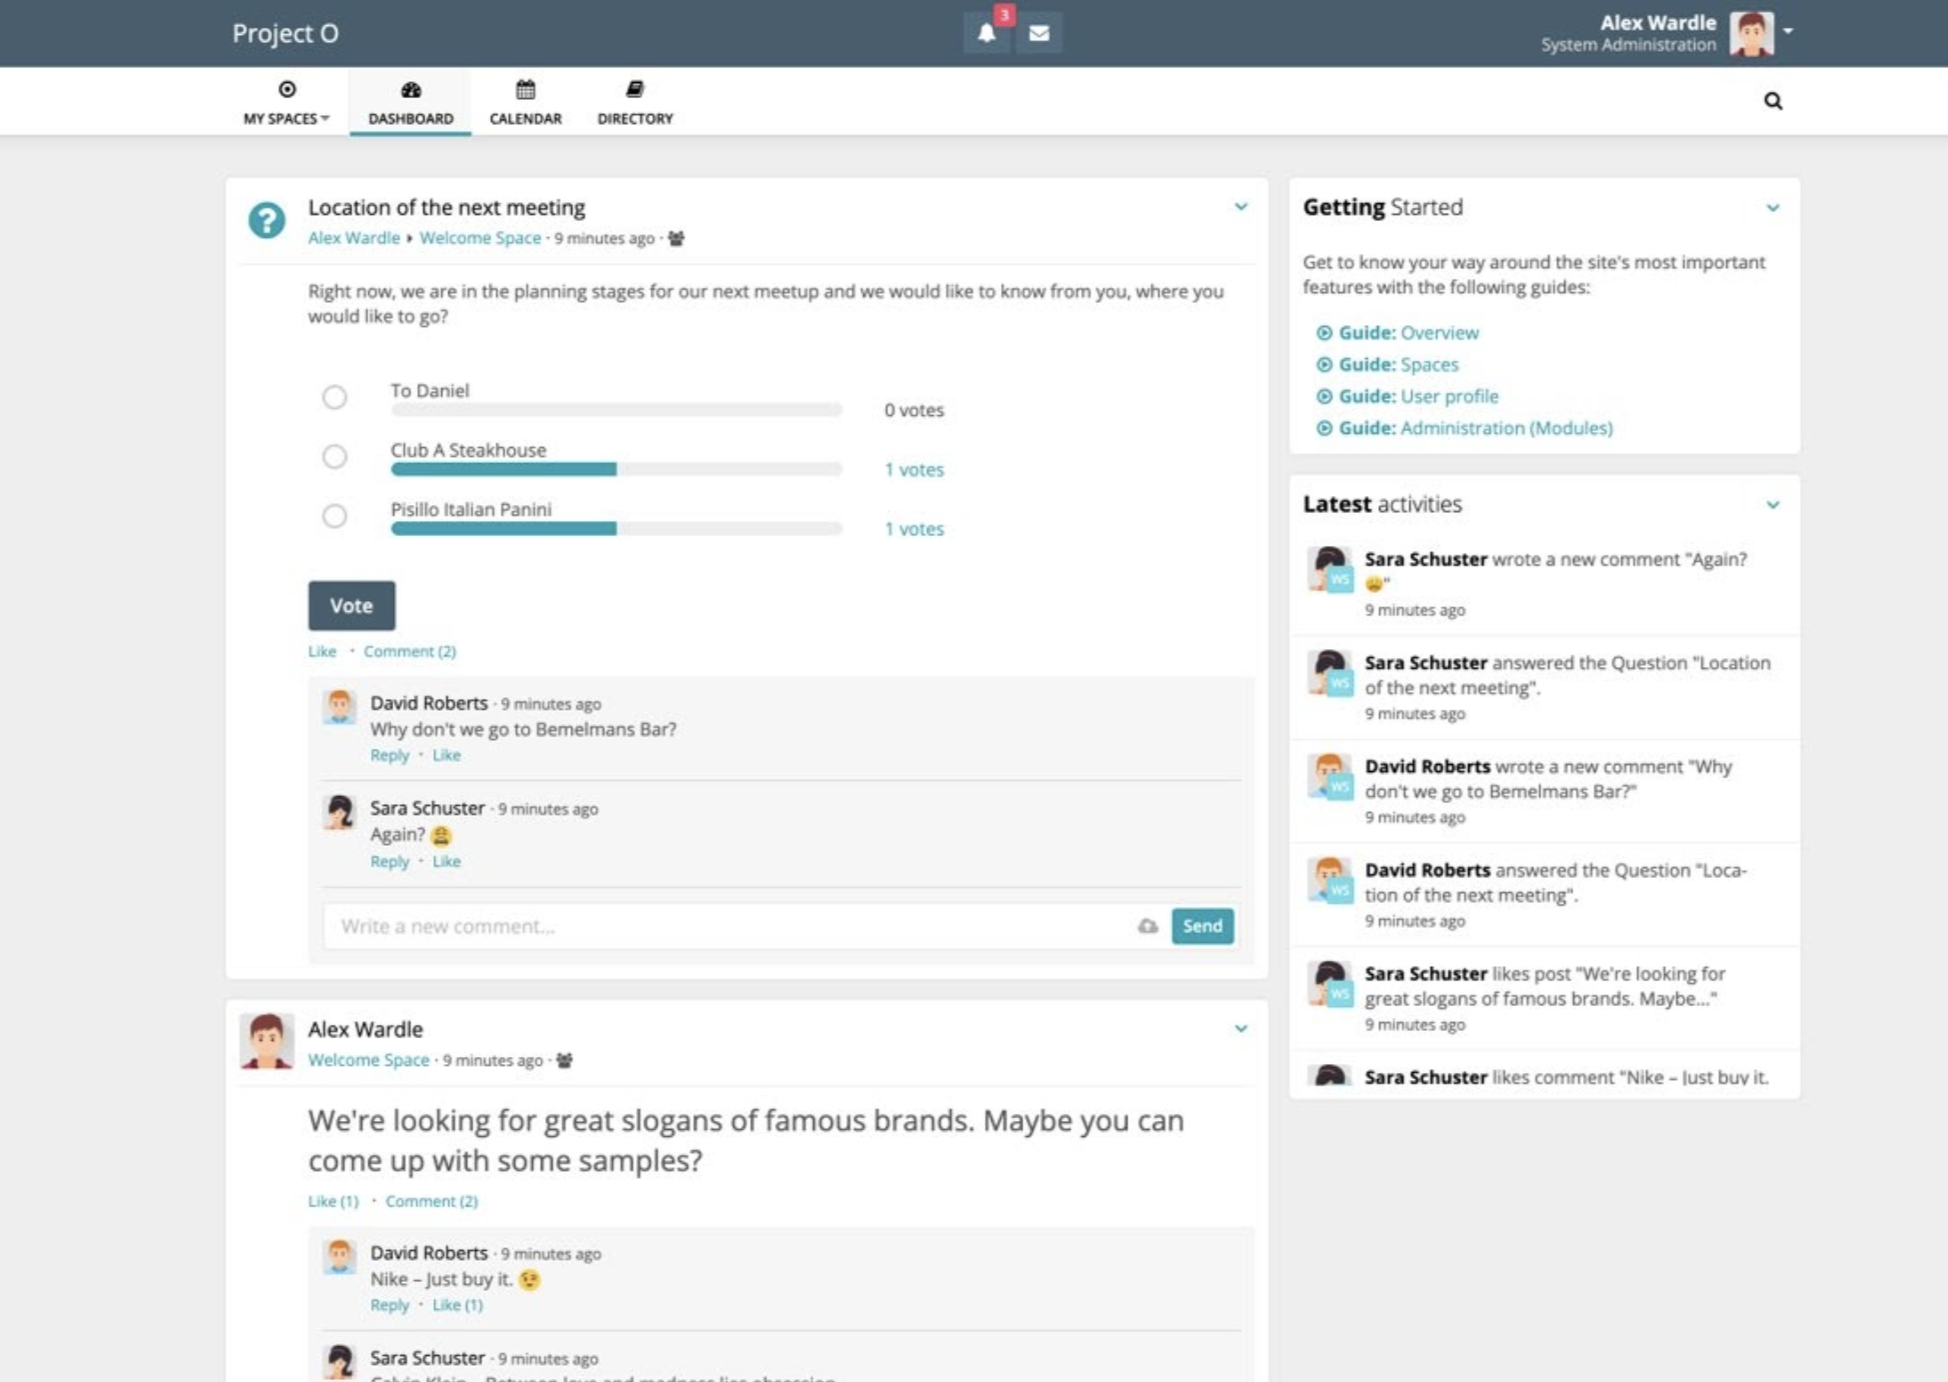
Next we looked at the front-end that displayed plenty of options and community features that our client required. We could see that there was a calendar area of dashboard directory area as well as profile pictures and messaging abilities. On the right it also listed latest activities of users.
Why did we decide not to use Humhub?

However we decided not to use home hub as the chosen application, as we felt there was not that many opportunities for us to customise the interface of Hum Hub.
Due to the lack of design opportunities, we decided to pursue a new Avenue in regards to WordPress as we believe there would be better ability to customise the interface of the site, therefore learning new technologies and more scope to gain marks. As I was building the front end we both felt it wouldn't be a suitable application.
Section 2- Wordpress development
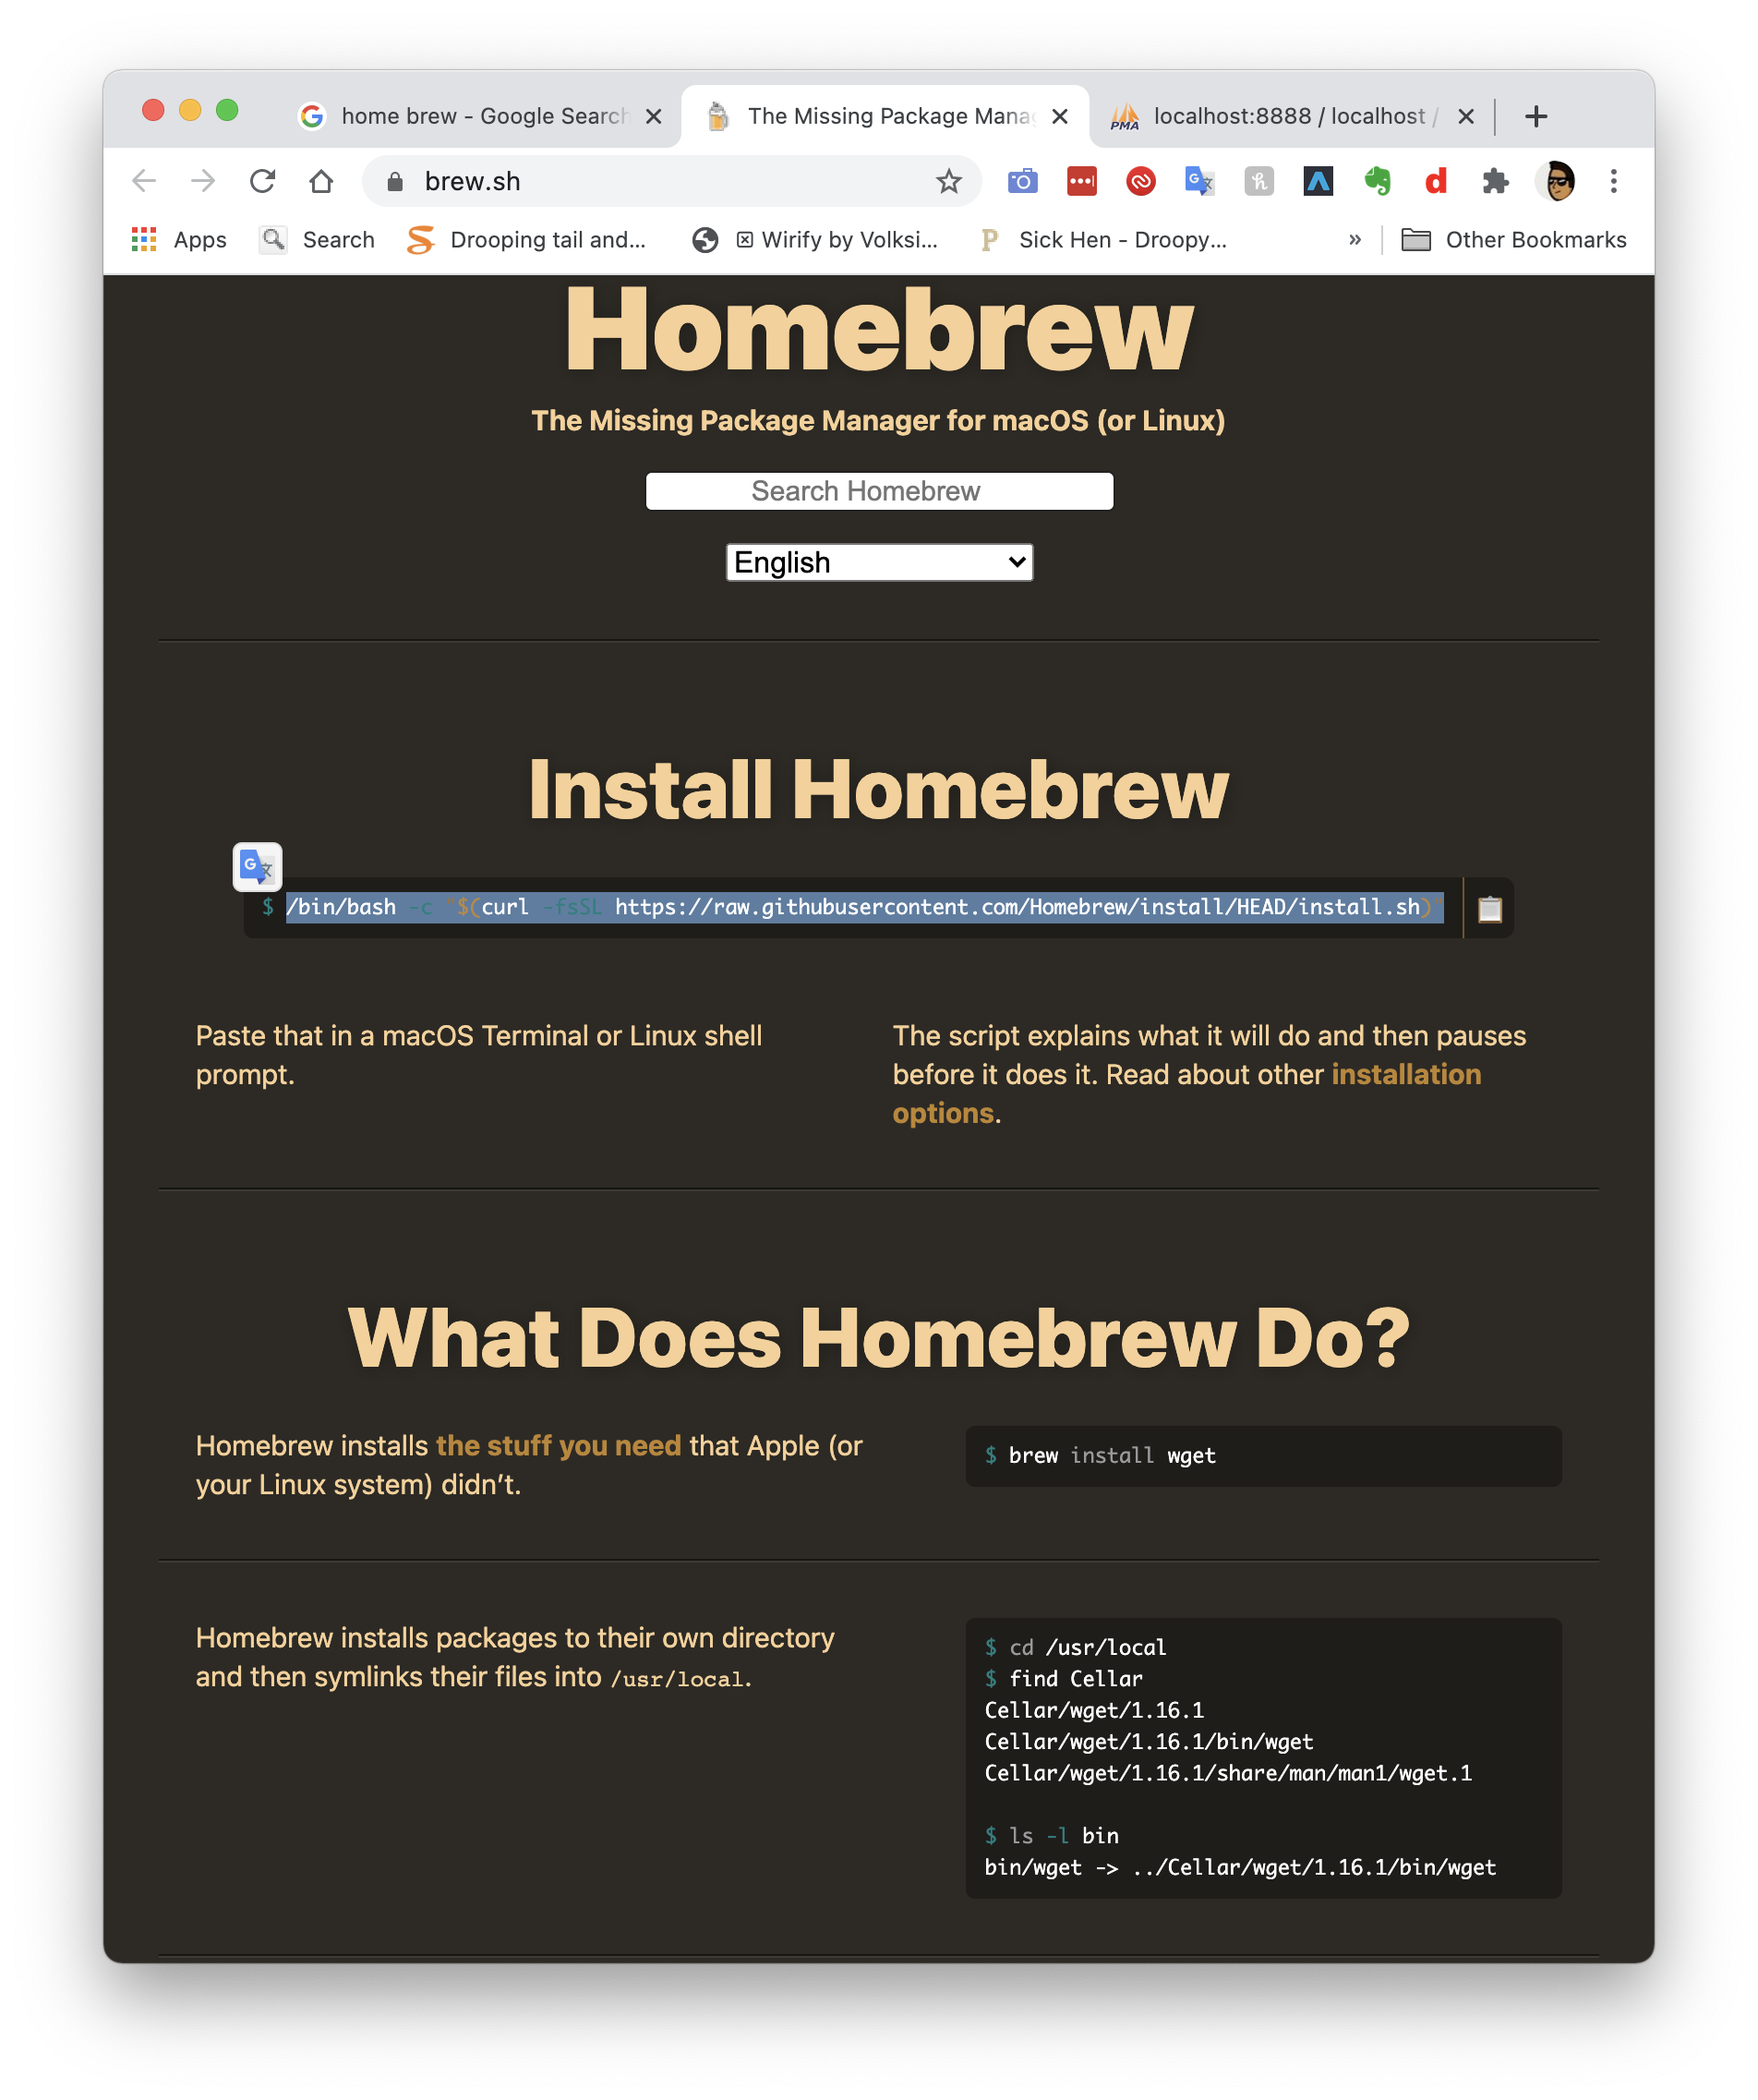
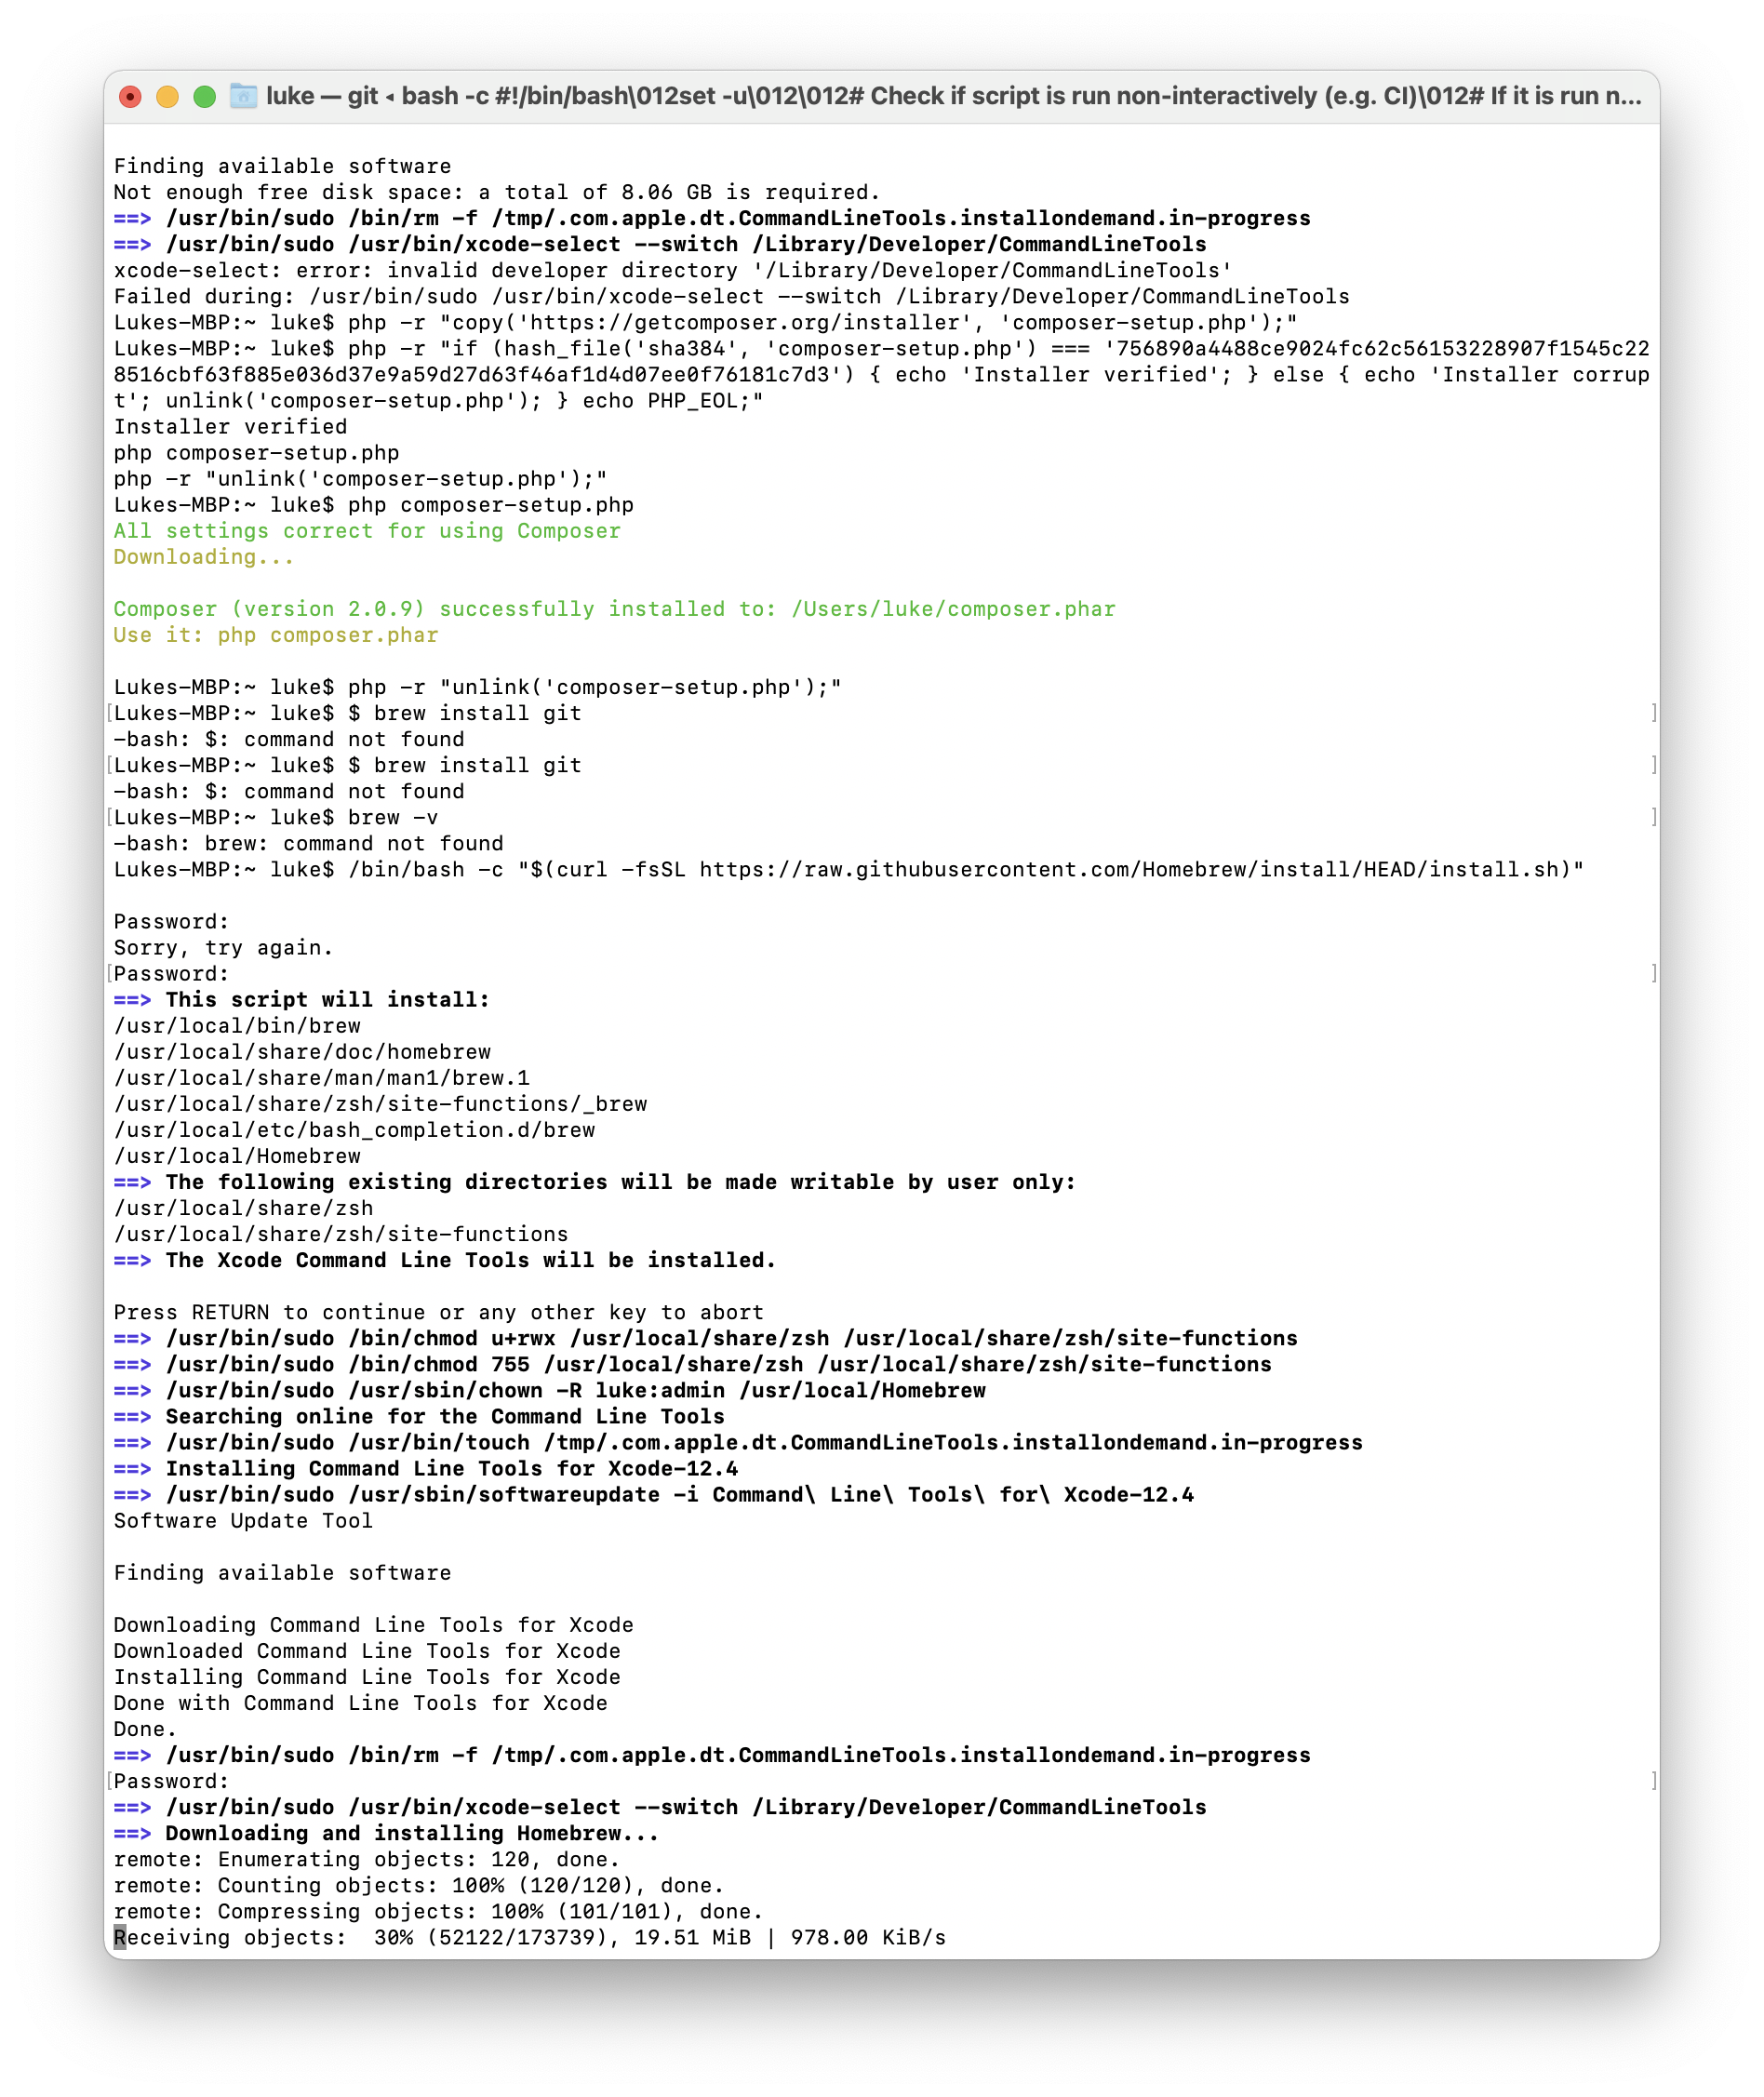
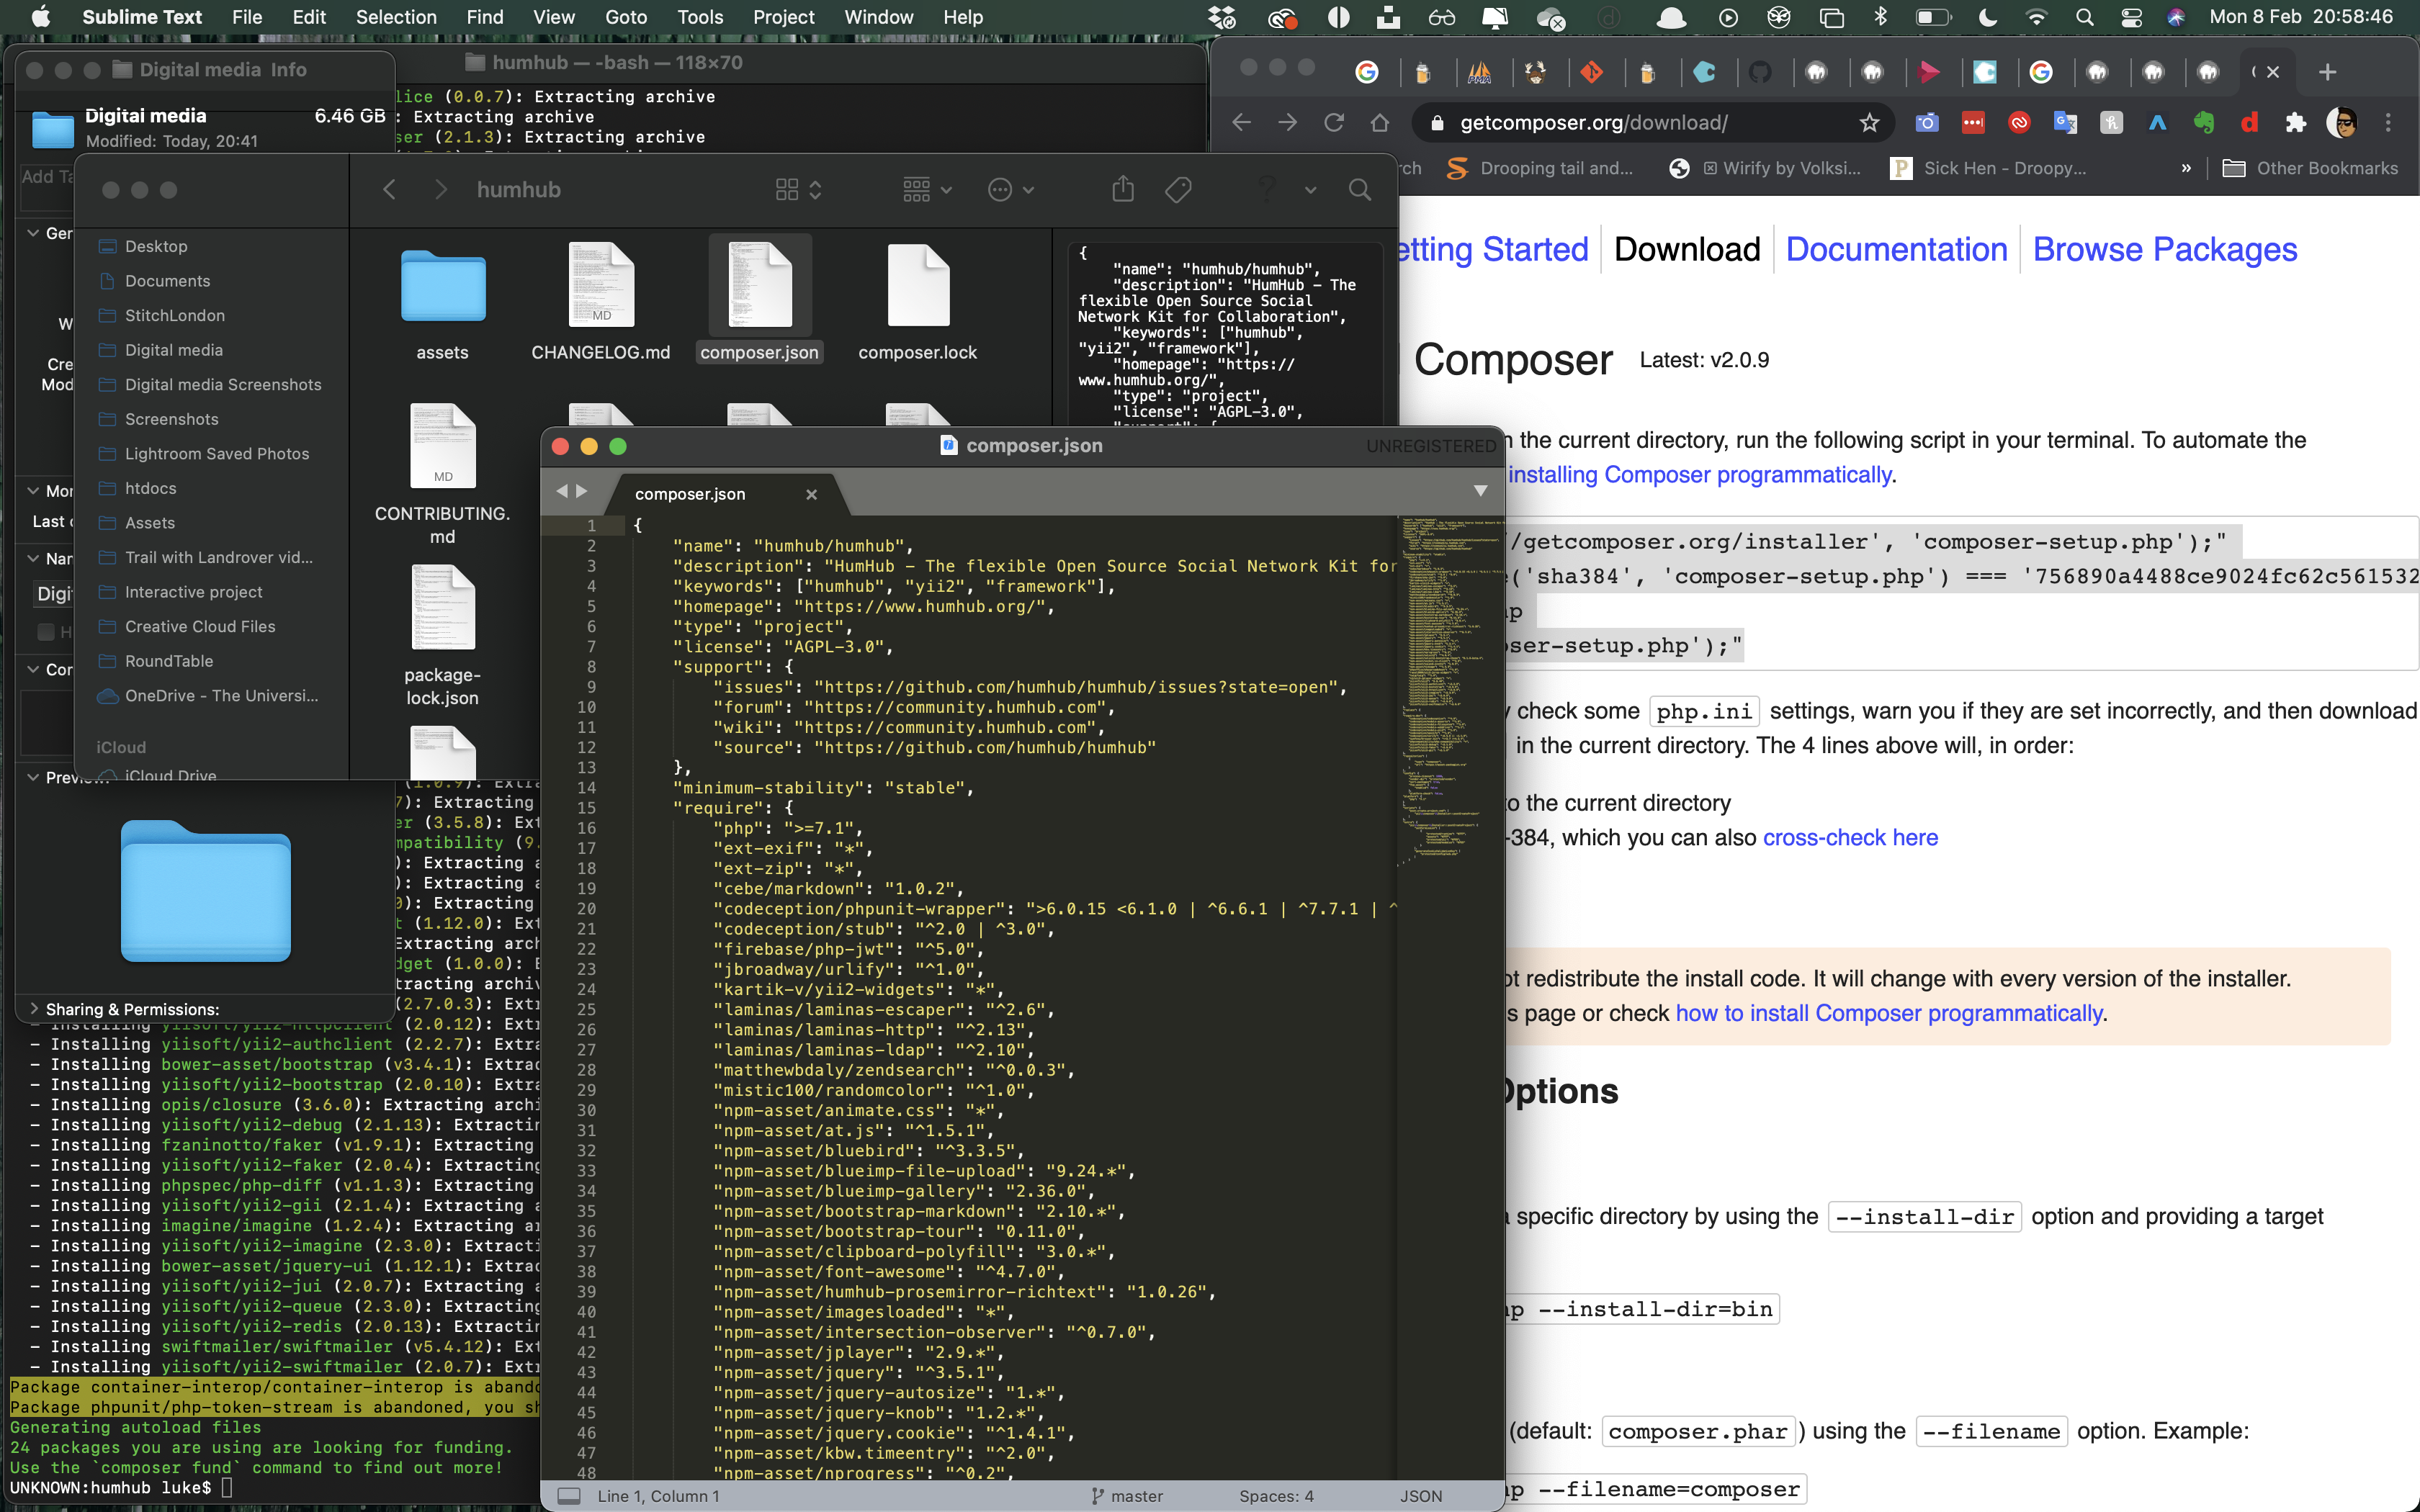
as we decided to continue with the project with the use of WordPress, it was time to download WordPress to my hard drive, and begin the installation period.
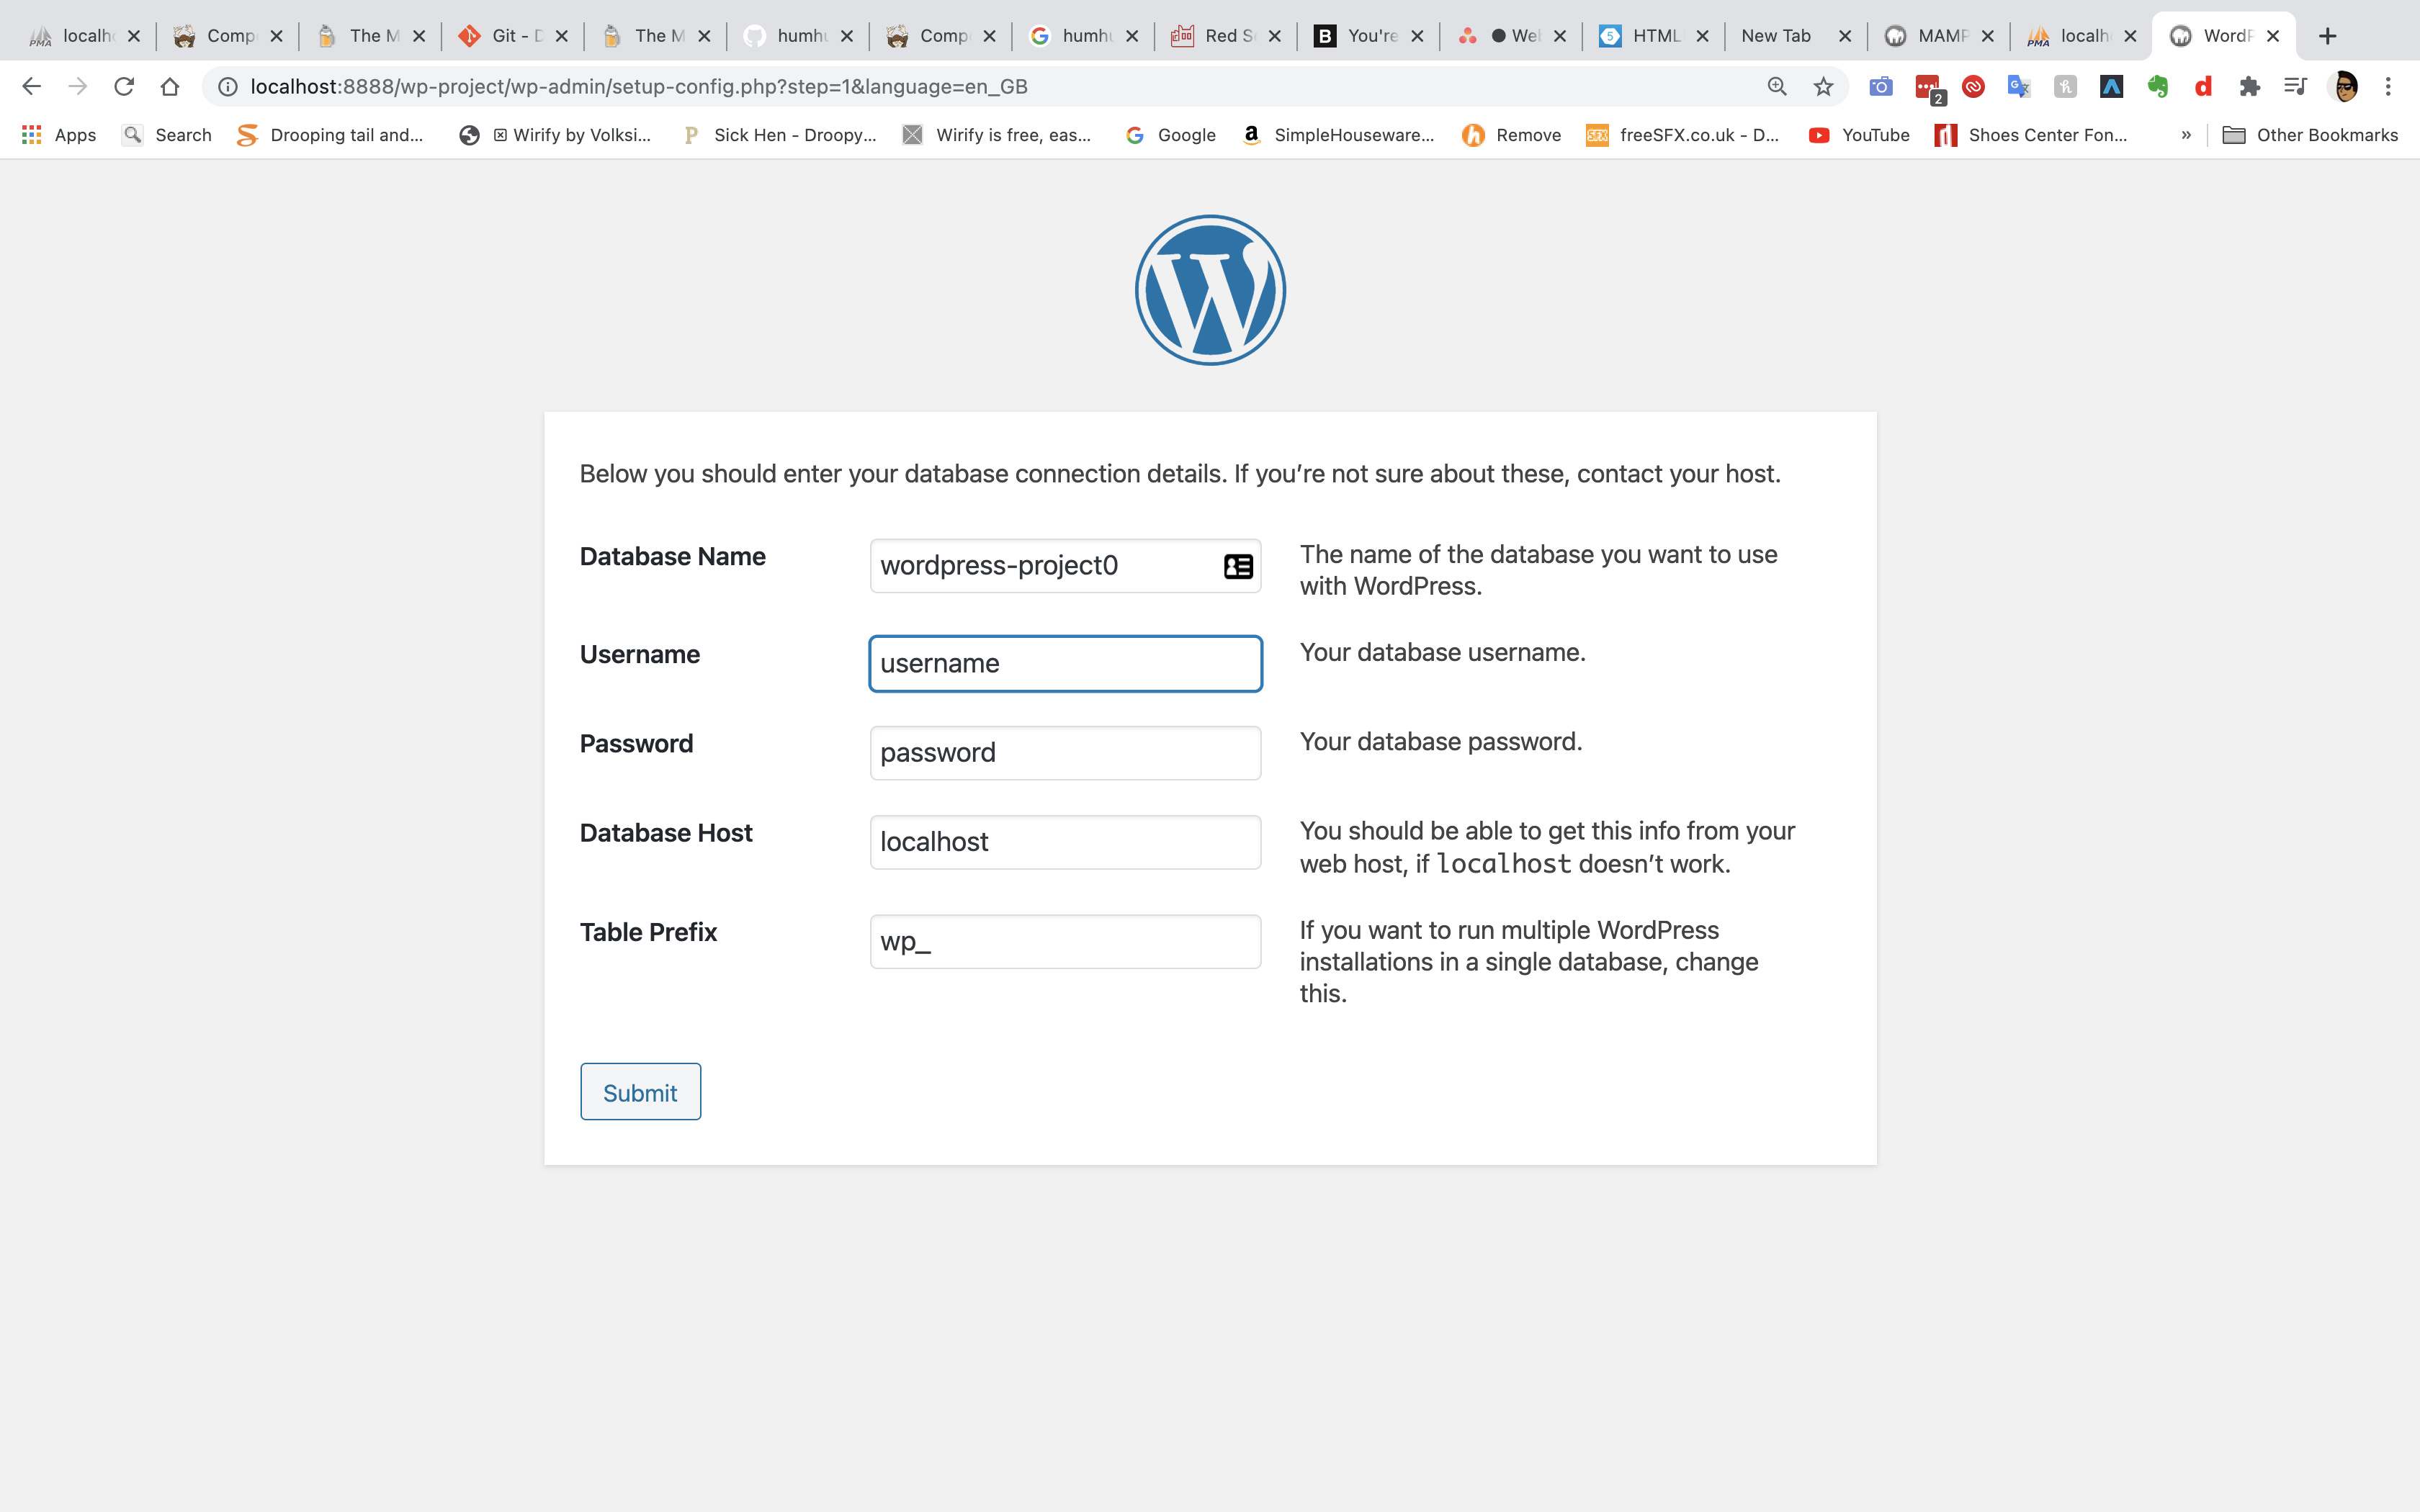
After creating the database I started to install WordPress.
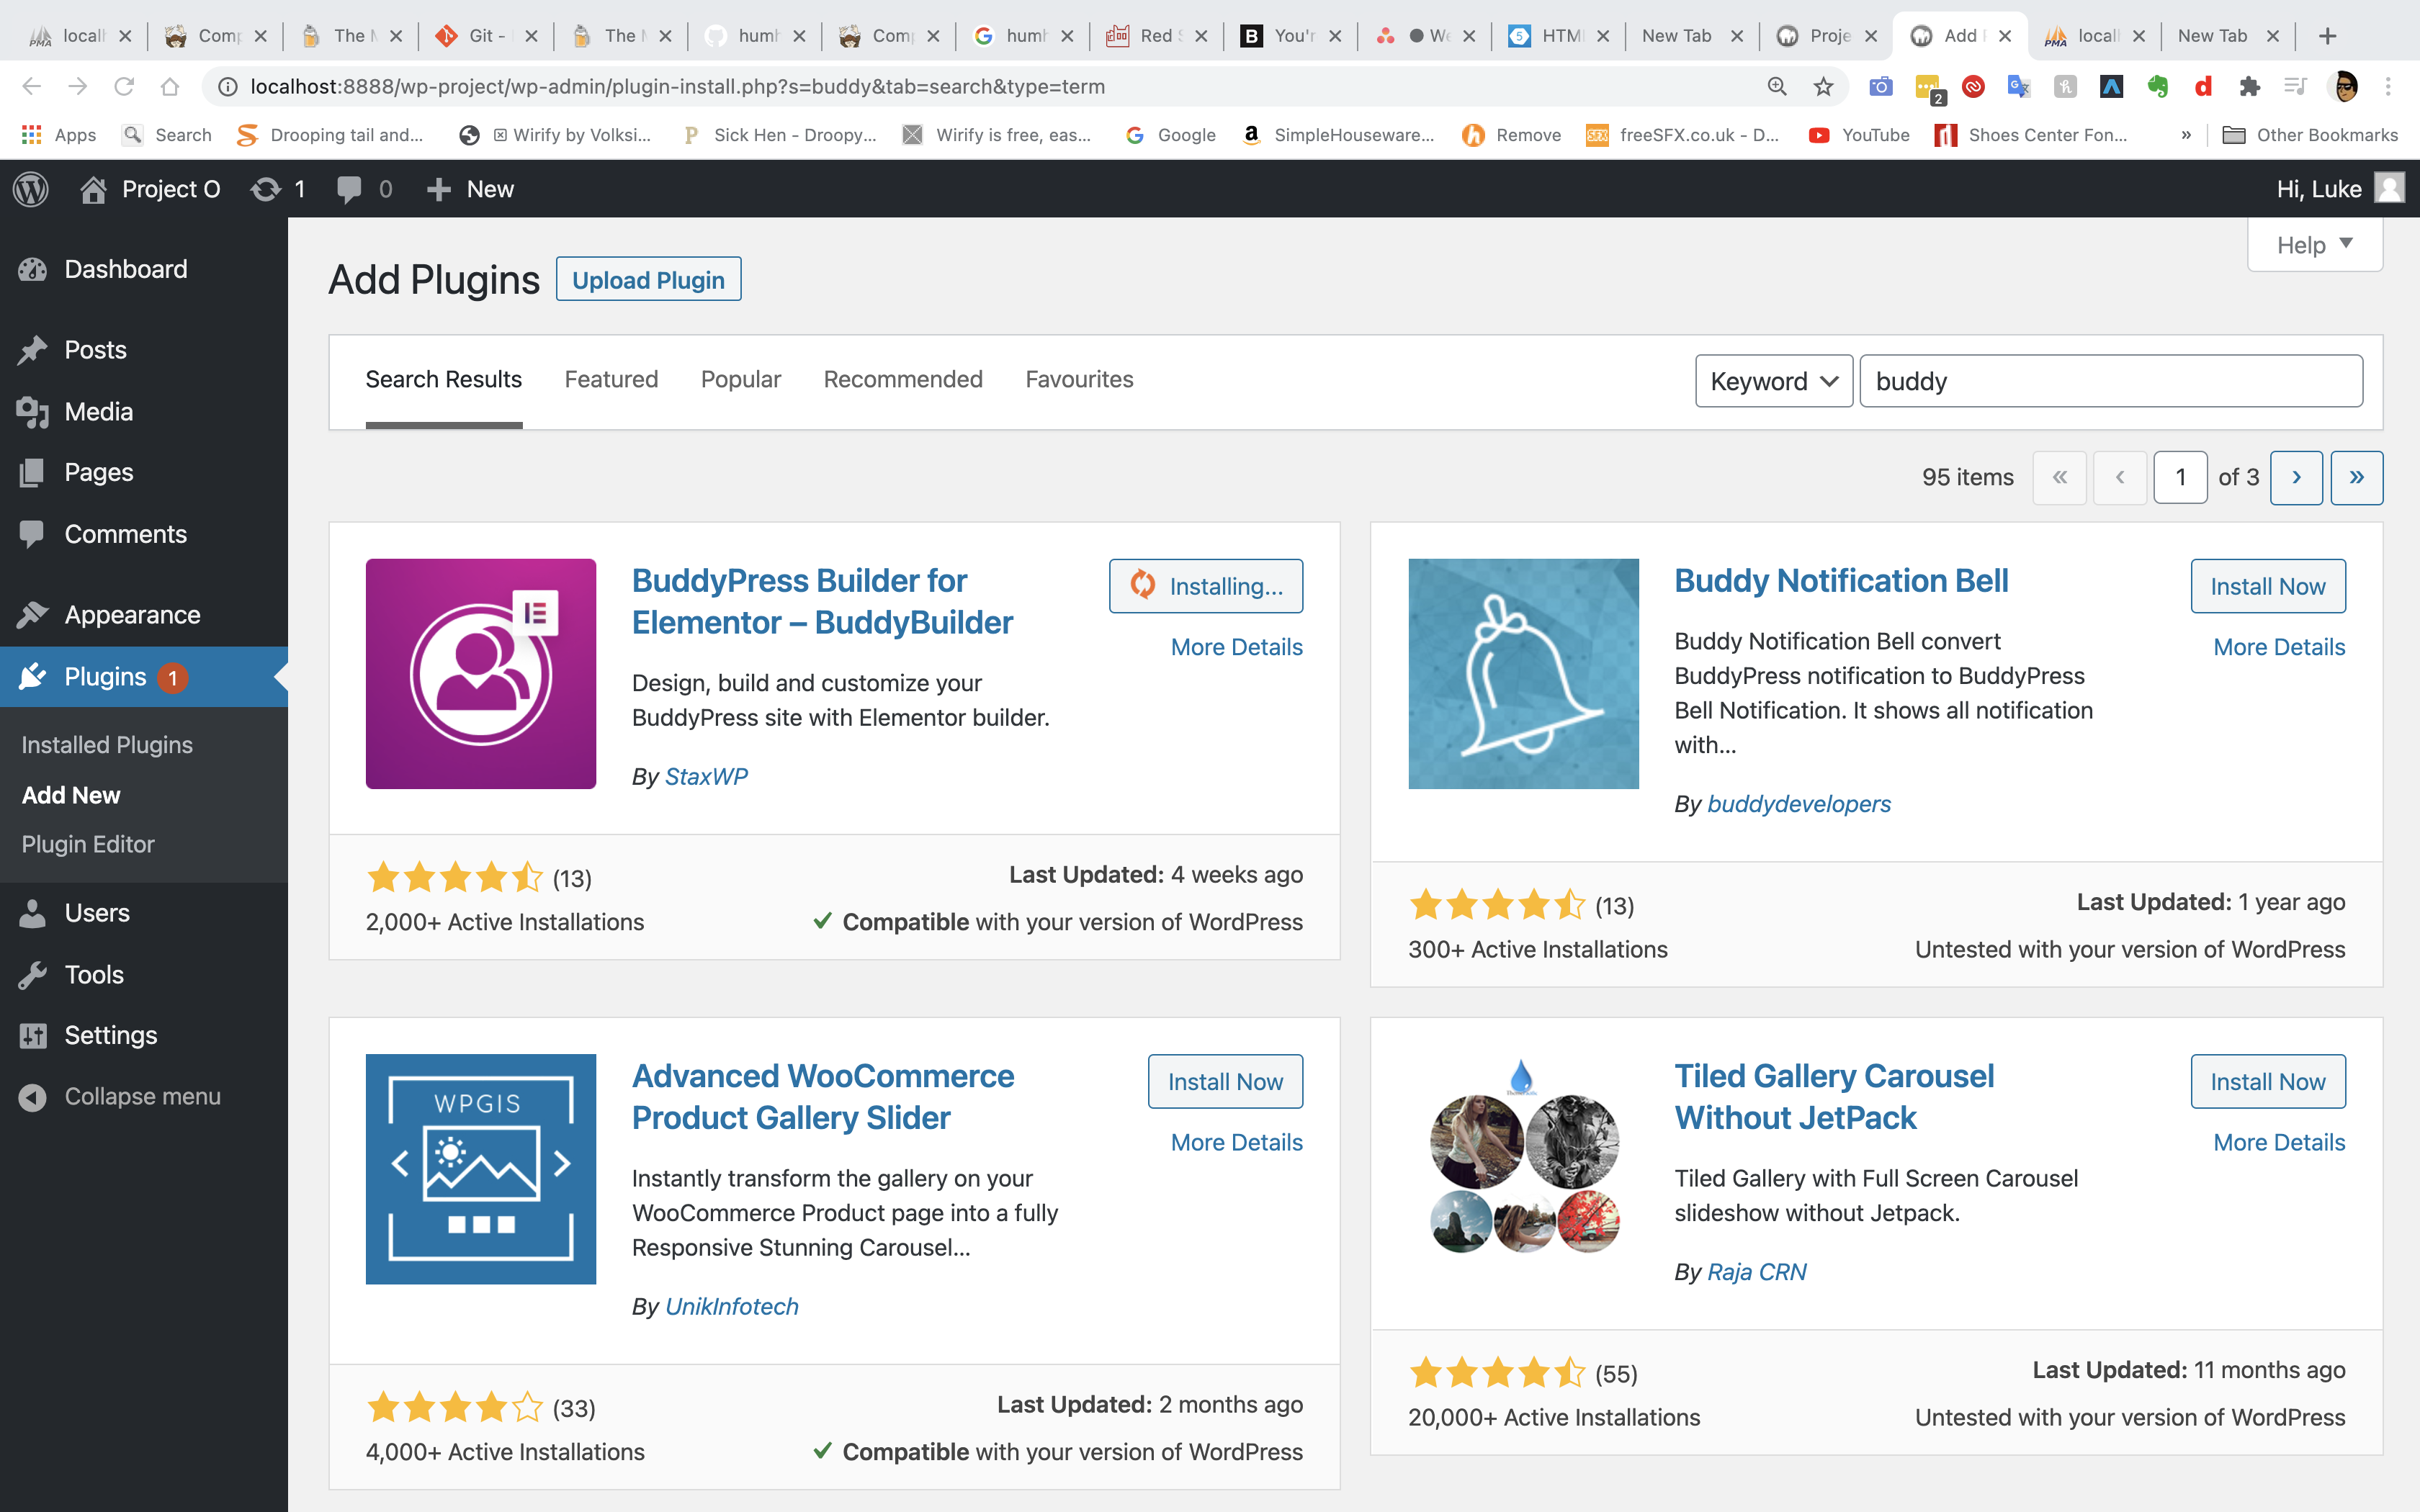
Next we use a well-known plug-in called Buddy press, to enable the social side of the application to be created.

next I installed a well-known application called Firefox developer addition, as it enables the user to have much more access in understanding and testing a website when building out the front-end.
Implementing designer's designs
As I was building at the front end of the application, I work very closely with the designers of the project to implement their colour codes design styles and logos into the project.
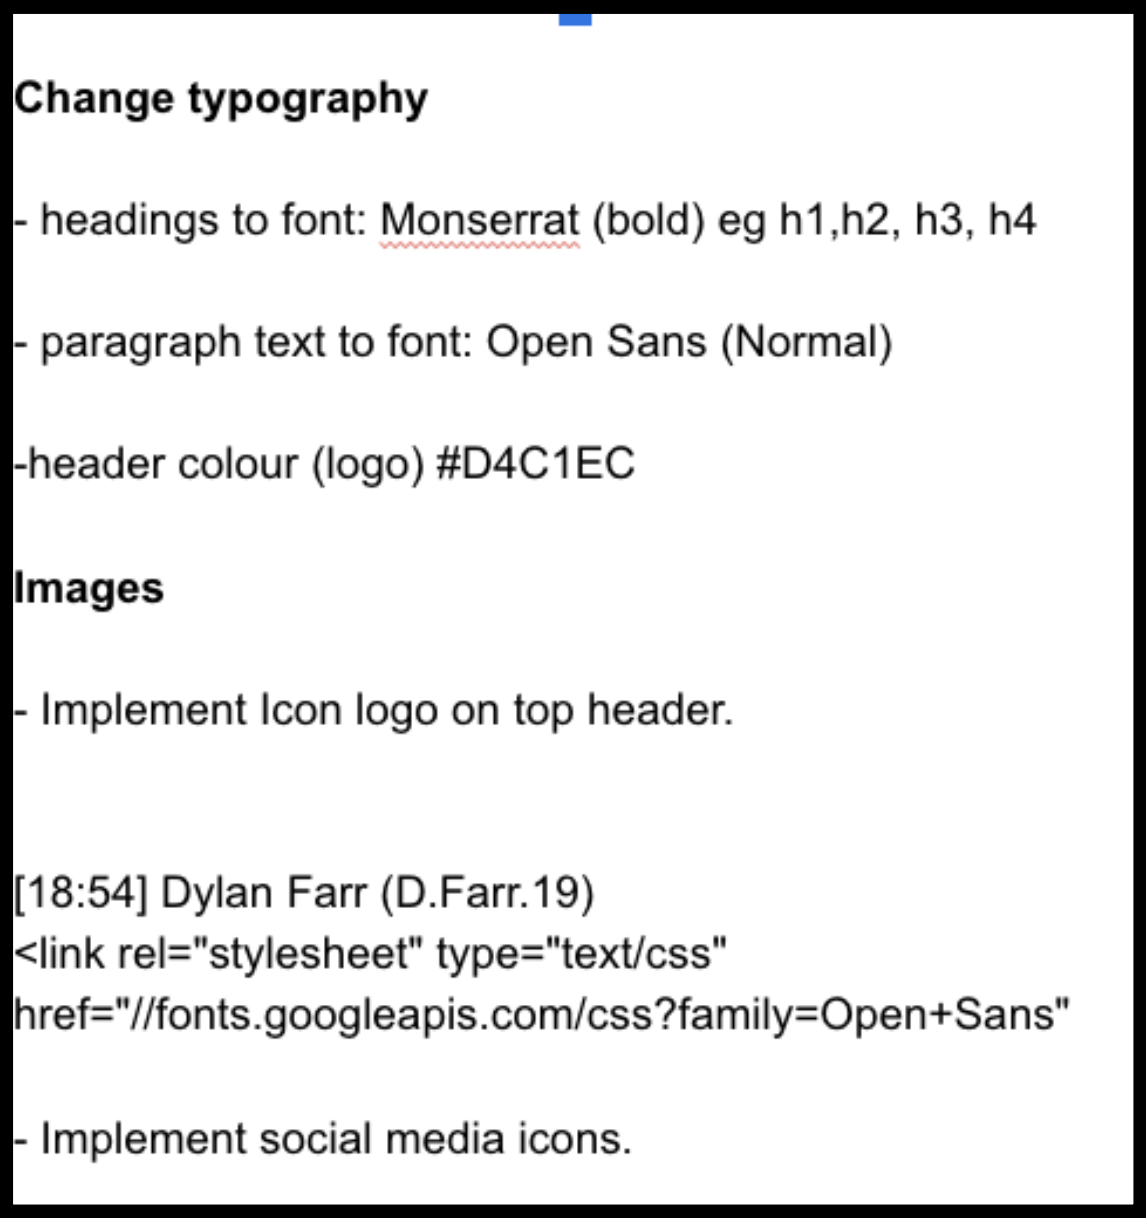
As you can see on the left this was one of the lists I was given to progress with the project and implement the designs that the designer felt would be appropriate for the application.
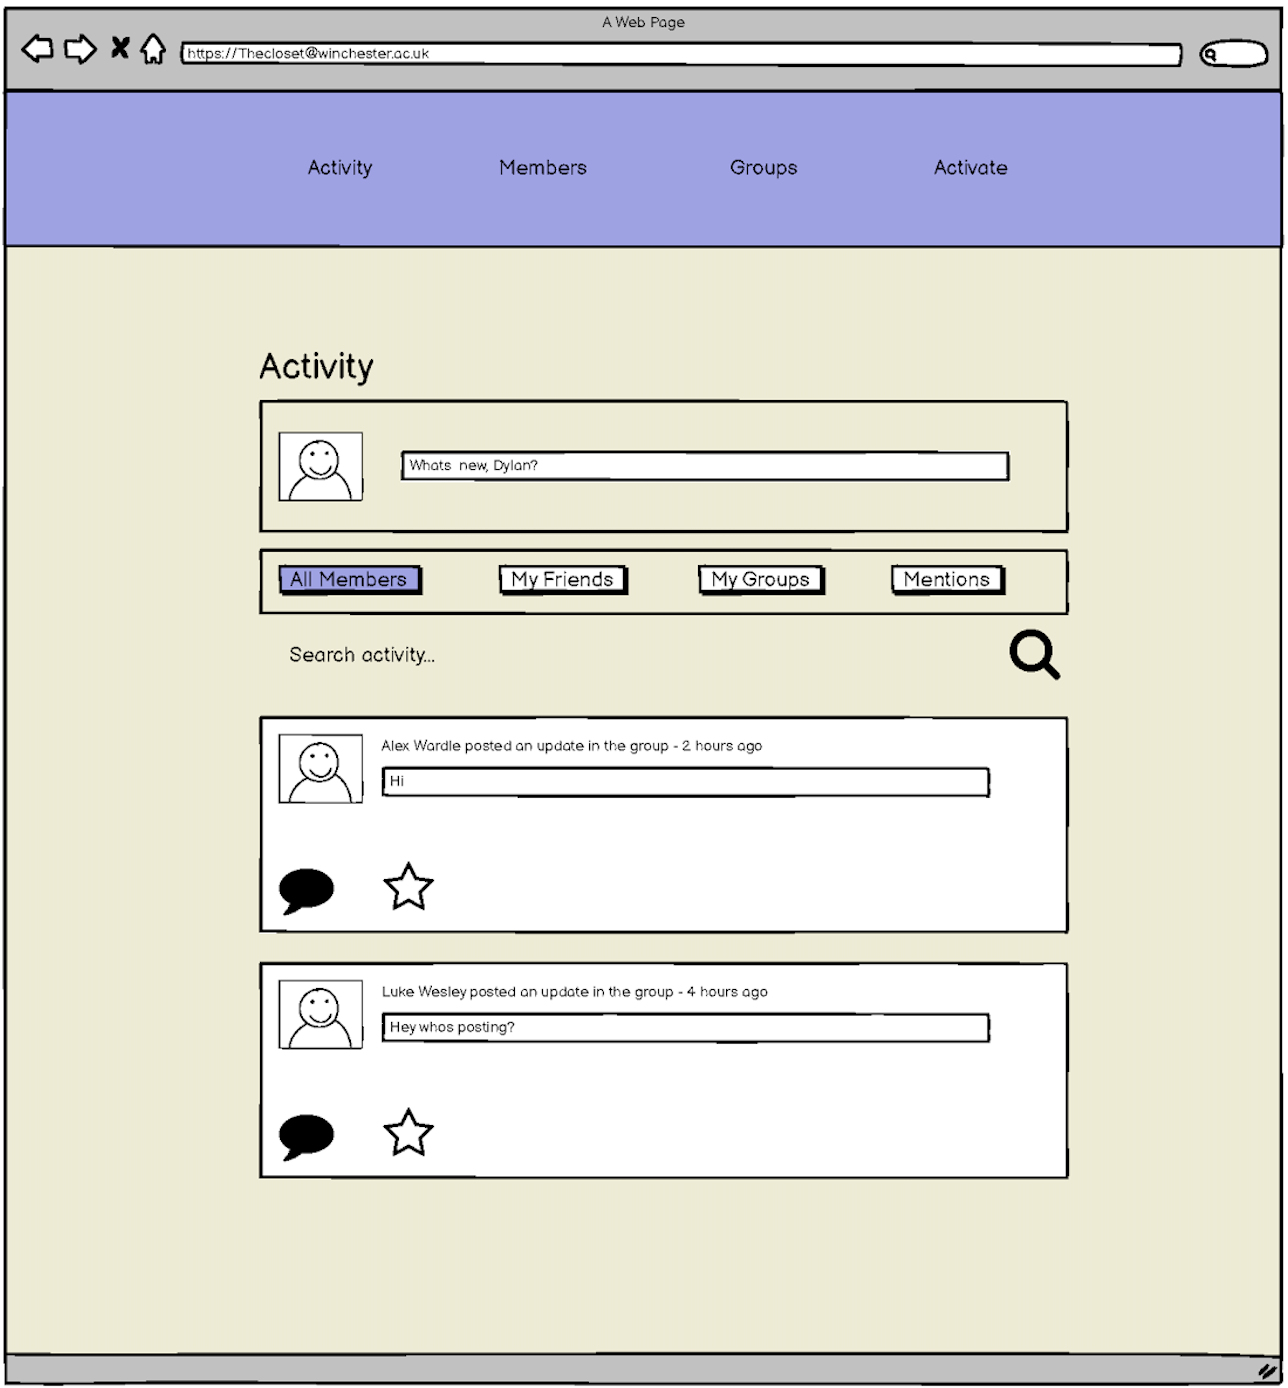
On the right is a mockup of what the designer wanted the interface to look like in the activity menu. Despite this being based off the press, I was happy to progress with the project and implement the colours styles that they requested.

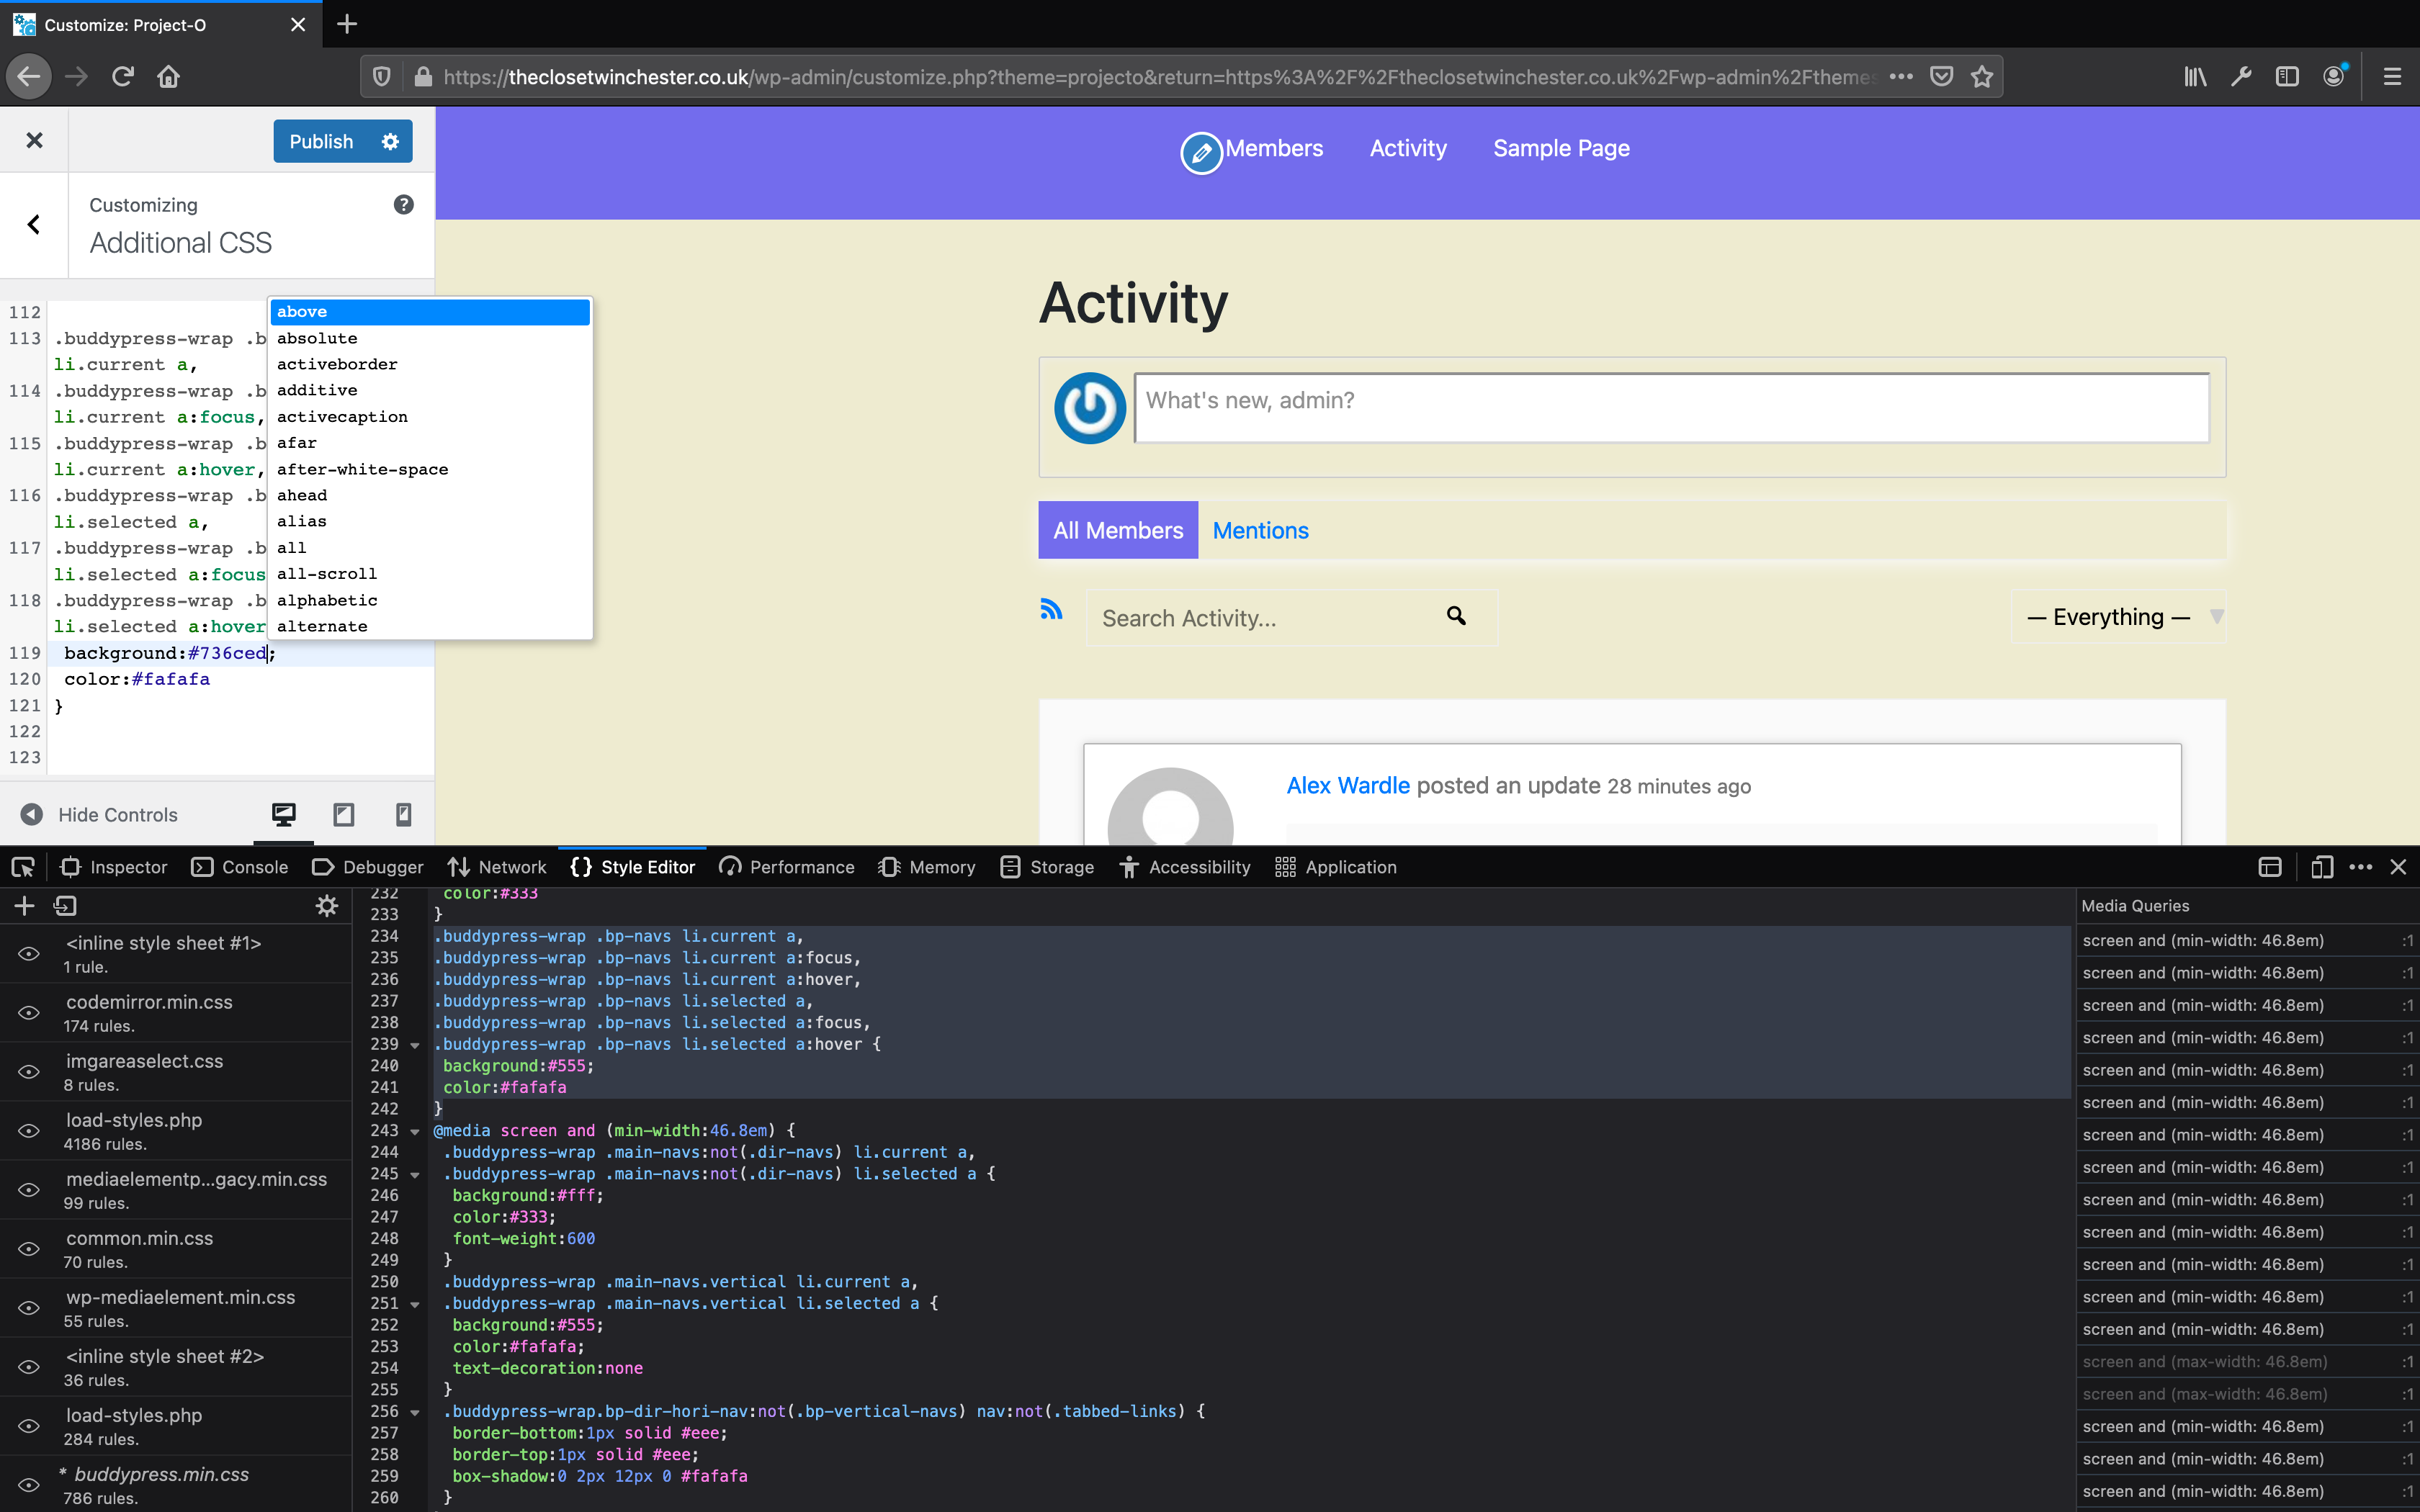
As this was built on WordPress, there was a very useful plug-in called additional CSS, that enabled me to log onto the site with WordPress (as the site had already been uploaded online to the DMD server by Alex.) This meant that I could progress with the project and change the interface of the project.
Here you can see me using Firefox developer application being used as a guide on to watch specific areas of the site needed changing when I inspected the particular area.
I then began to implement the typography into the site. As you can see on the left in addition of CSS I changed the font family from inherit to Monsarrat as instructed by the design of the group which immediately changed H1 heading of the text.
Post Presentation Feedback (Client)
On the left is the layout and functions of the site shown, where I walk through the activity, members, groups, and blog functions within the site.
At this point it was time to do our presentations to our client as well as our lecturers and peers on the progress and current state of the site. At the end of the demonstration, our client had it very clear that she did not like the layout and the colour schemes that the project had. This feedback was initially very hard to accept as we had worked very hard on this project, with no prior knowledge as well as little previous feedback on the direction that our project was going before the client presentation.
Alex and I therefore sat down and discussed the possible next steps to progress the project further within the limited timescale that we had which was only less than four weeks to complete a project for the client.
Section 3-Installation of react and improvements
A week after presenting our WordPress site, we decided to look into building a social media application for our clients as that was what she really wanted for her fashion students to be able to share, upload and have their own independent application to use for the Winchester fashion course.
as a result we chose to create the new application using React Framework.
React uses open source JavaScript library which is typically used for front and building user interfaces all components, and is mostly used for the handling of the view layer for web and mobile applications. As our client requested a mobile application, as she said that the majority of her students would be accessing the app using their mobile devices, we felt that this would be a good opportunity to learn react and start the development of this application for the third time.
After writing 'npm init'at the begining that creates the package json files that lists the package json files for the project. I then filled in some basic information for the project such as the name the version and the description that the project would be containing.
next I installed react by typing in 'NPM i react' as you can see in the lower half the screen on the left, that is used to create the dynamic user interface, which added four aditional packages.
Next I wrote NPM install express which is a web framework for node making it easier to write webservers, which began to install.

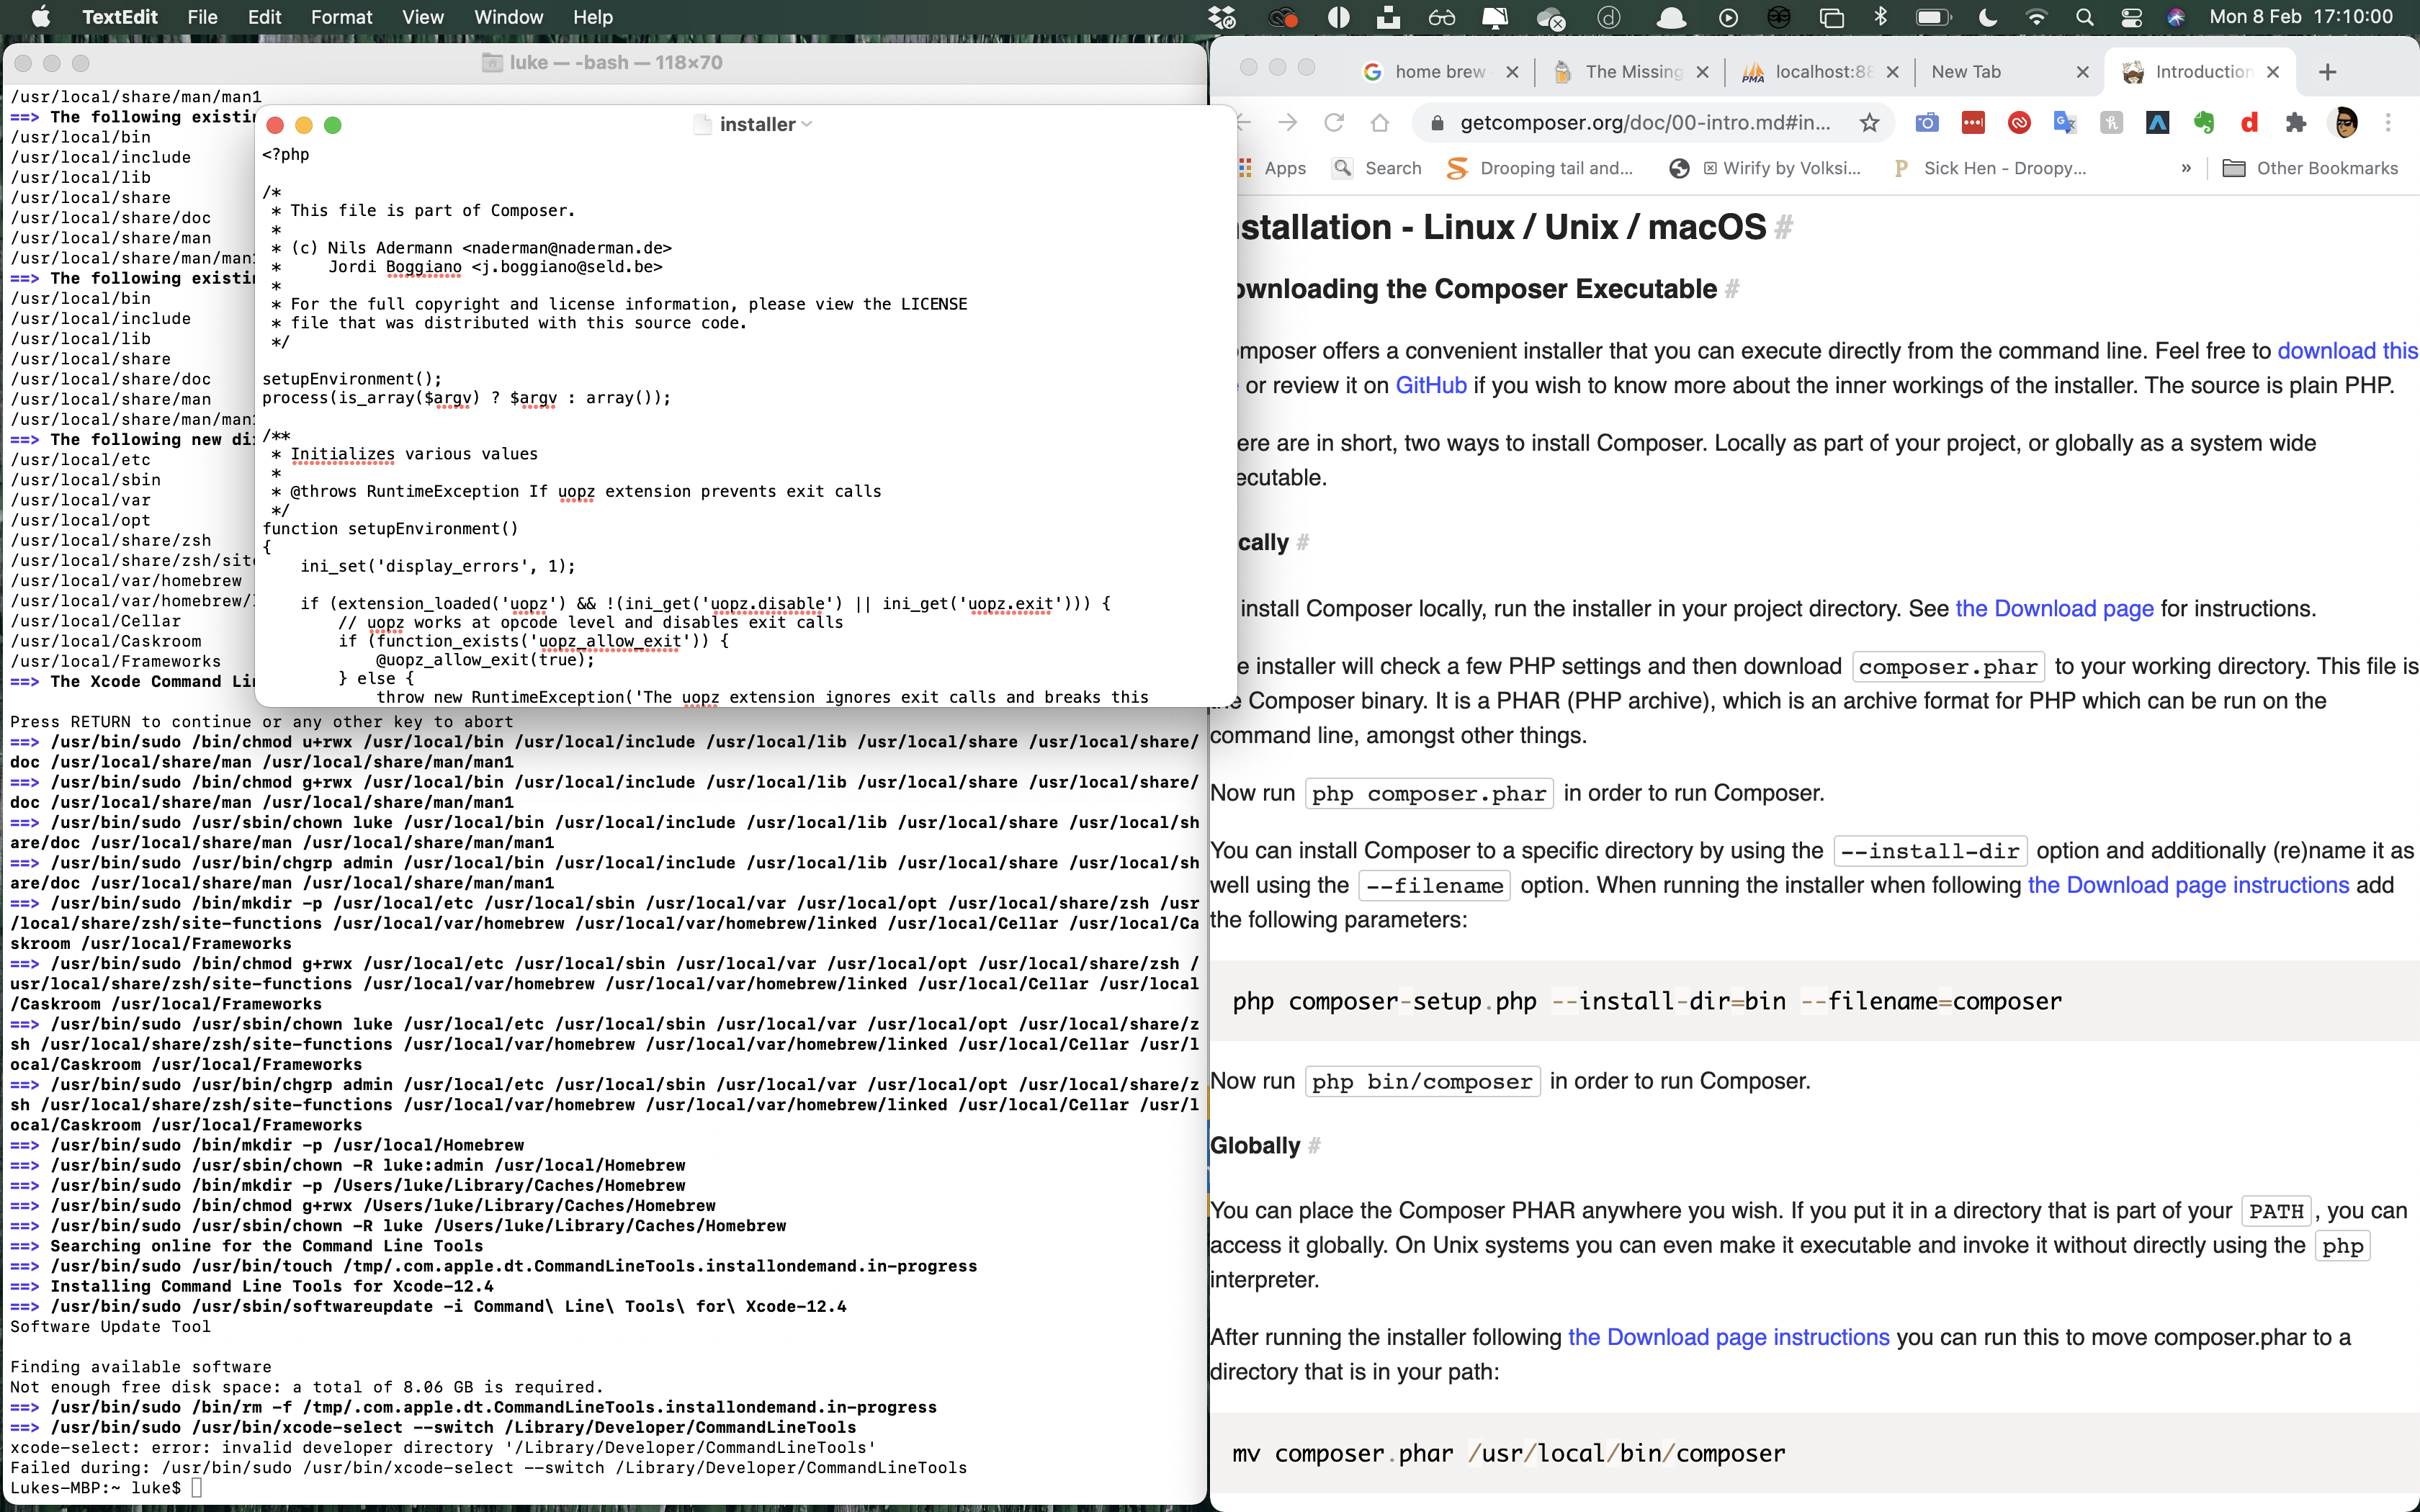
After installing jquery, bootstrap and mongodb which is a nosqul database, I went into update homebrew as it is a package manager.
After the components were all installed it was time to install a new code editor called visual studios which is beneficial as it has terminal integrated into the code editor.
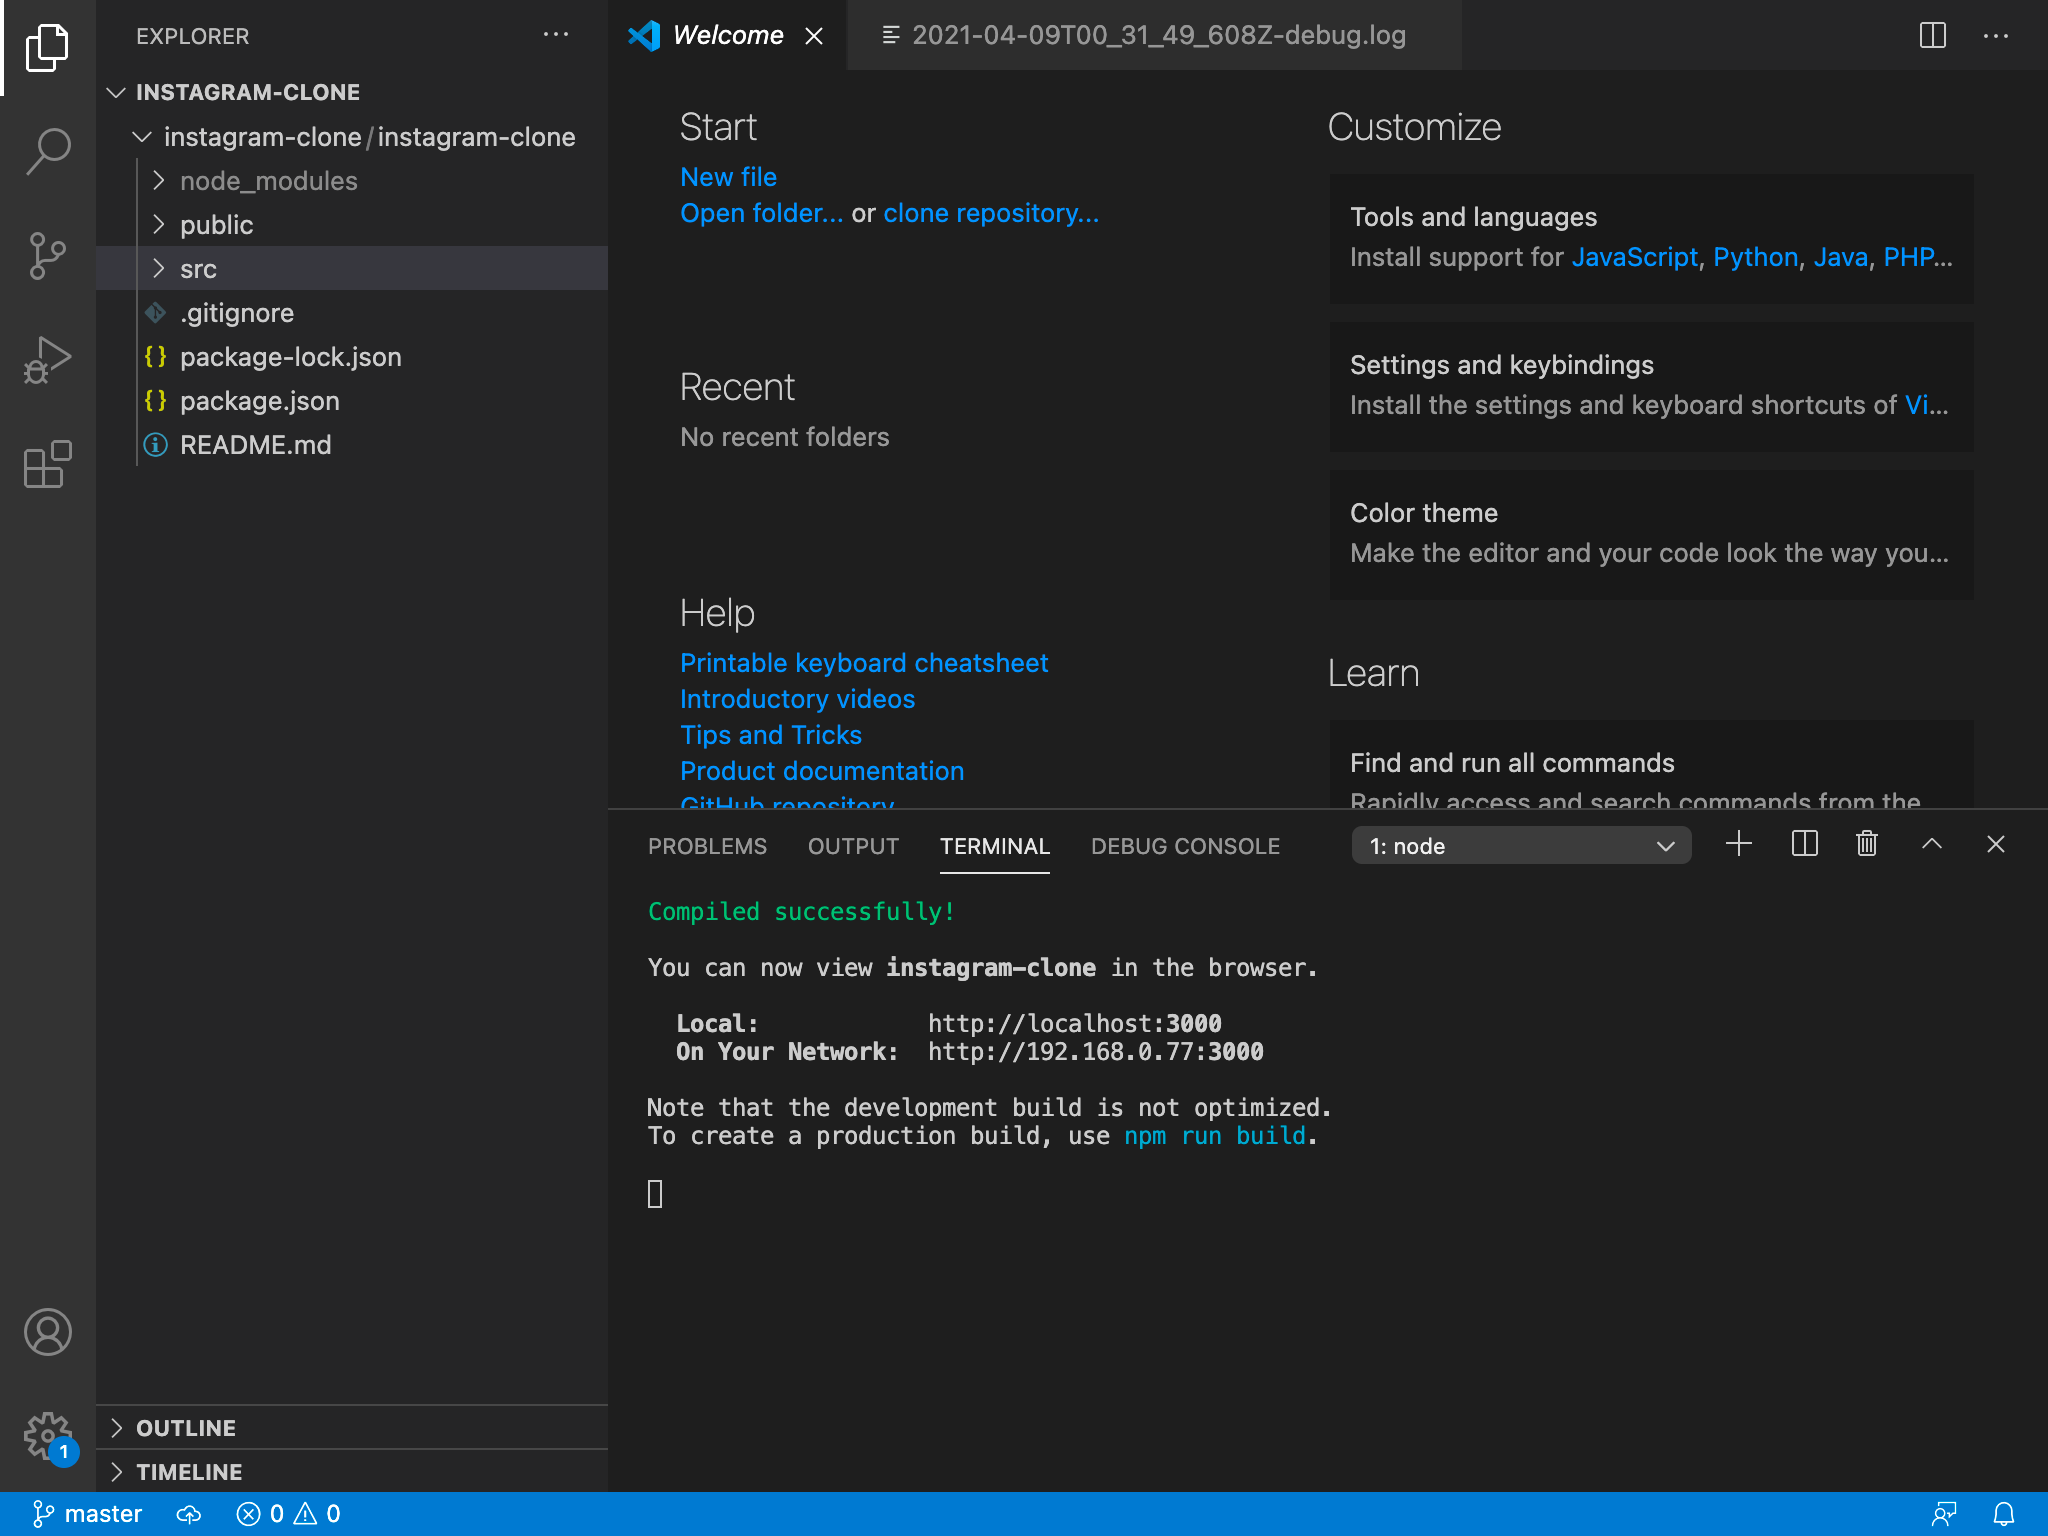
To begin the process I wrote 'Npx create-react-app instagramclone' which starts to install of the starter files for the project set up with a react template.
Finally the after the files had been installed, it gave me a notification saying that the files had been compiled sucessfully.
Next i wrote 'npm run build' which starts to build out the react app application.
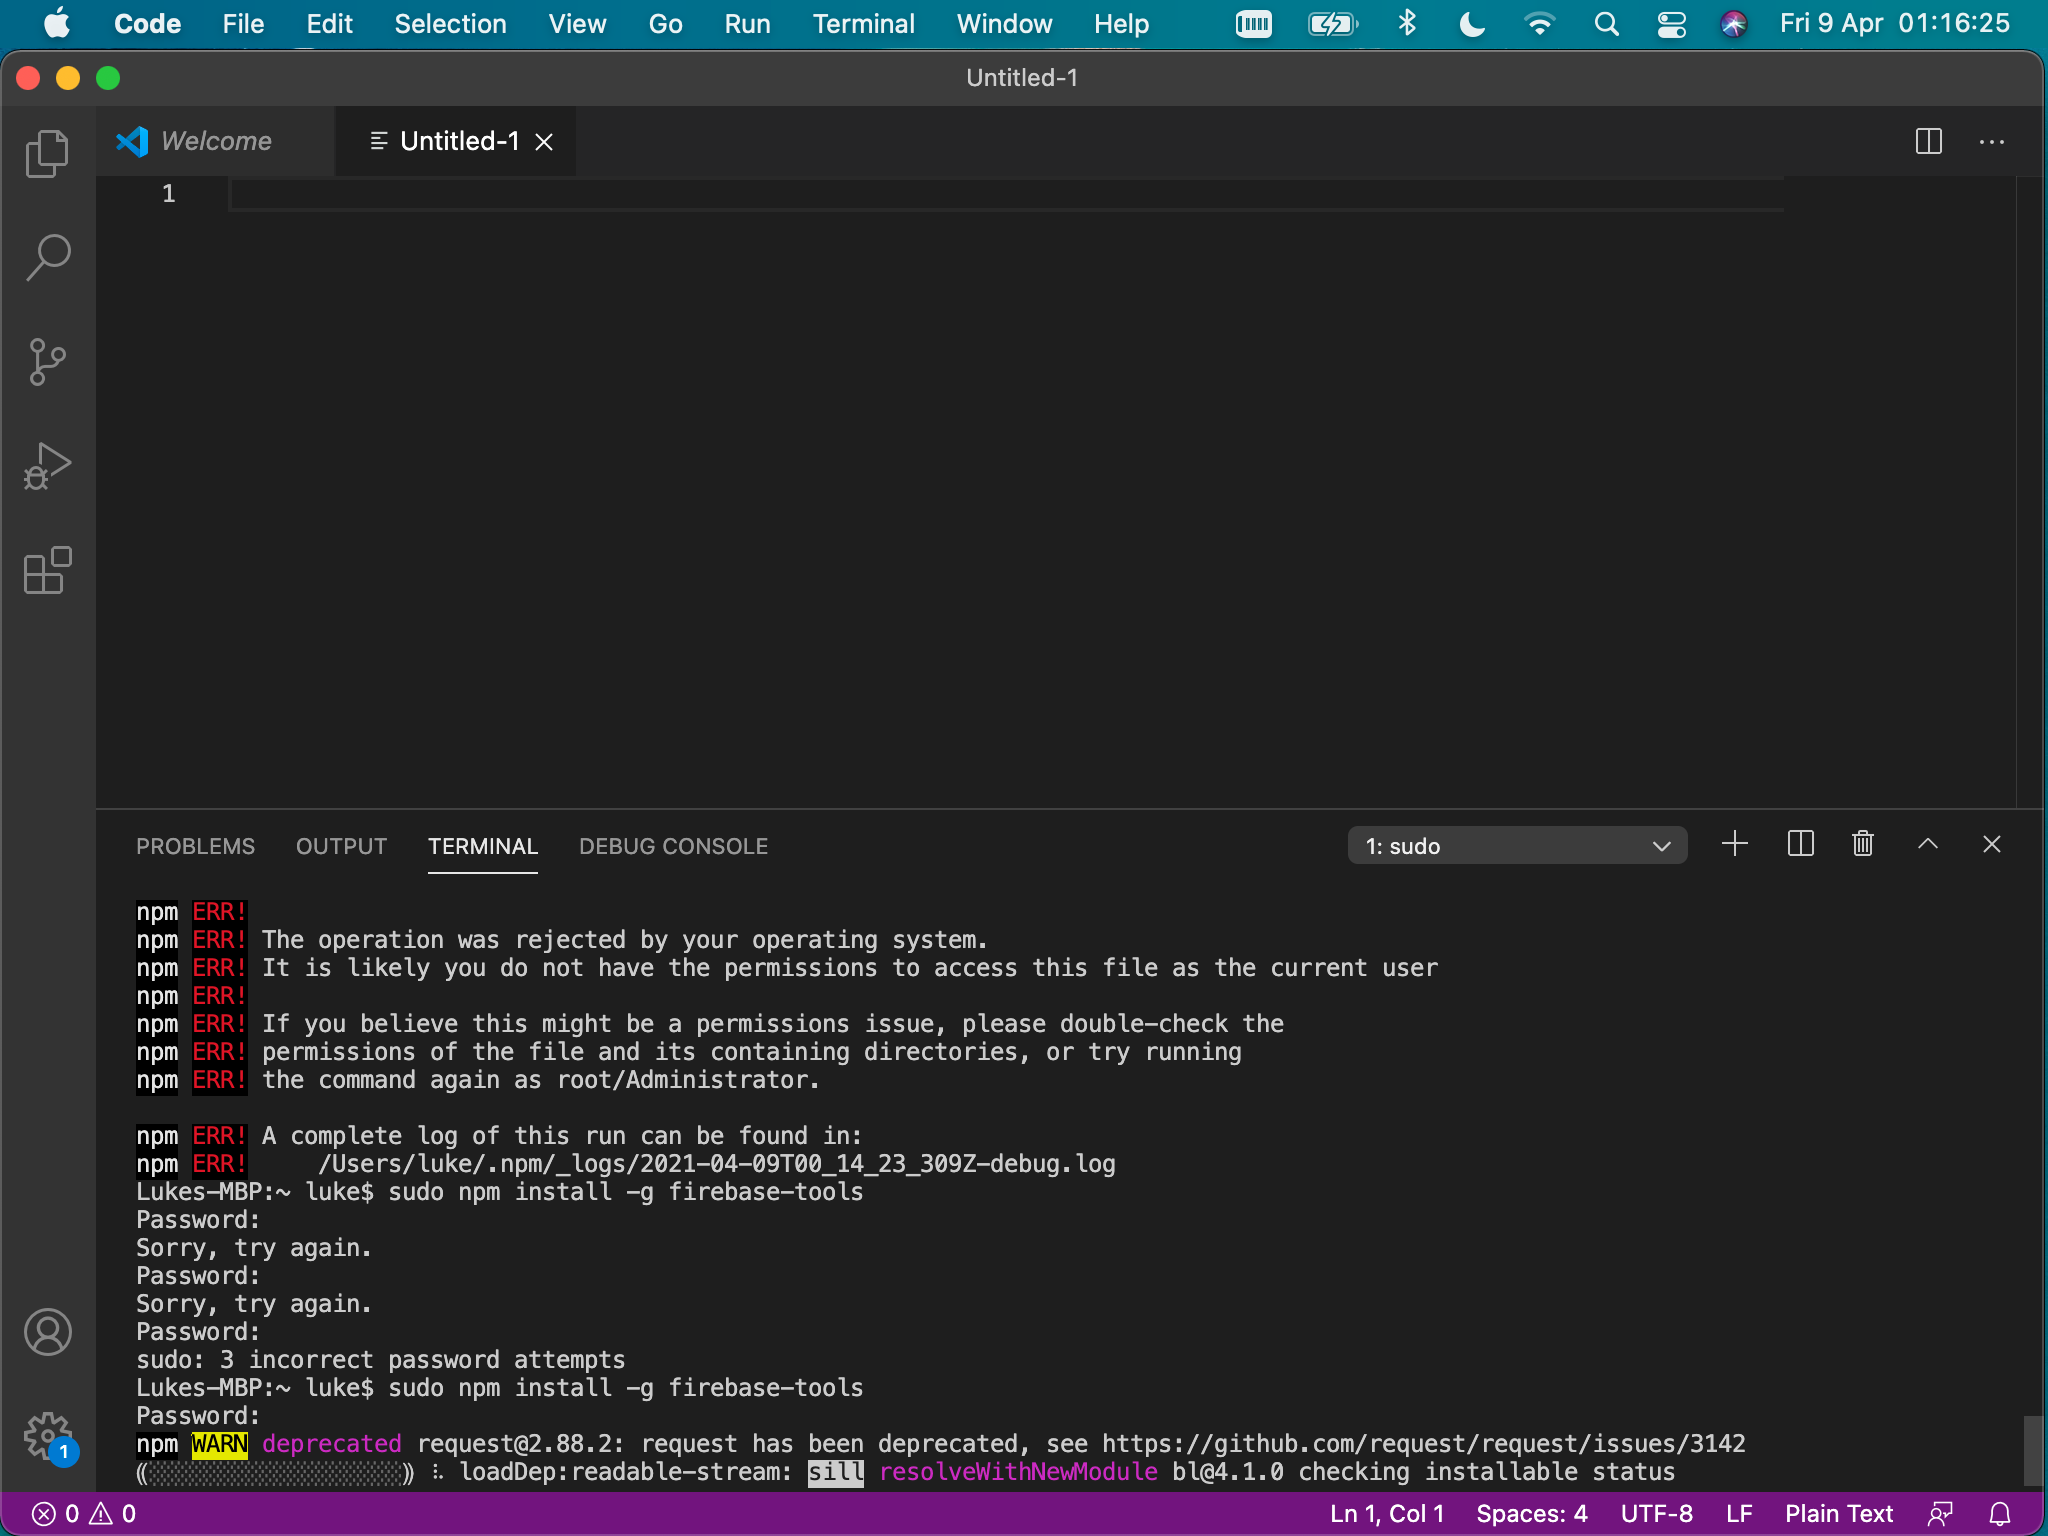
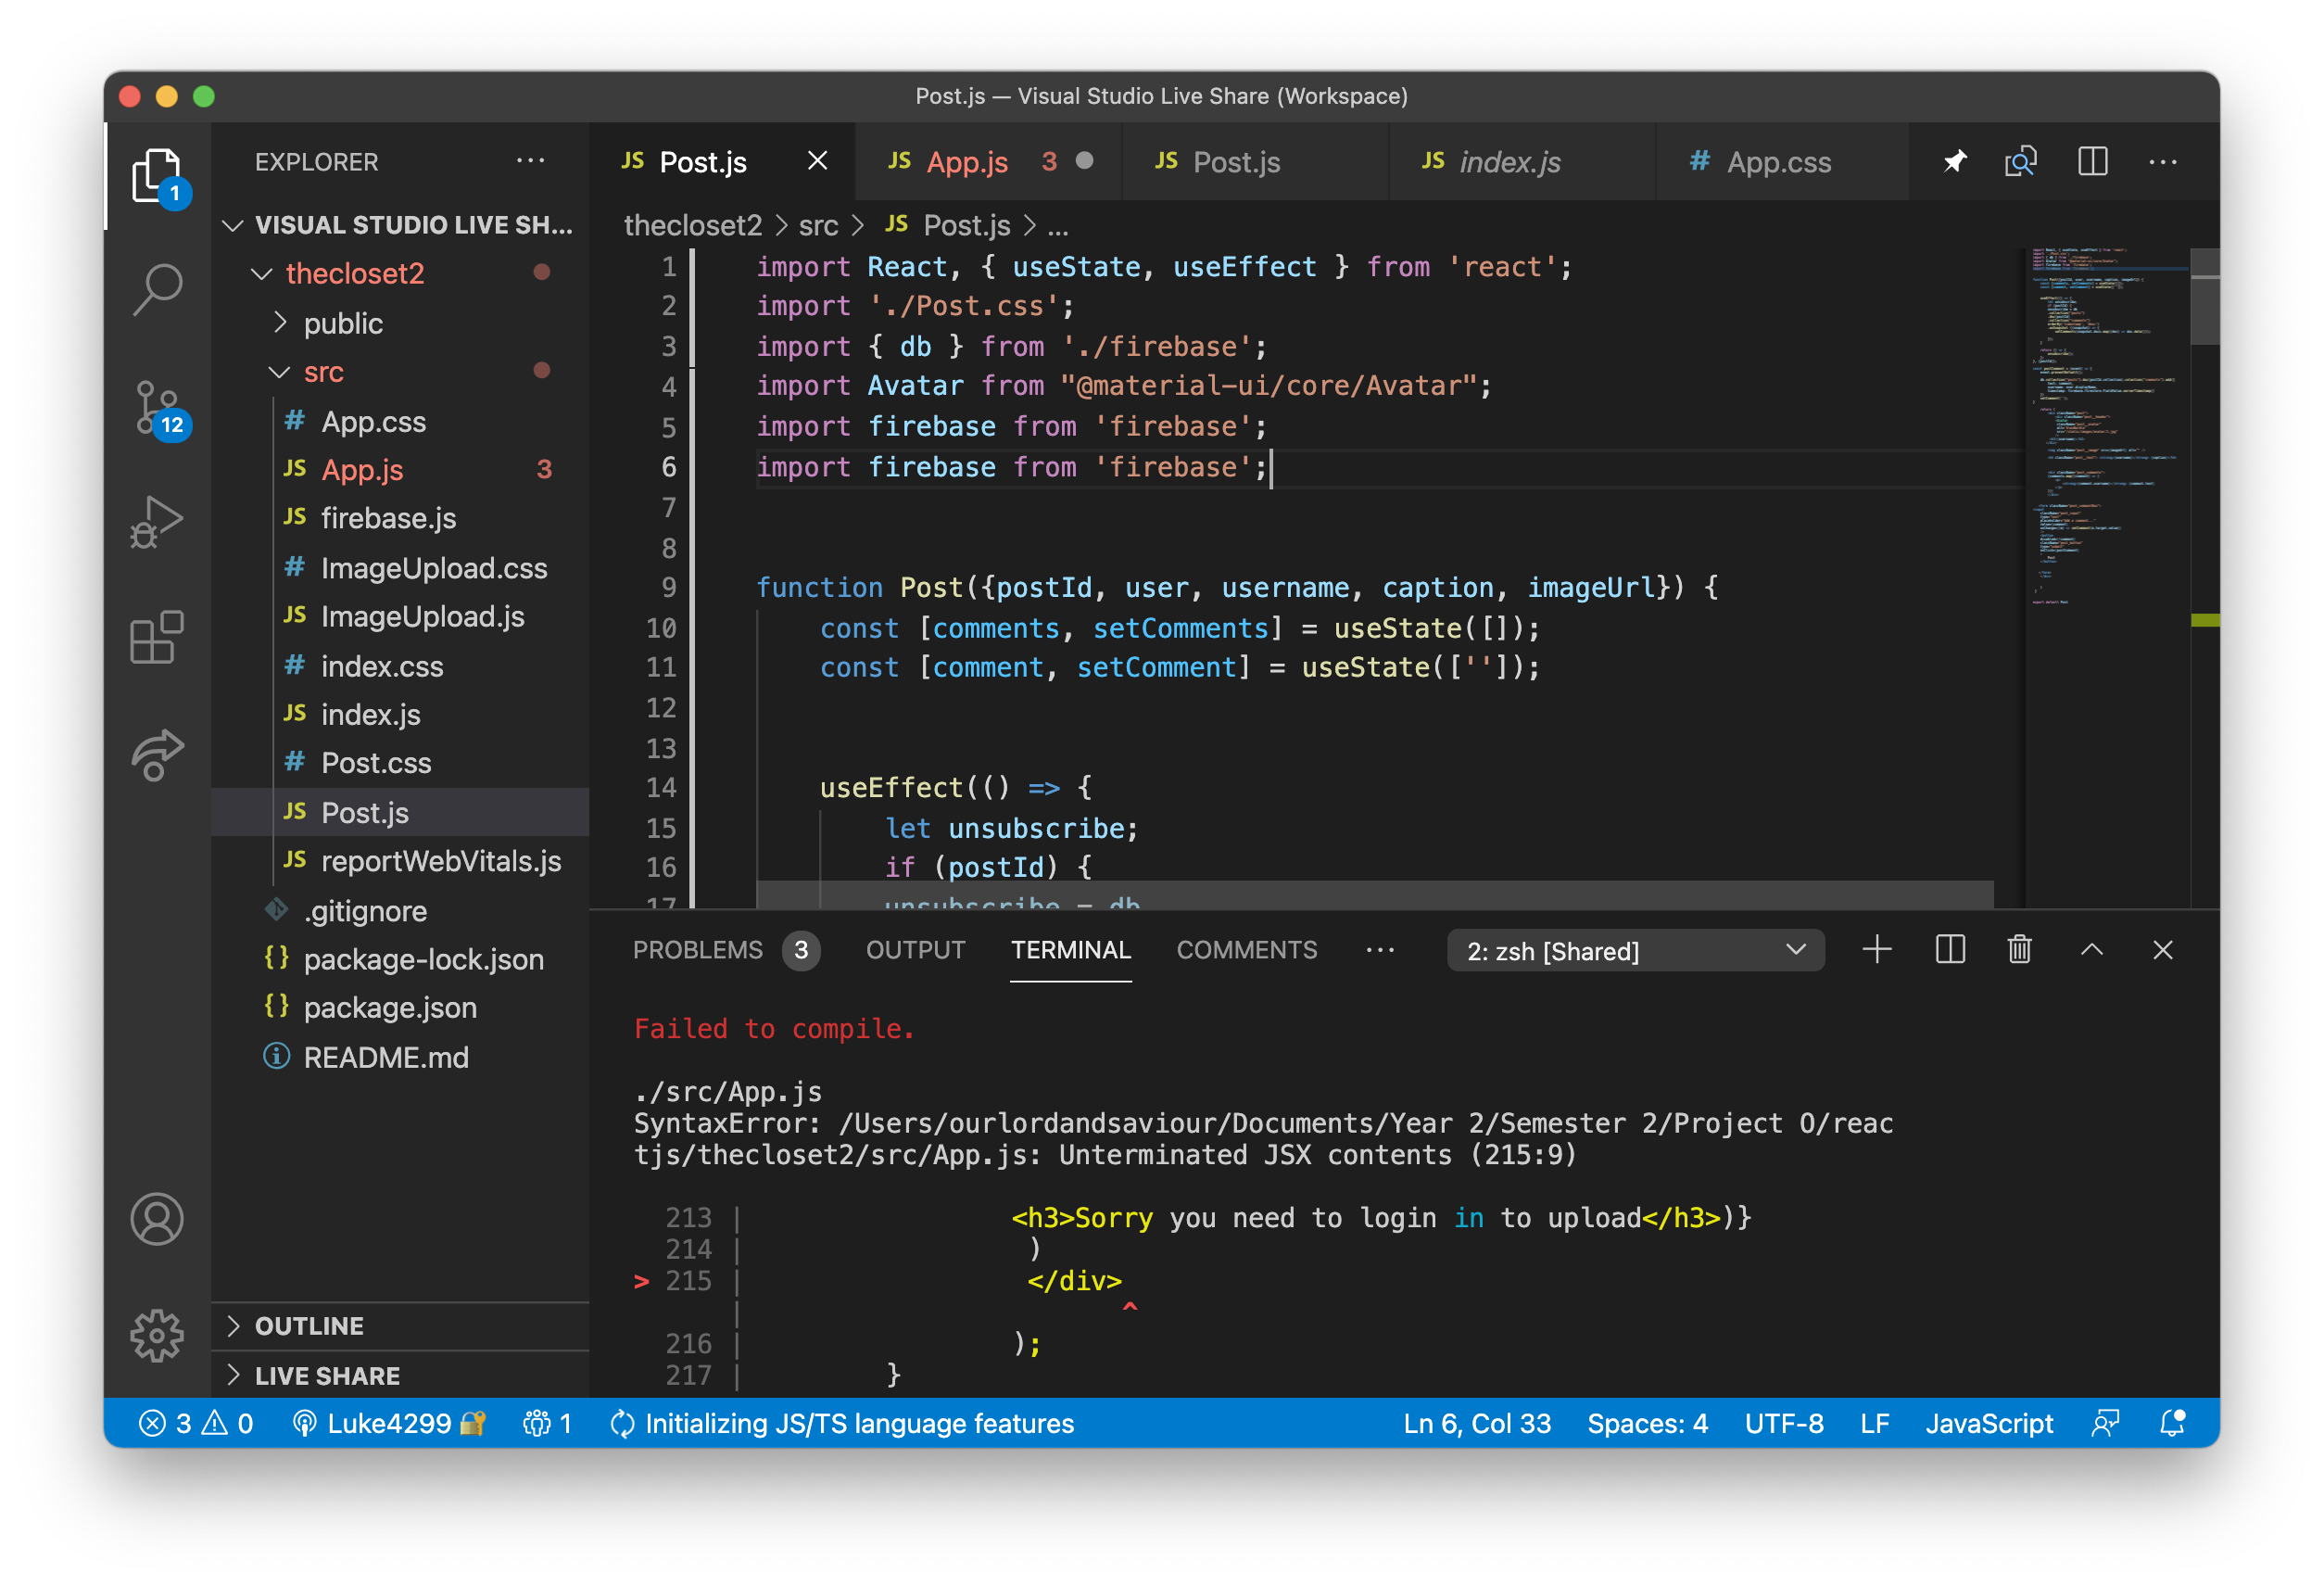
One error that I encountered was that it did not have permission to access the files it needed in order to build out the react application. This error was fixed by writing pseudo NPM install, where I was prompted to enter in my password to allow the application to fully install. This then fixed the error and began to build out react.
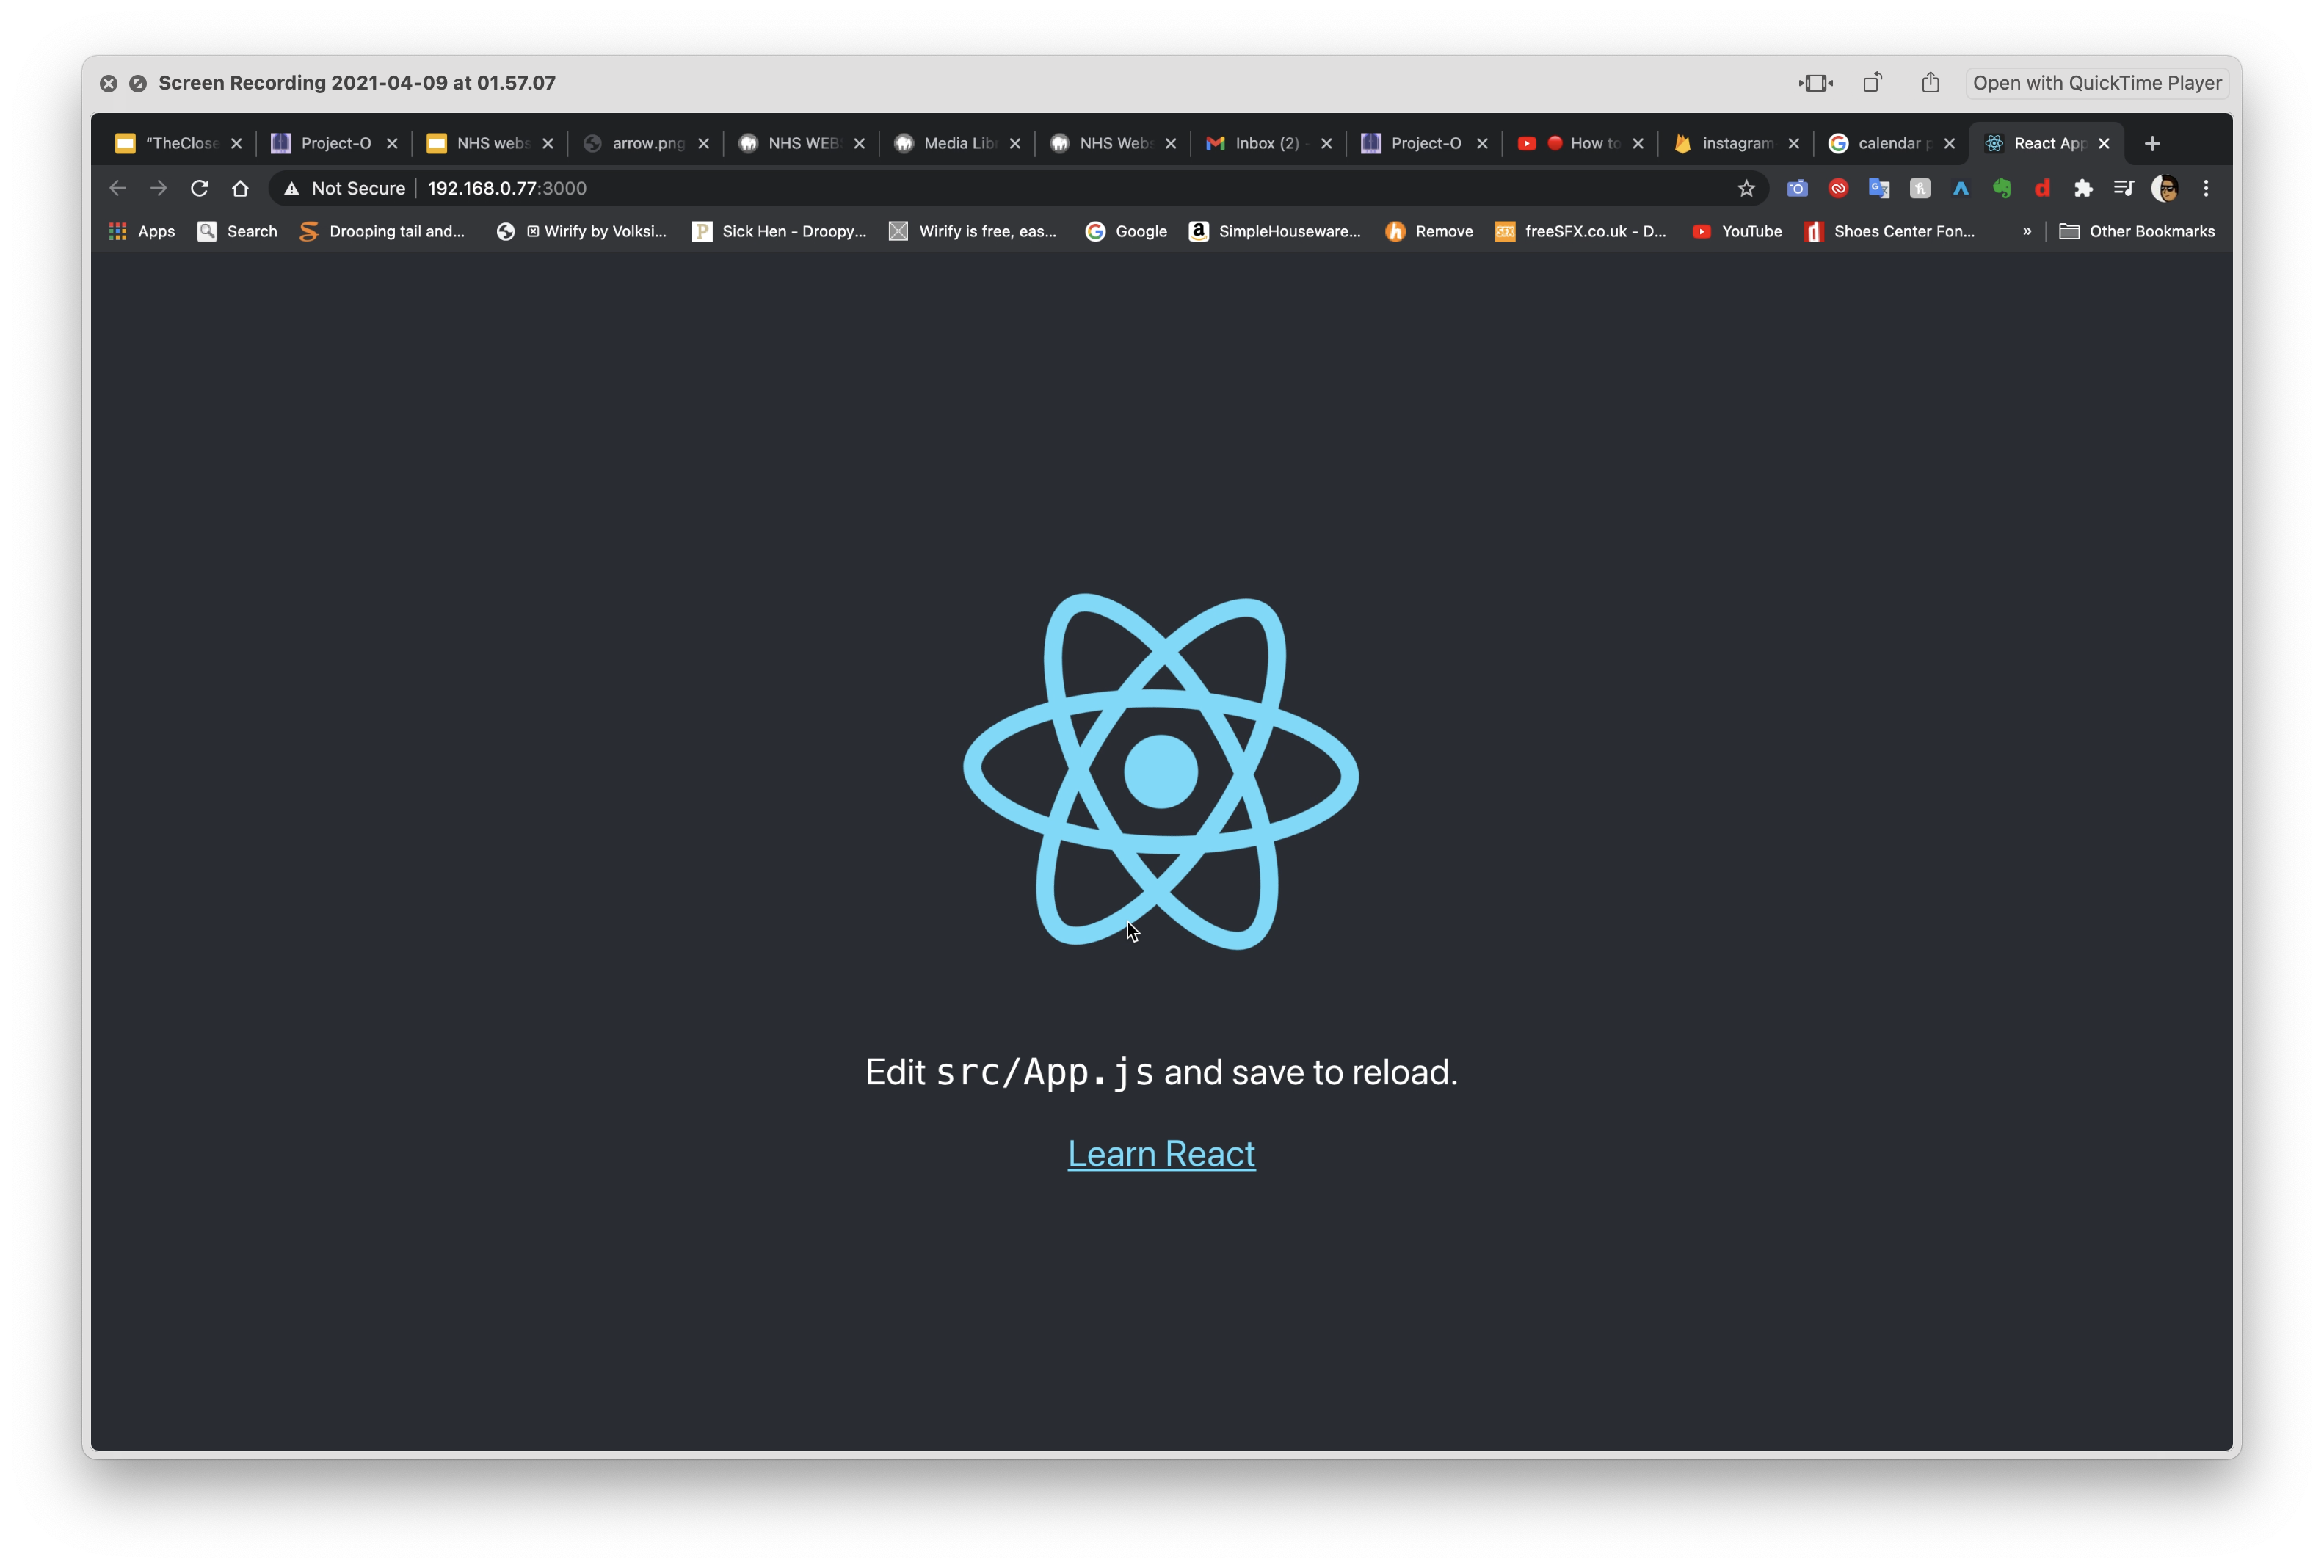
After the build was complete the react app was ready to be constructed.
Section 4- Development of react work

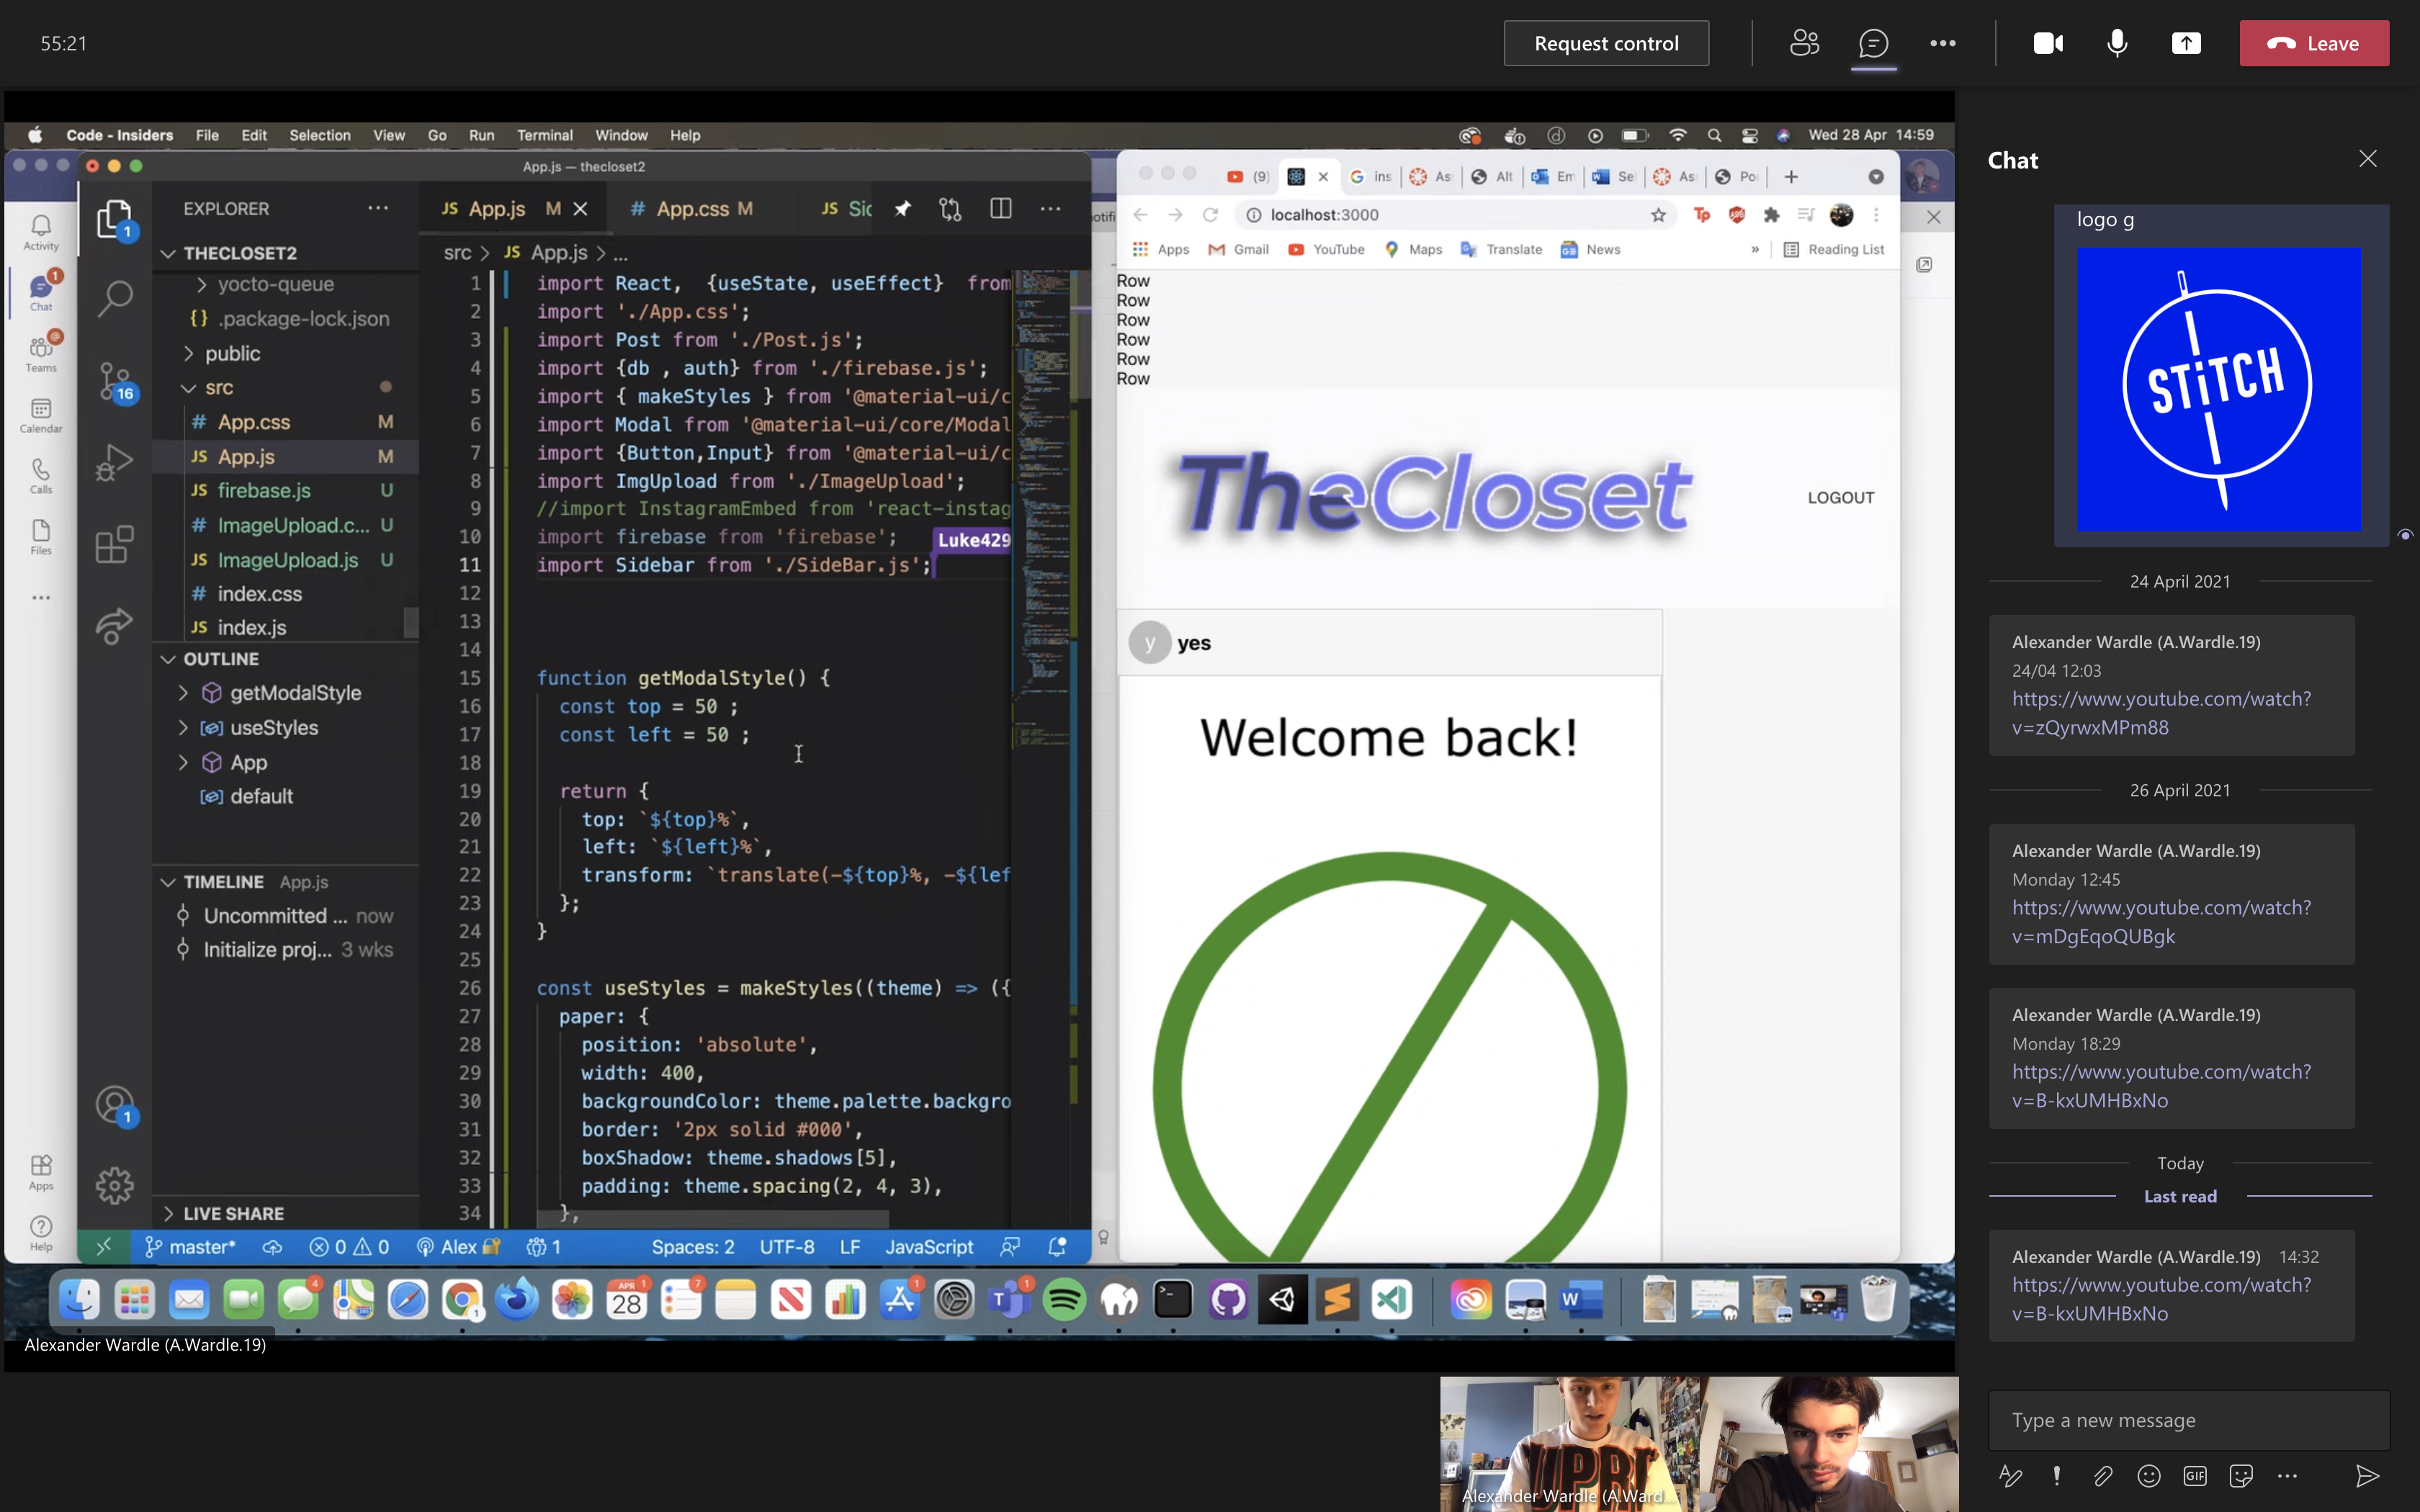
as mentioned previously I used visual studio code editor to work on the project as it had terminal built into it as well as enabling the ability to do live share between two computers working on the same project, which would be brilliant for Alex and I as we could contribute to the project together live.
I then took over from where Alex had got to with the application so far. To continue what he had done, i added in orderbytimestamp which orders the posts by the time it was posted.
Whislt i was starting on this side of the project, Alex was buidling out the firebase databse to store the posts.
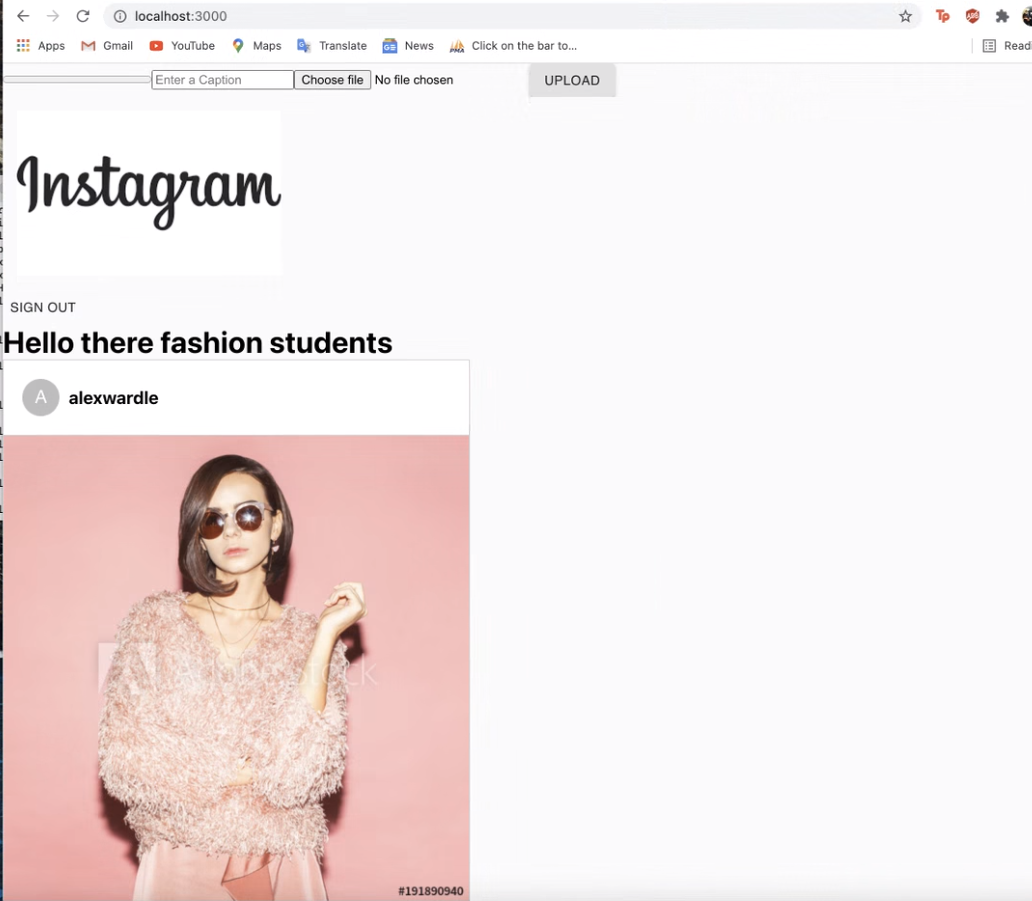
This was the stage that Alex had got the application to look like with posts now appearing as well as the signup and image upload are functional. We discussed and decided to give me three main roles: 1. To style the image uploader. 2. Style the the application
3. Add comments to the application. 4. Intergrate a sidebar into the application.
we did this to allow as mentioned previously, 2/3 of the project work to be for Alex and 1/3rd of the project work to be for me.
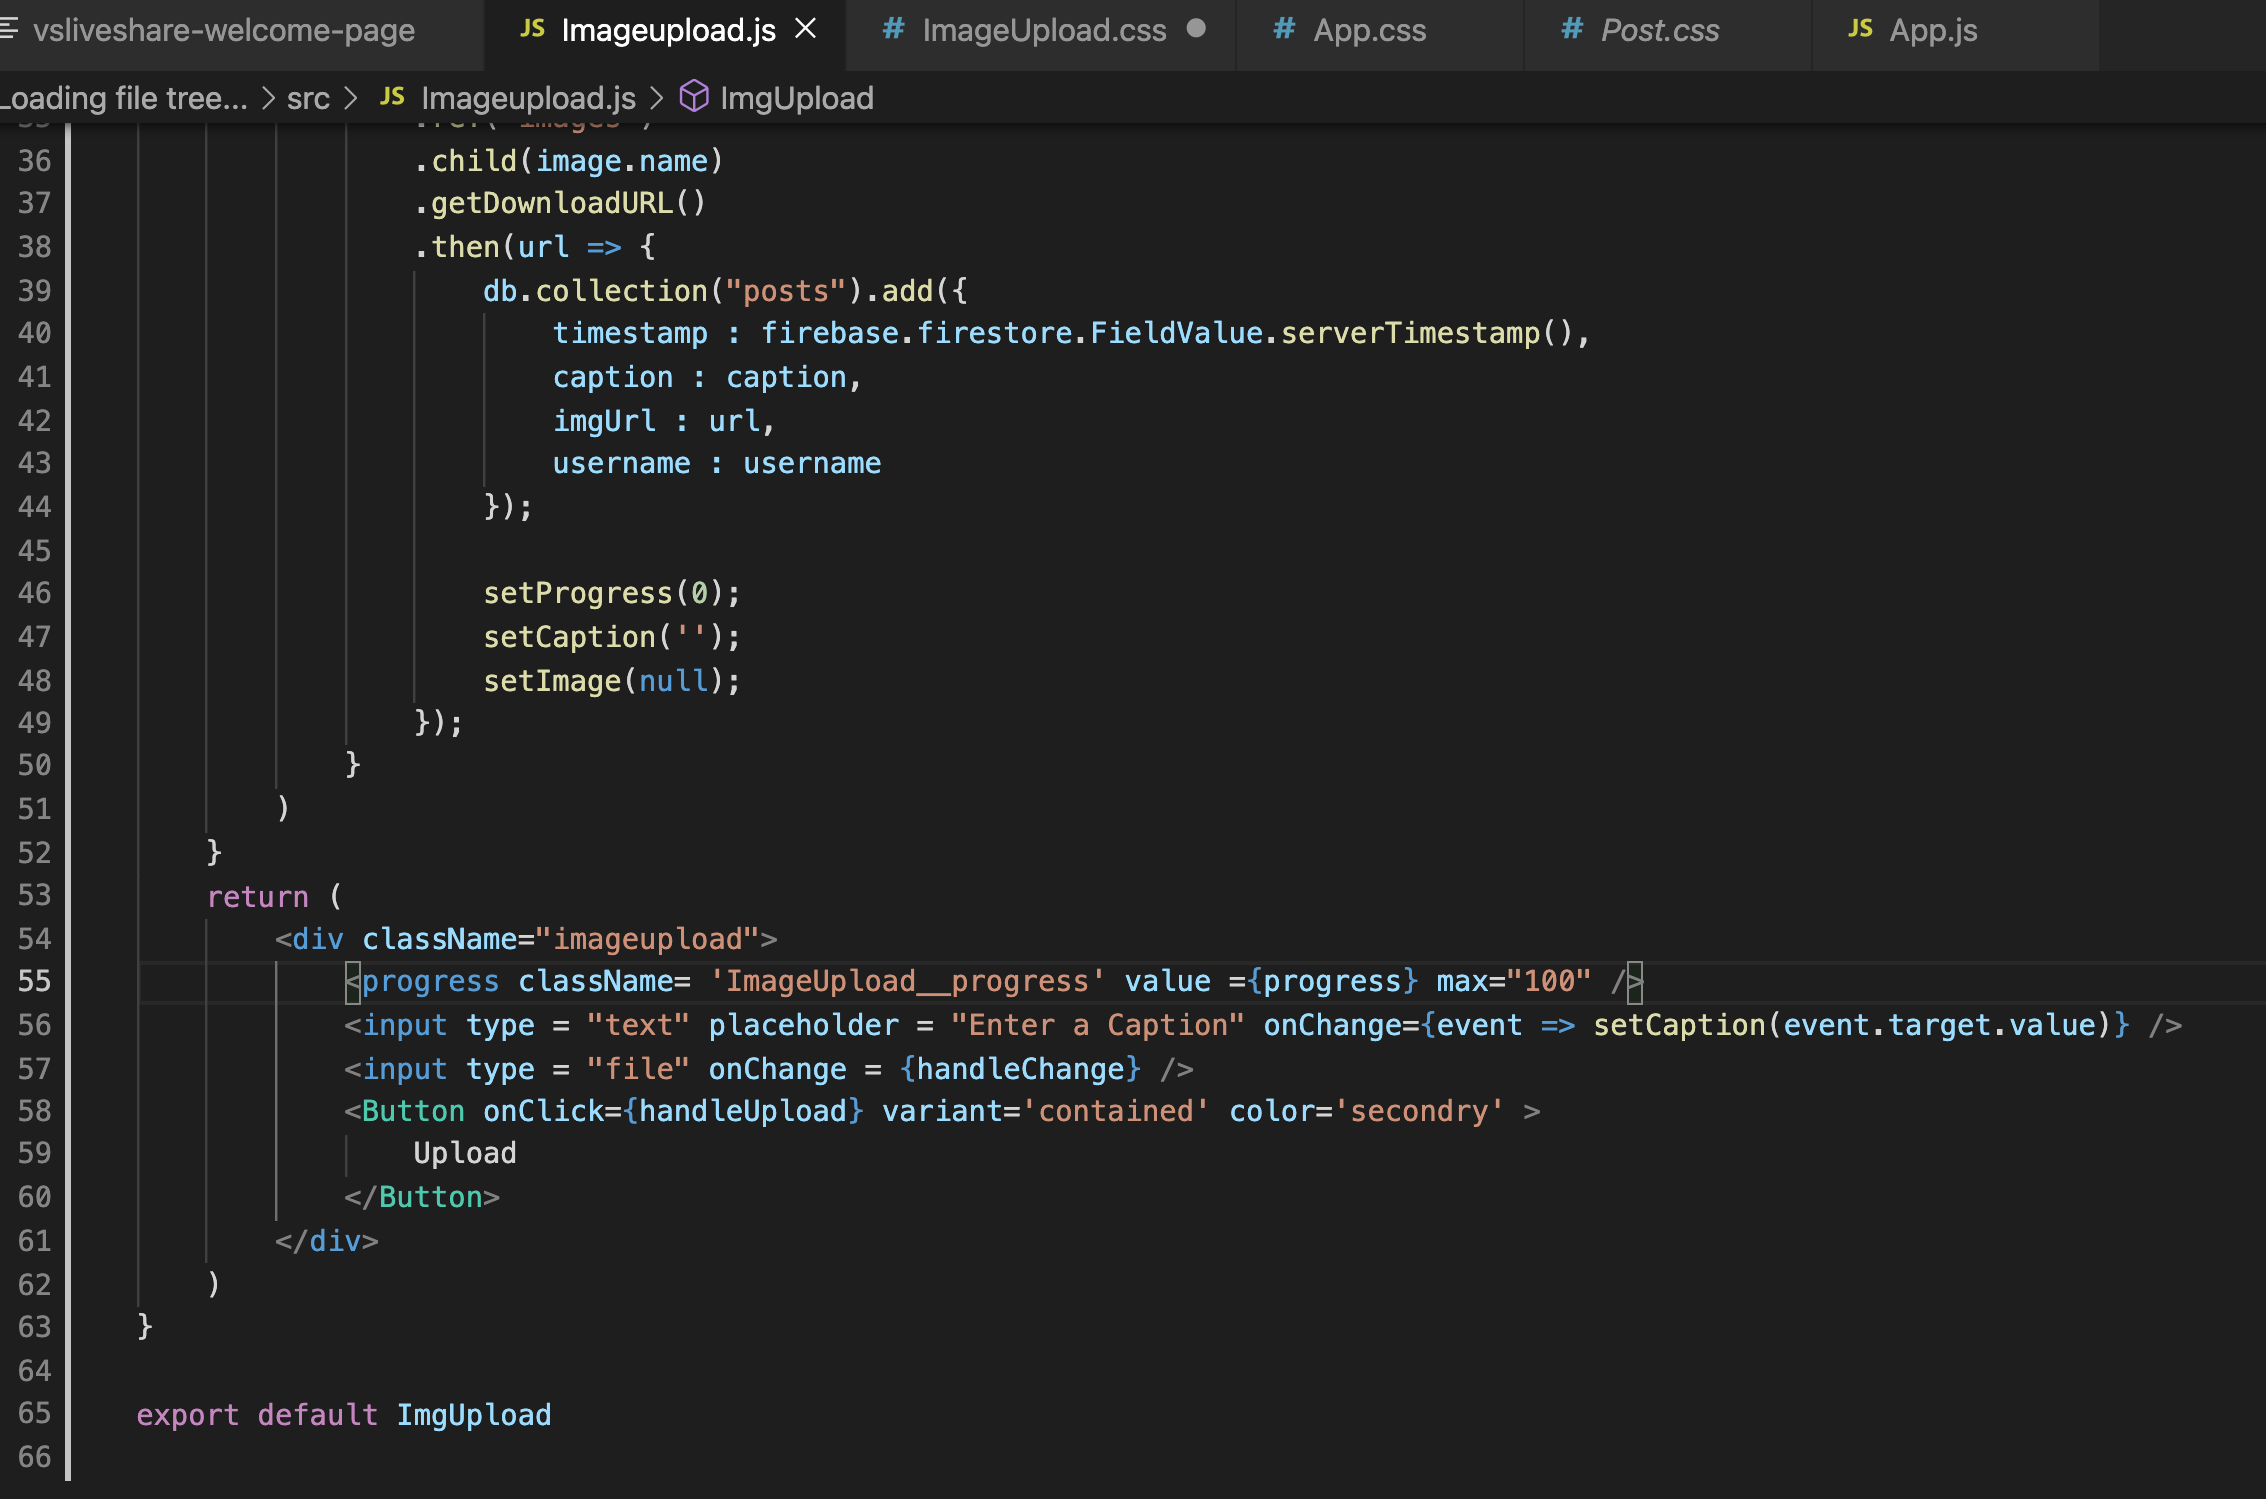
On line 54 I created a class name called imageupload to allow CSS to affect the image uploader.
As you can see on the left, the image uploader isn't very well customised at the moment as it is pretty standard in its appearance.
To start off with I wrote down 'displayflex' which makes the components of the image upload a lineup for next which other but then I then wrote 'flex-direction' to be in a column file which means that they are together. I then added in my chosen width of 60%, with margin left margin right being auto centres the image uploader in the middle.
As you can see on the left I added margin top 10 pixels and margin bottom 10 pixels which automatically changes on the application on the left, allowing me to see the immediate changes that I make to the CSS.
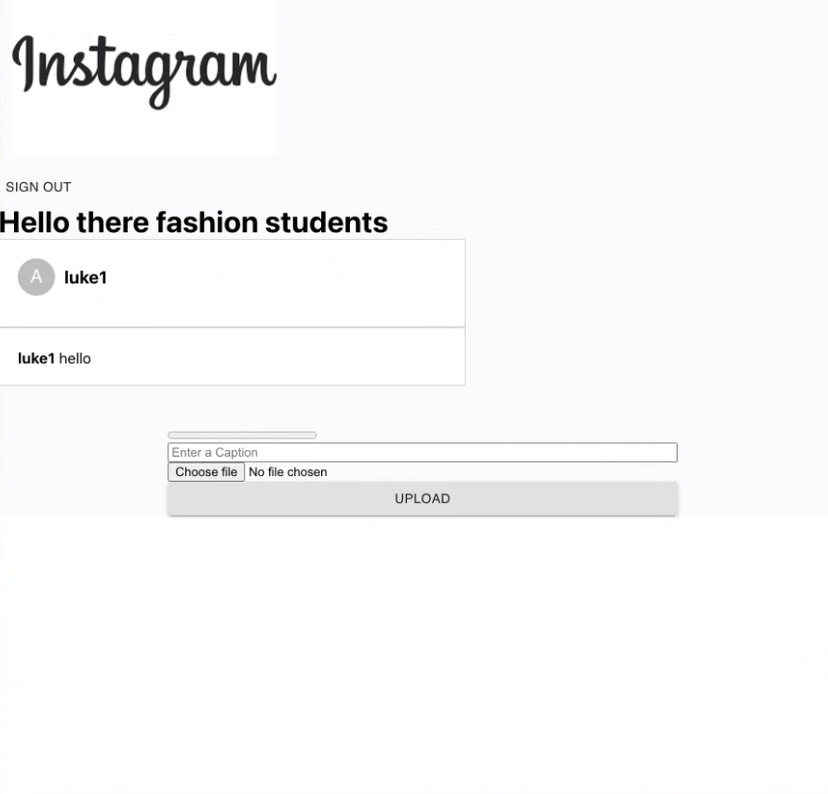
I then moved the image uploaded down to at the bottom of the screen.
Section 4.2- Adding comment firebase strings
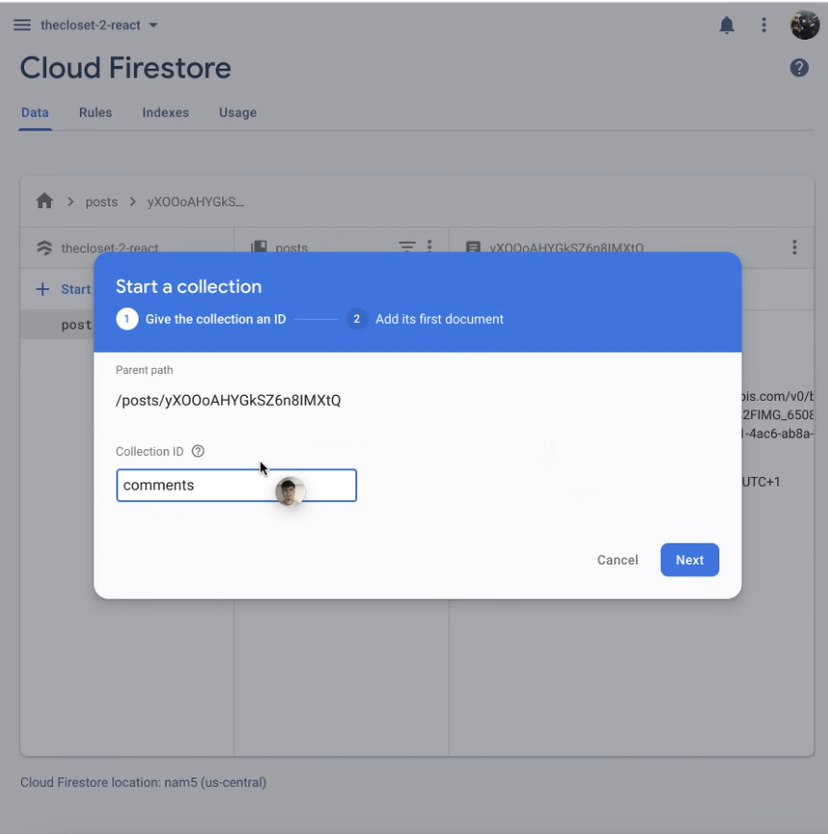
I then created a collection called comments, that is inside the posts so that all of the posts are realetd and they hae their own datatbase, with strings seperating the usernames.
Next inside the collection I added two fields with the first field Dean text with the type string equalling the value of nice post(which is the value of the comment that the user will submit).
with the second field being the username with the typing string and the value being the actual user's username.
This allows for an unlimited amount of comments to be stored within five days as firebase can hold millions of users inside of it seamlessly.
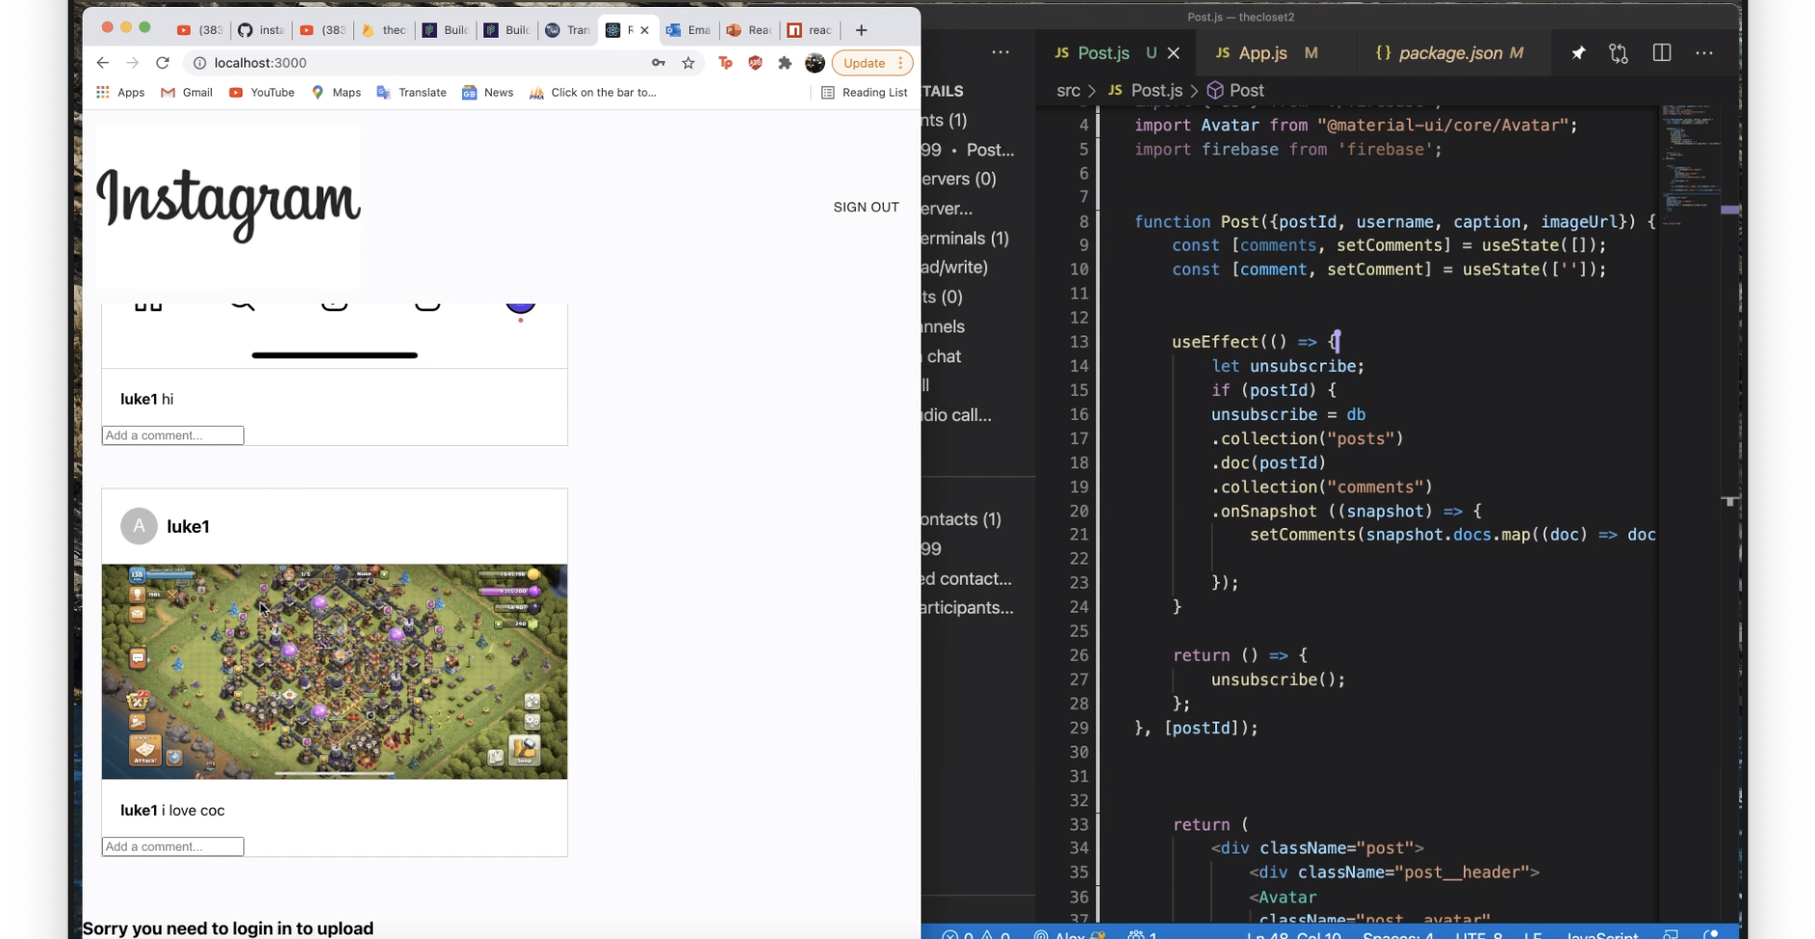
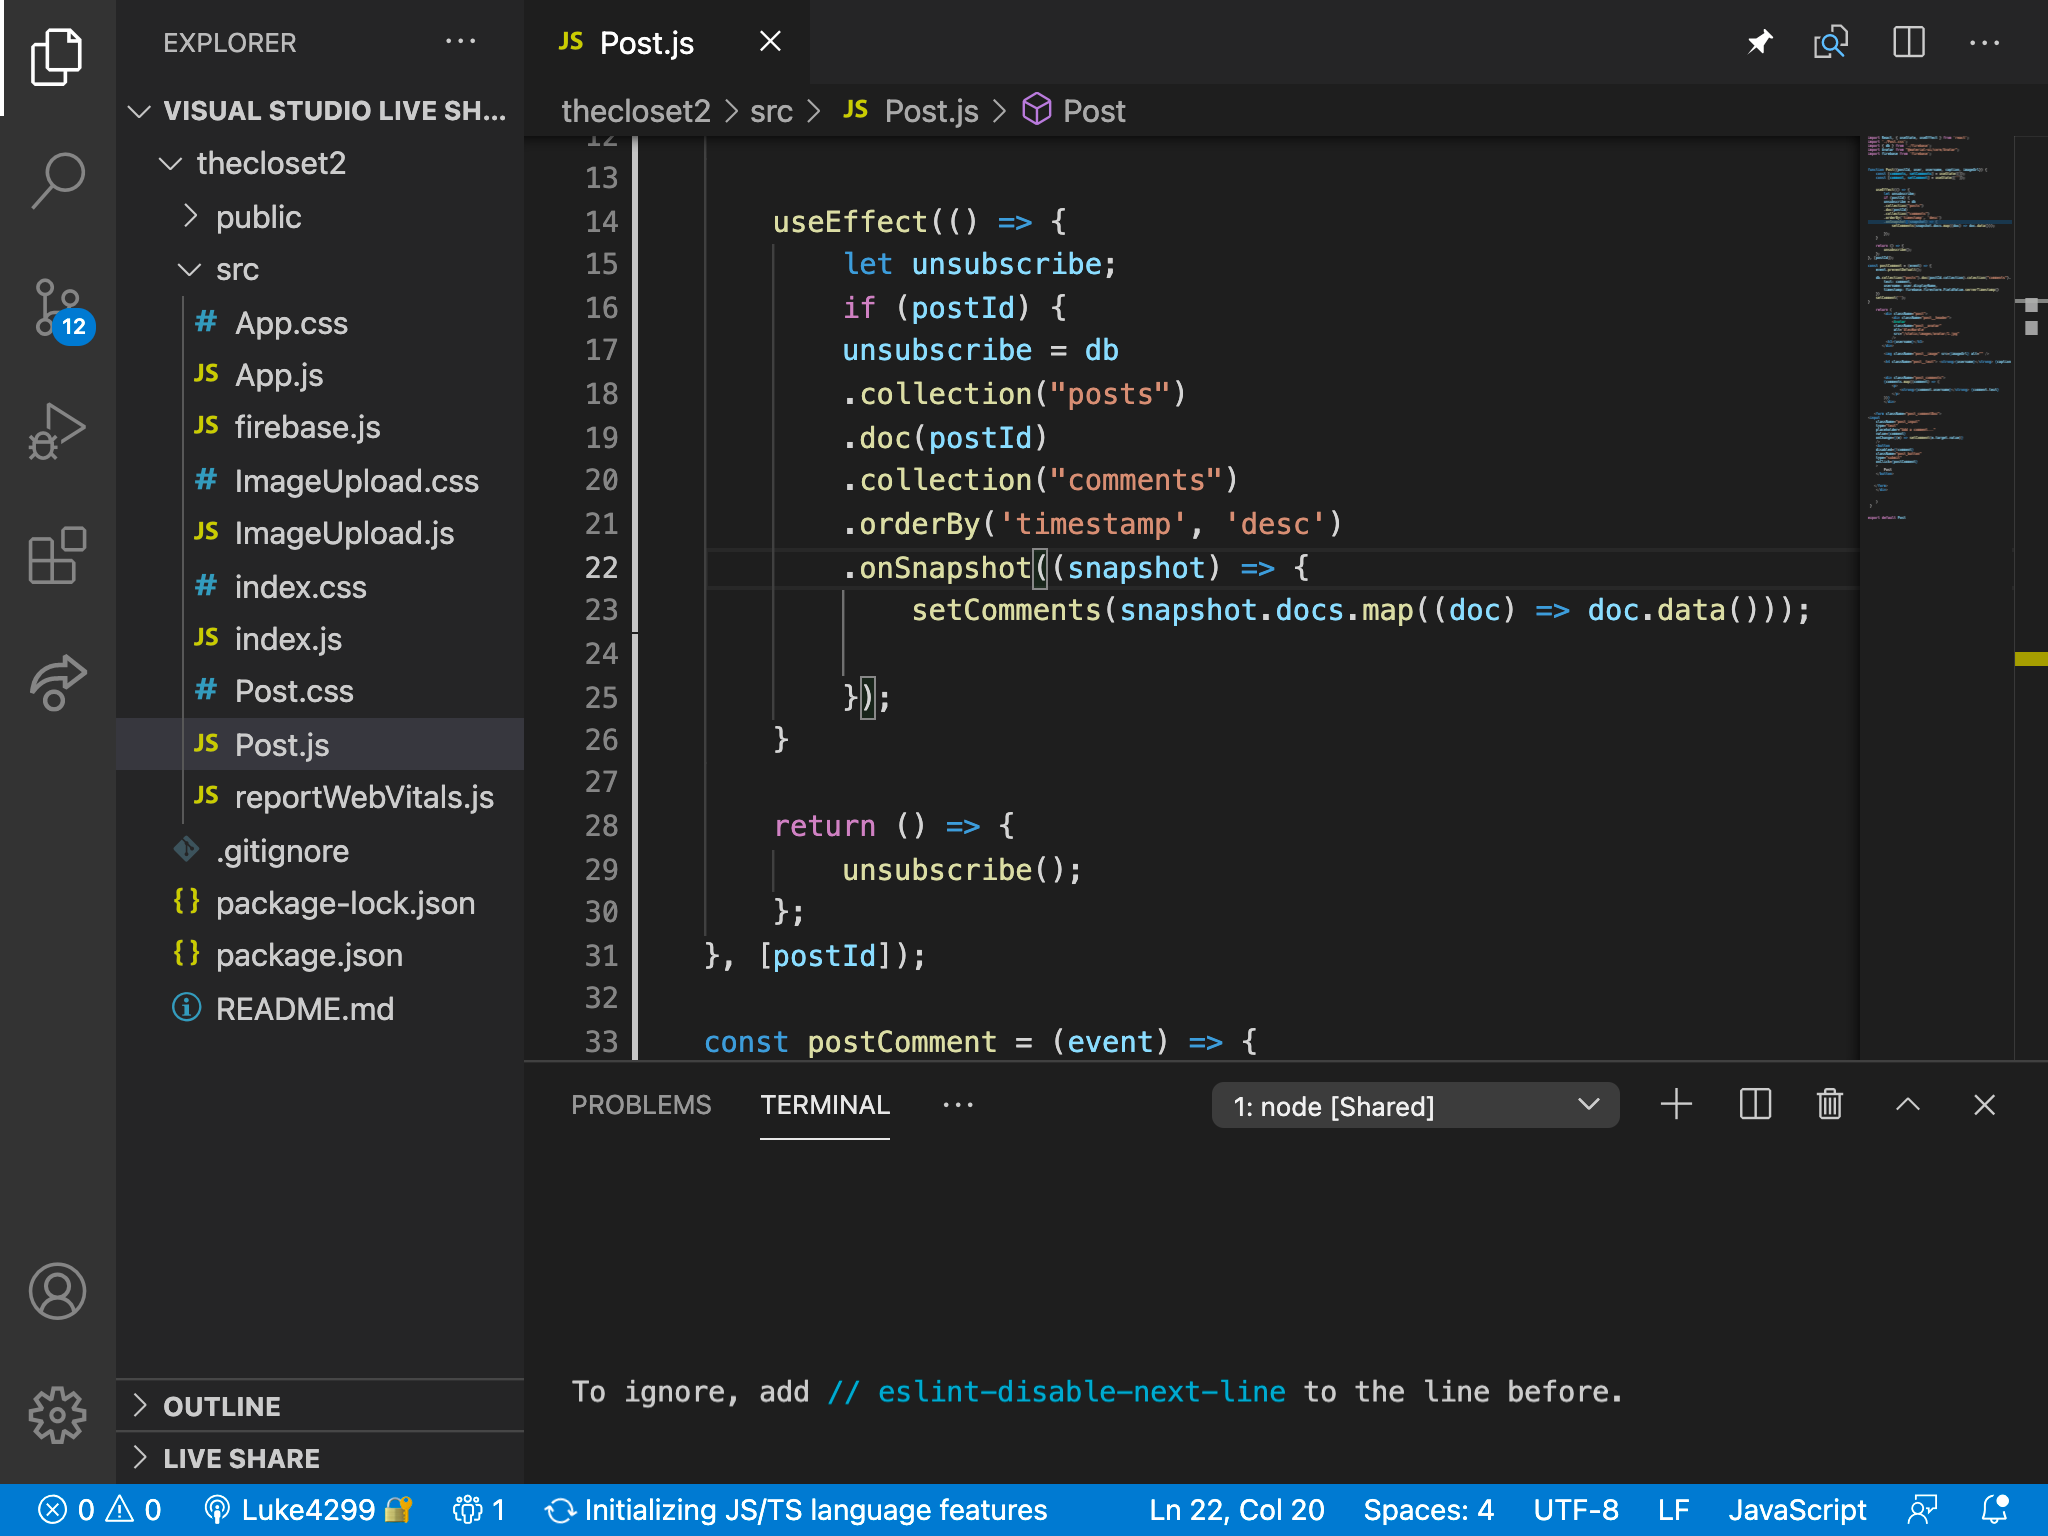
next online eight I wrote use effect. This is essentially the connection to the database where the comments will be posted from the database back to the application.
as you can see on line 10 it is saying, if a post ID was passed through, where it is unsubscribed from the database. Then the colleciton of posts is accessed, where it then goes into specfic post id's document, where it next goes into the collection of comments. Then it is asking to go get a snapshot of listener of those comments.
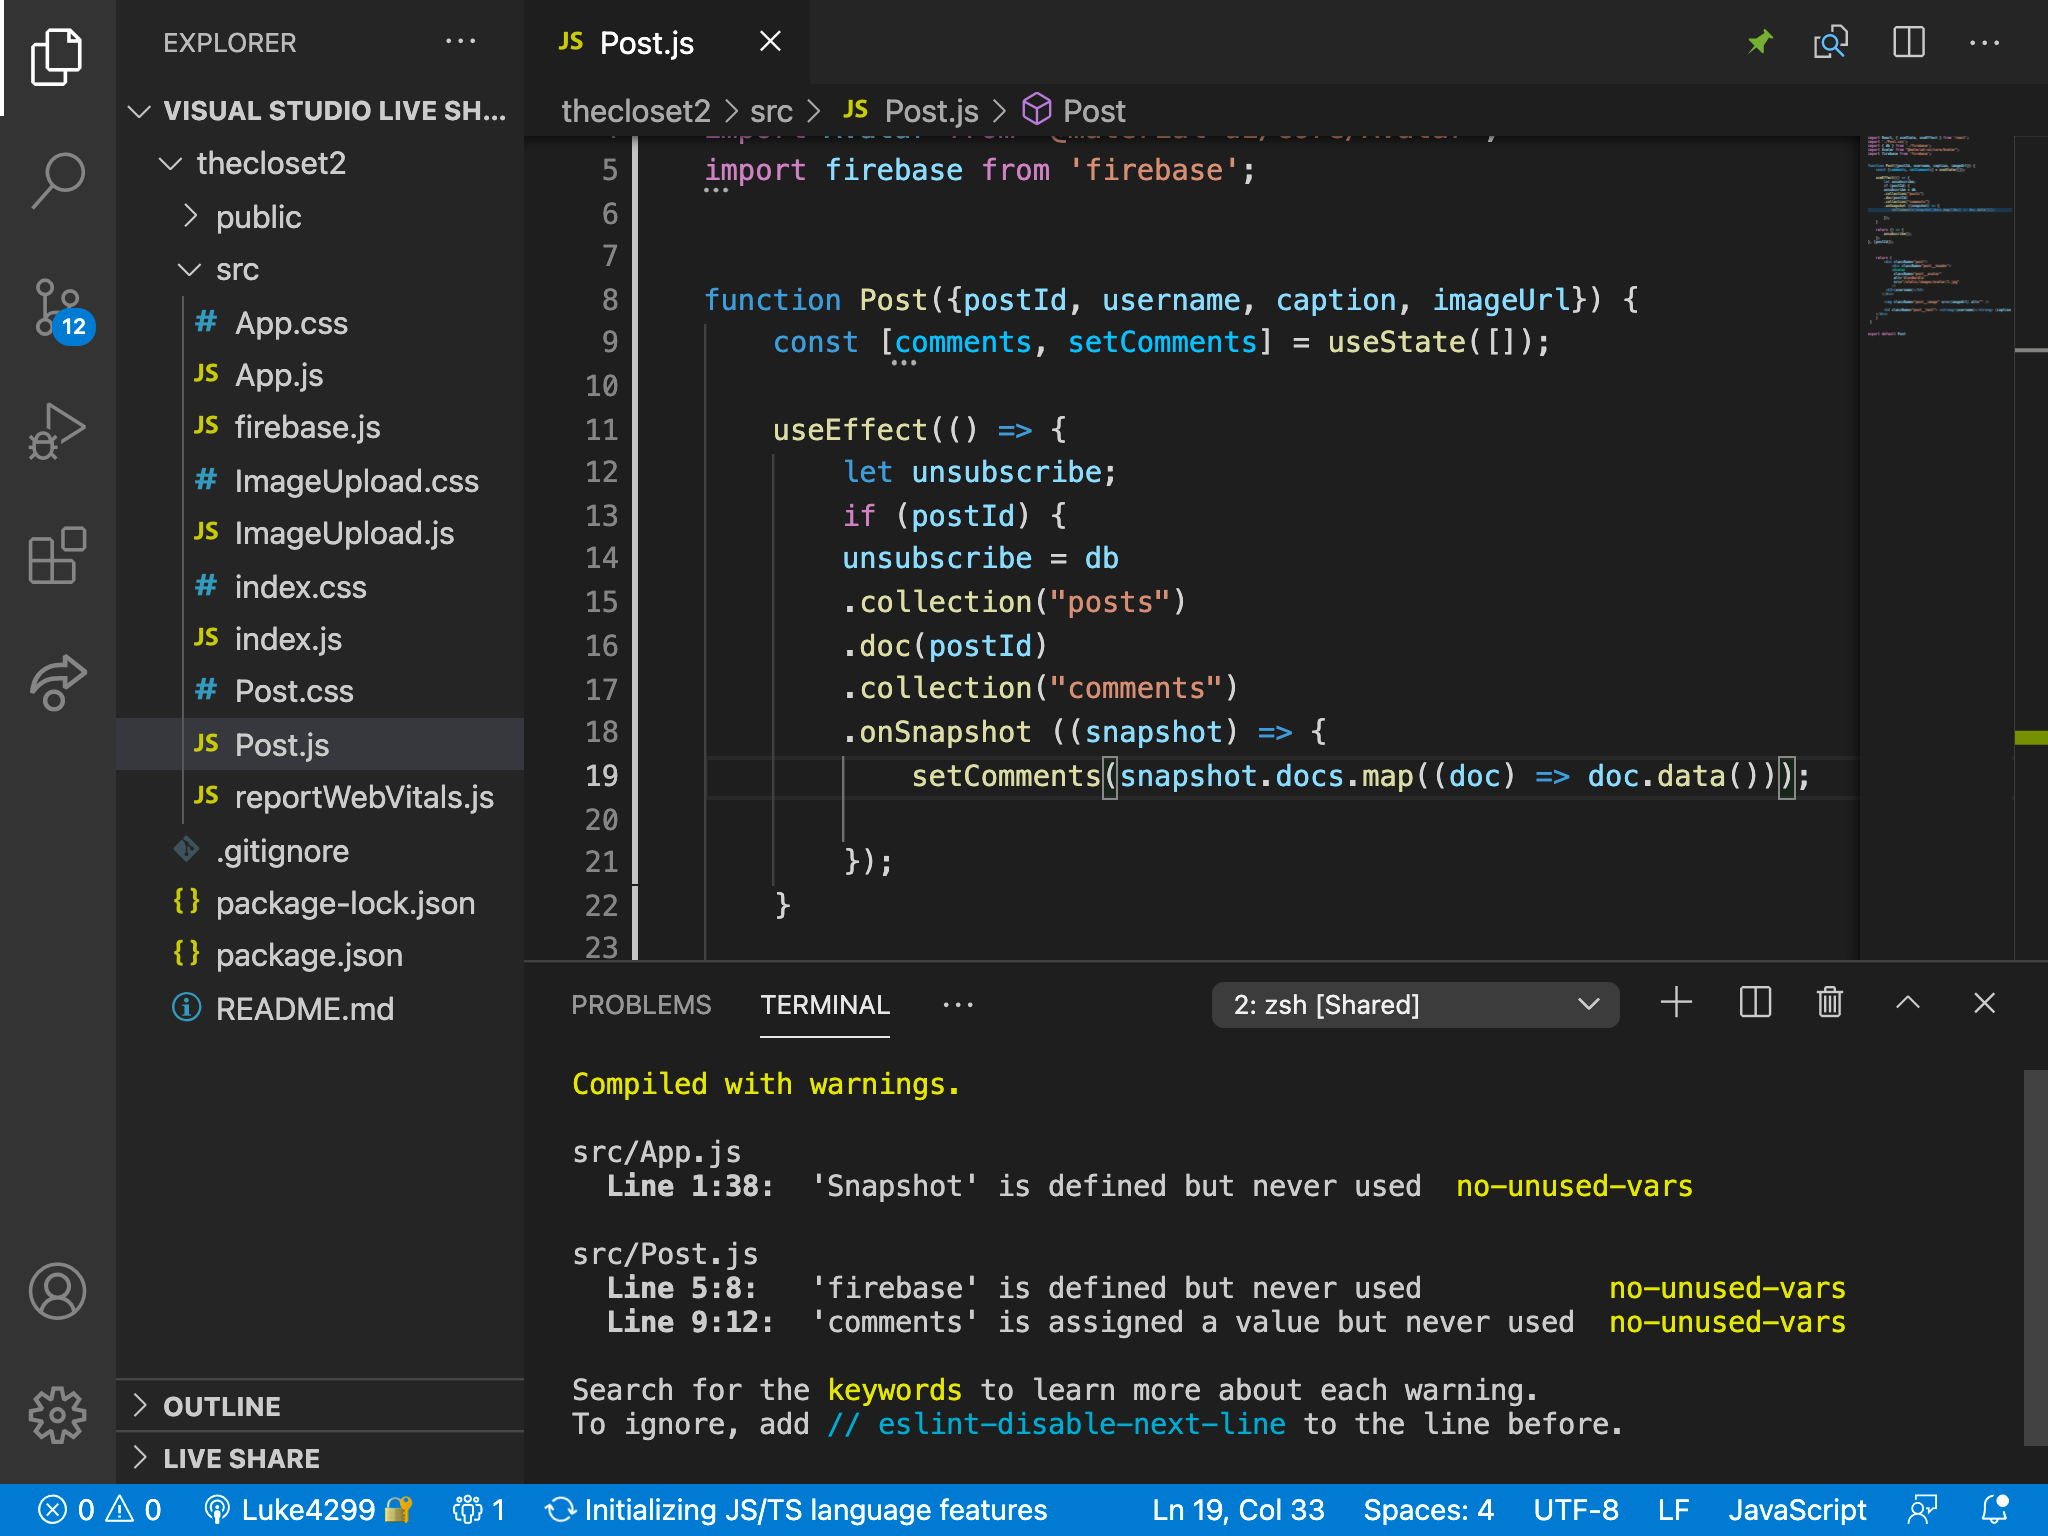
Then it is asking to go get a snapshot of listener of those comments on line 18 and 19. Any time there is a new comment added to a specfic post, it listens to that particular post and all of the comment changes within it added to that post. This is otherwise known as a nested listener, which enables the ability to not have to refresh the entire page but it only refreshes a particular post and comment.
This allows for comments to be fetched and implemented onto that post, as there is a collection call comments within the posts.
Section 4.5- Adding comment support
In order to allow those comments to come through I had to add support for those comments within post.JS, the main page for all posts.
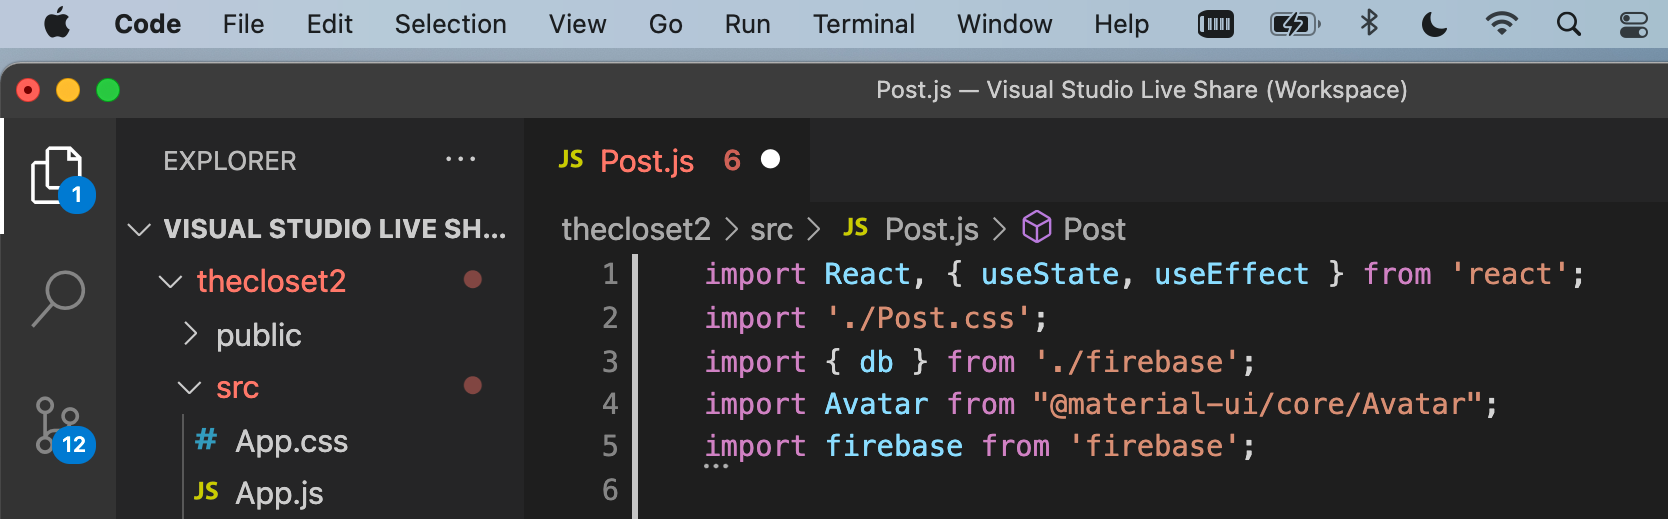
On line one I imported useEffect as well as online three I import the database from firebase, allowing the databse to communicate with the posts.
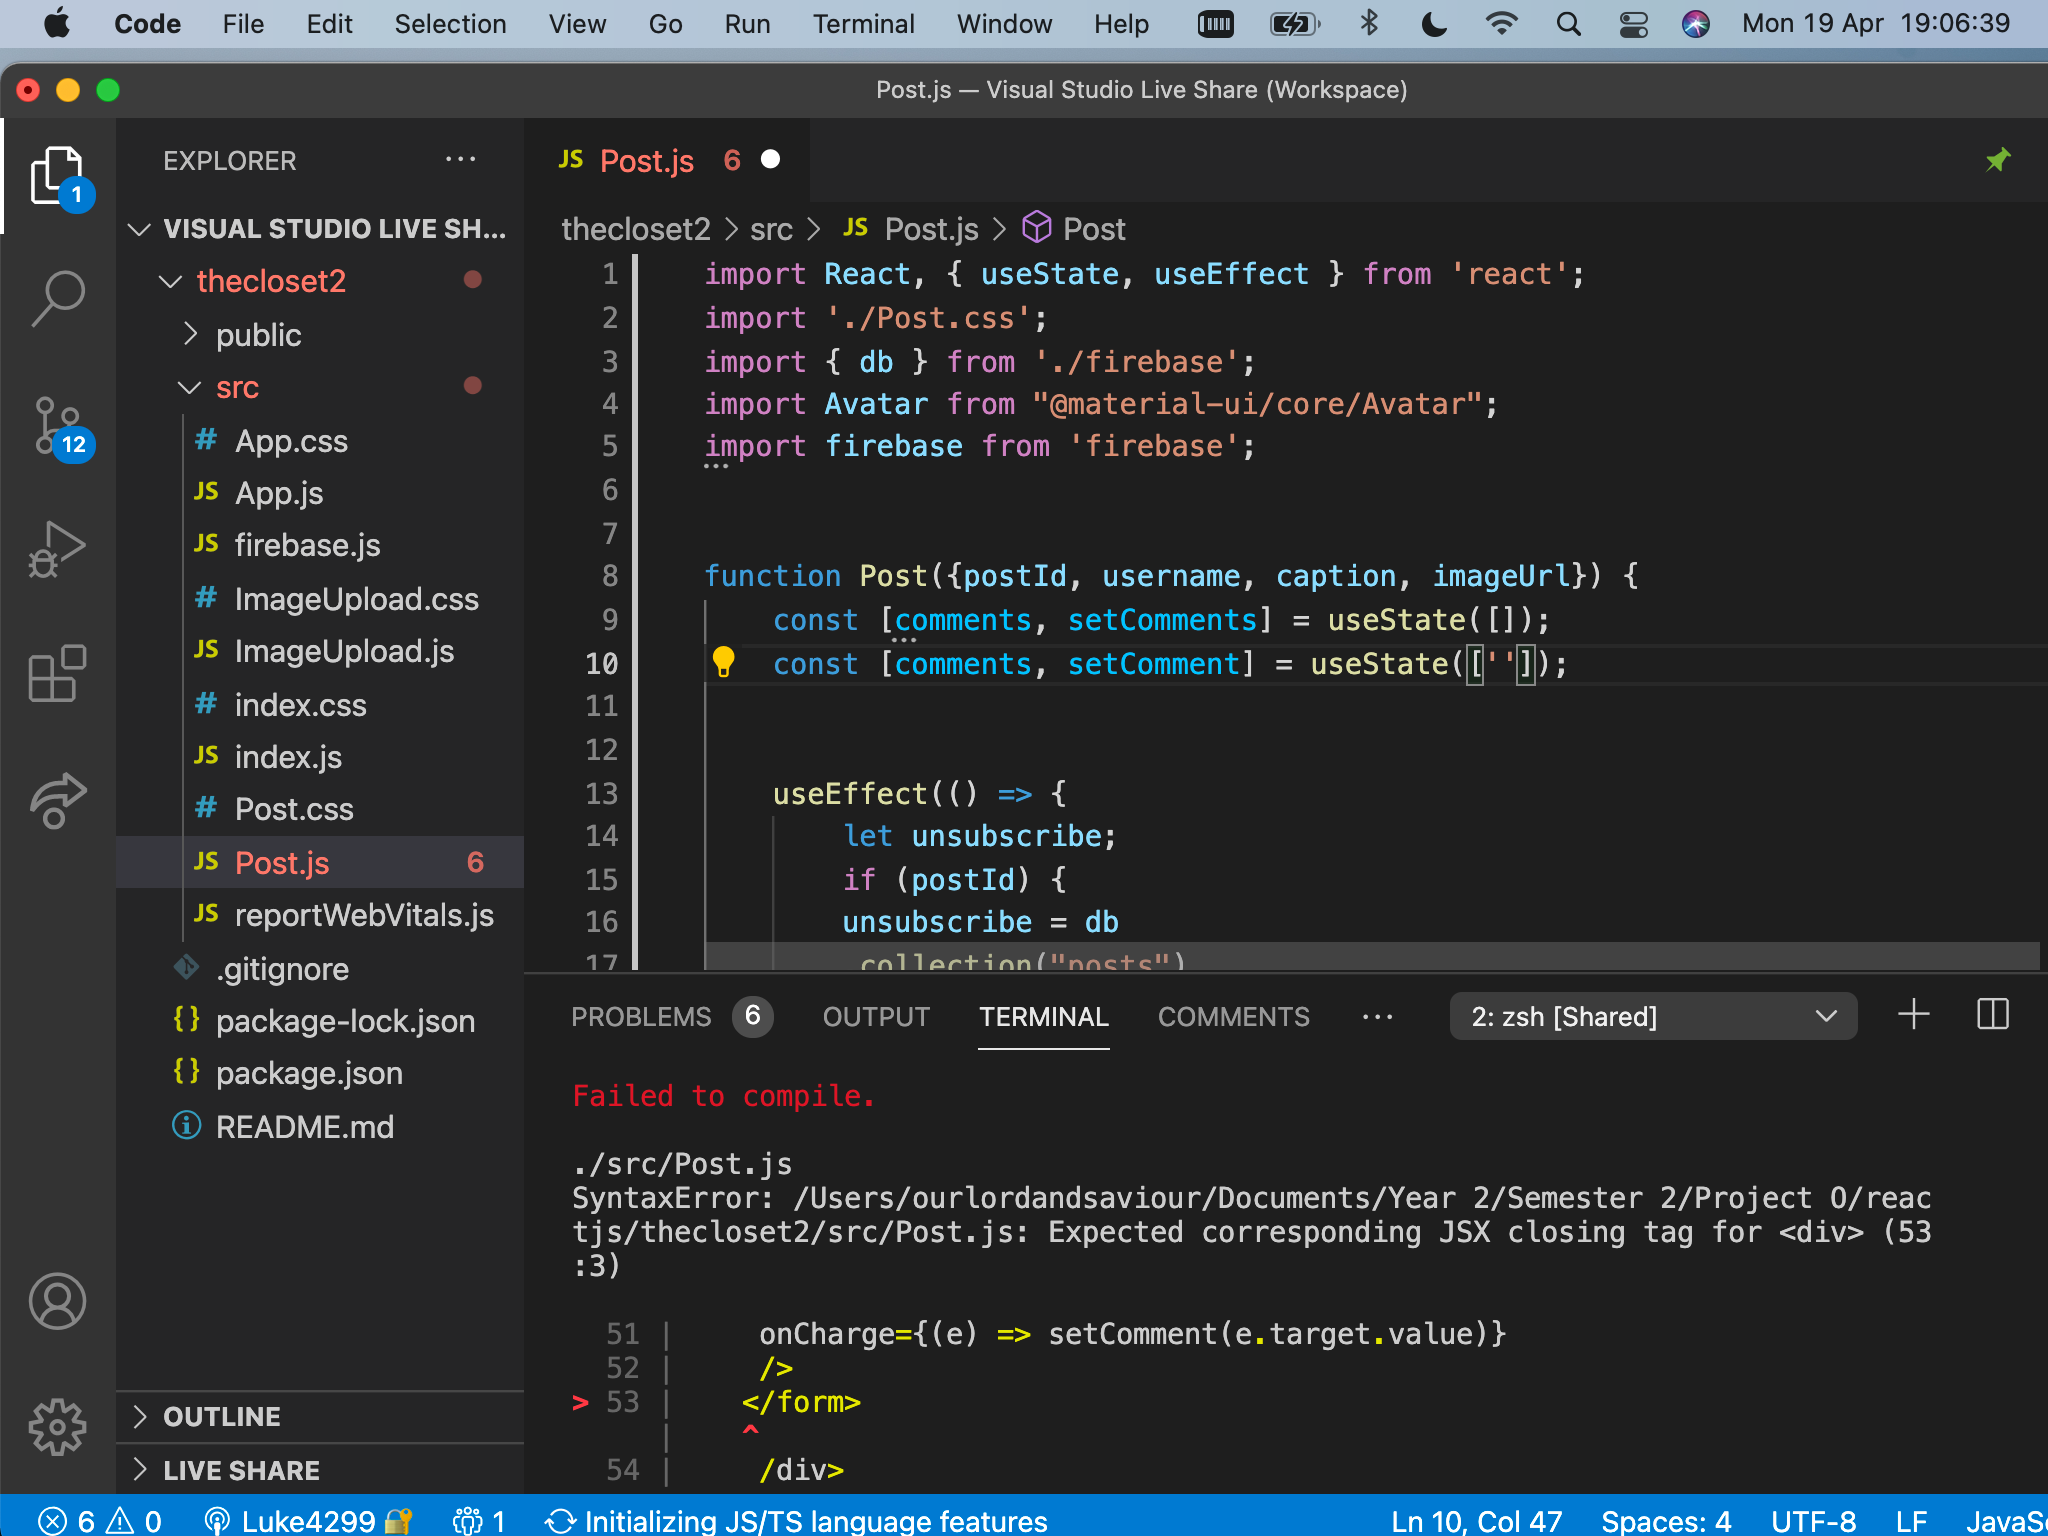
I then created a piece of state to keep track of the individual comment, by adding it's infomation on line 8 with useState[''] being blank to show the placeholder.
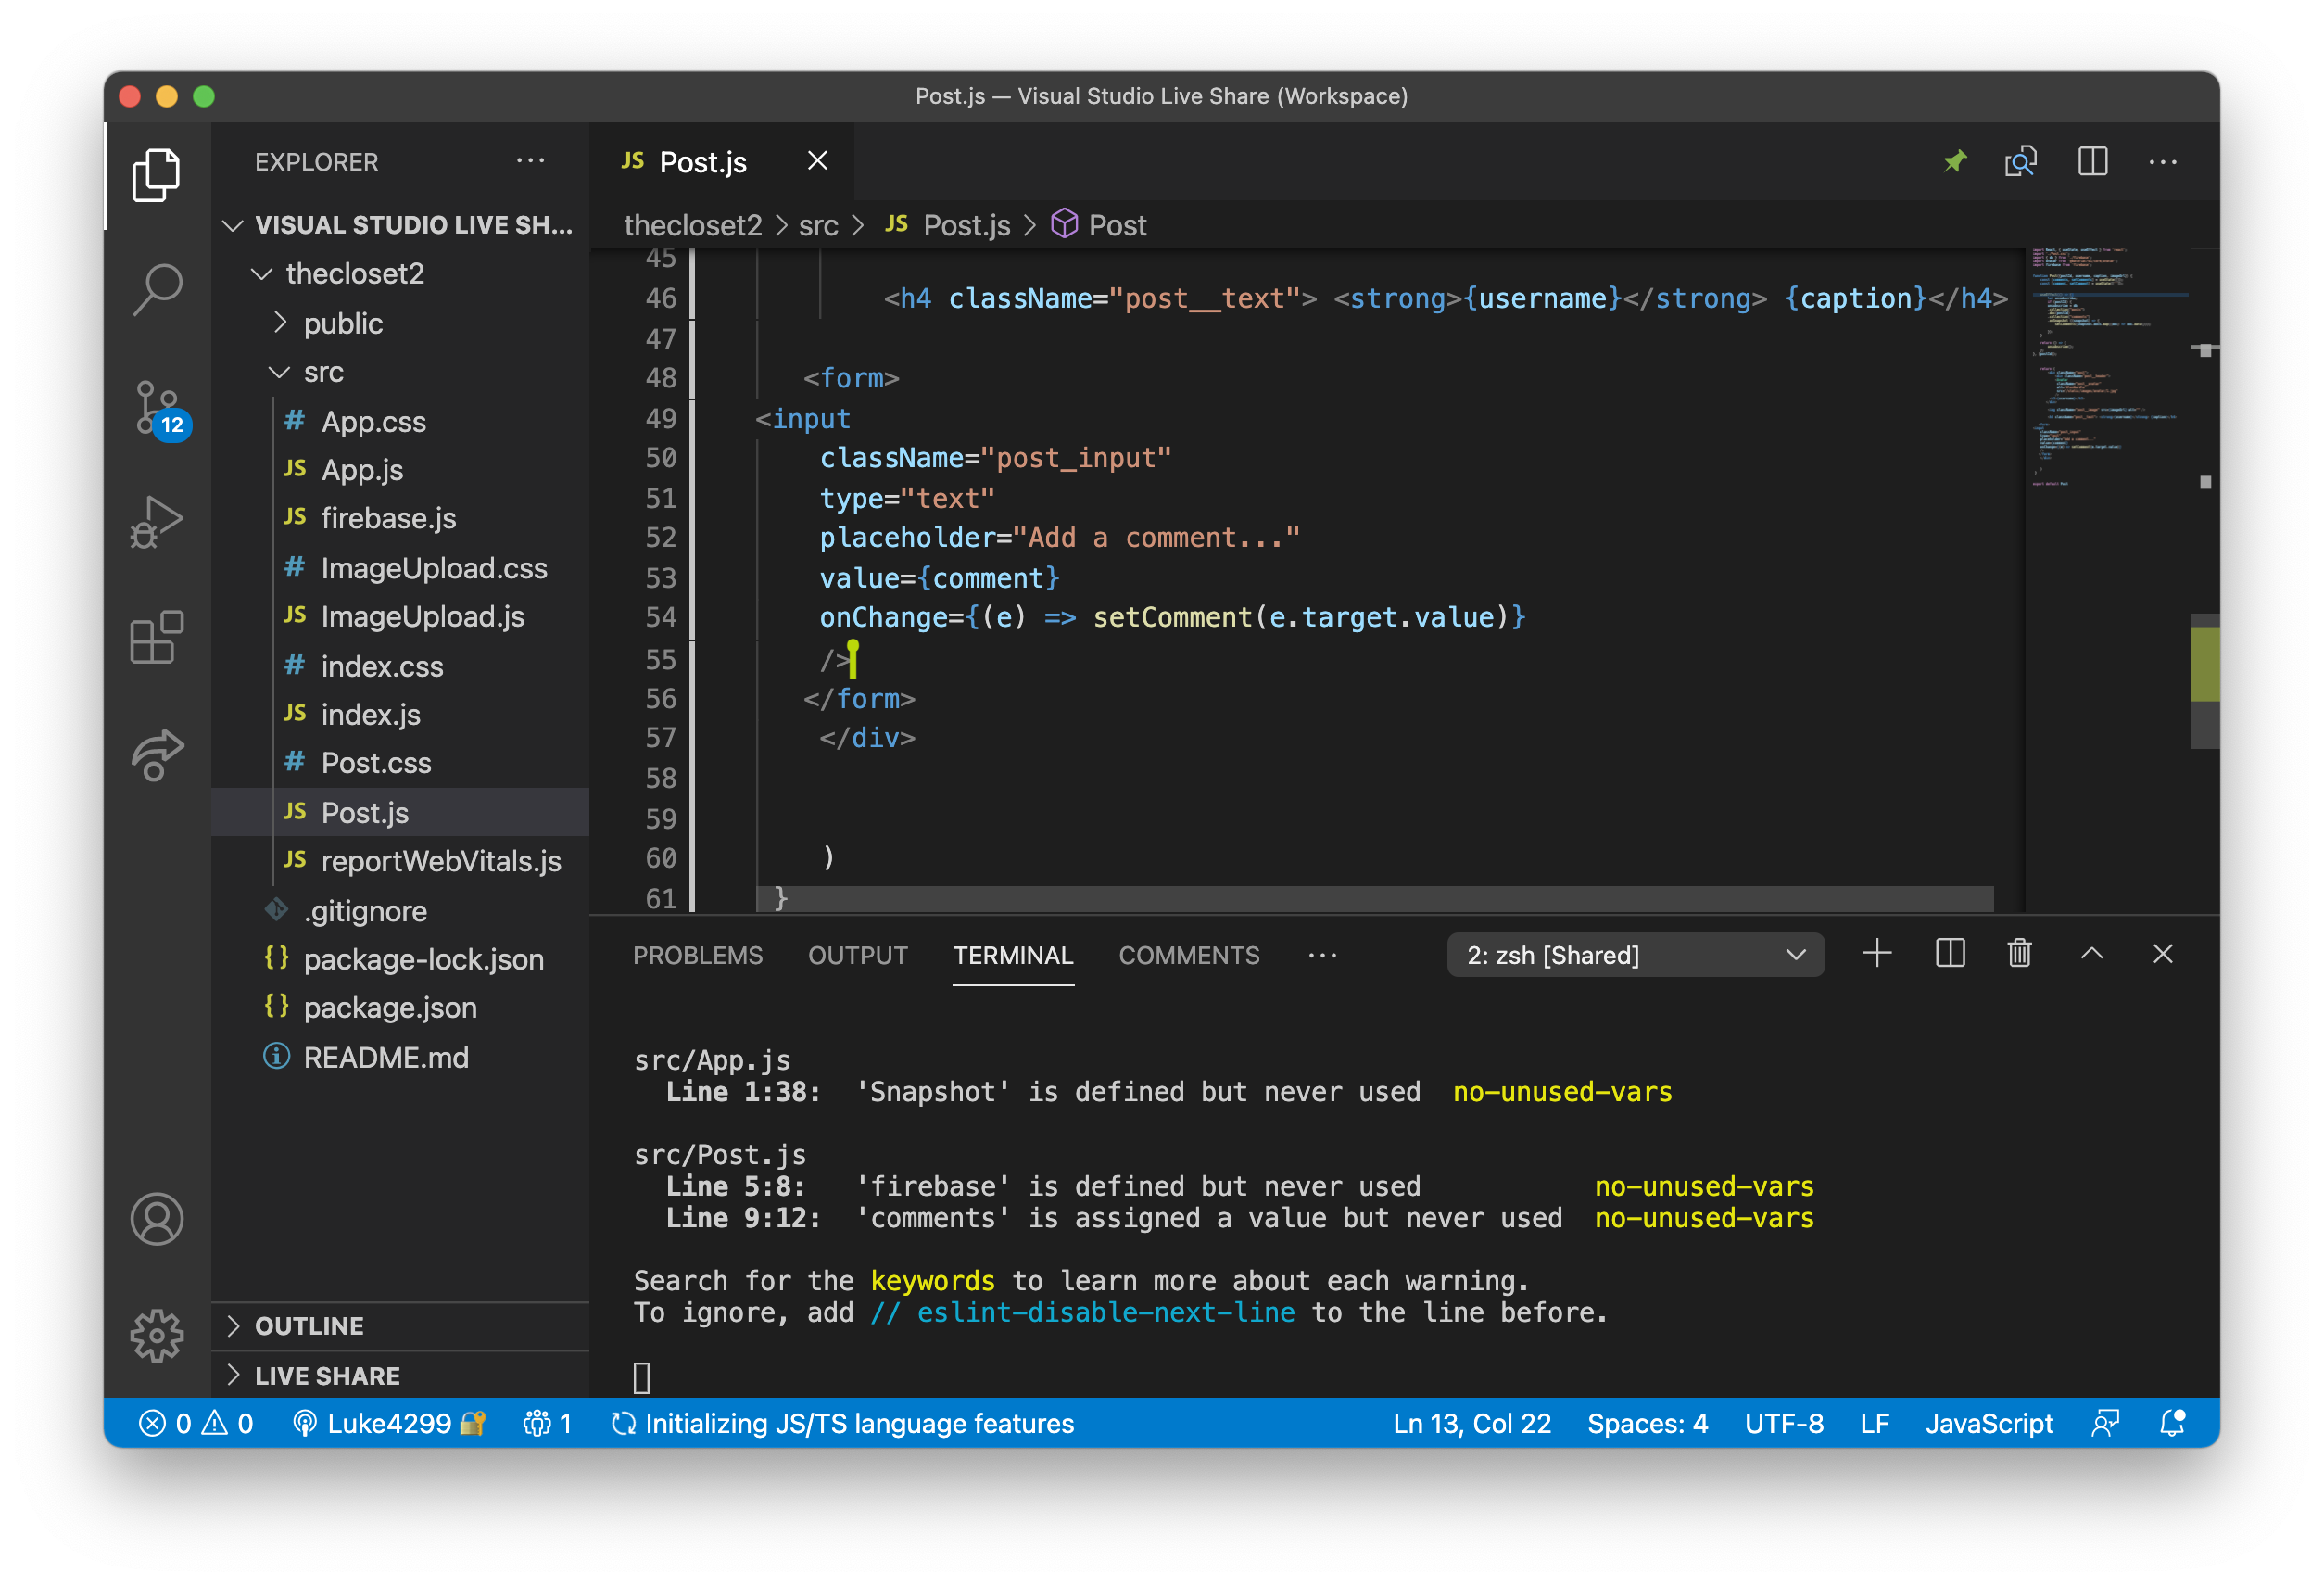
Next I implemented a form to allow users to start to enter their comment onto the post. I then wrote one input which will allow the user to write and post their comment, as it has the value of comment.
On line 54 it says onchange, which updates as the usestate on line 1.
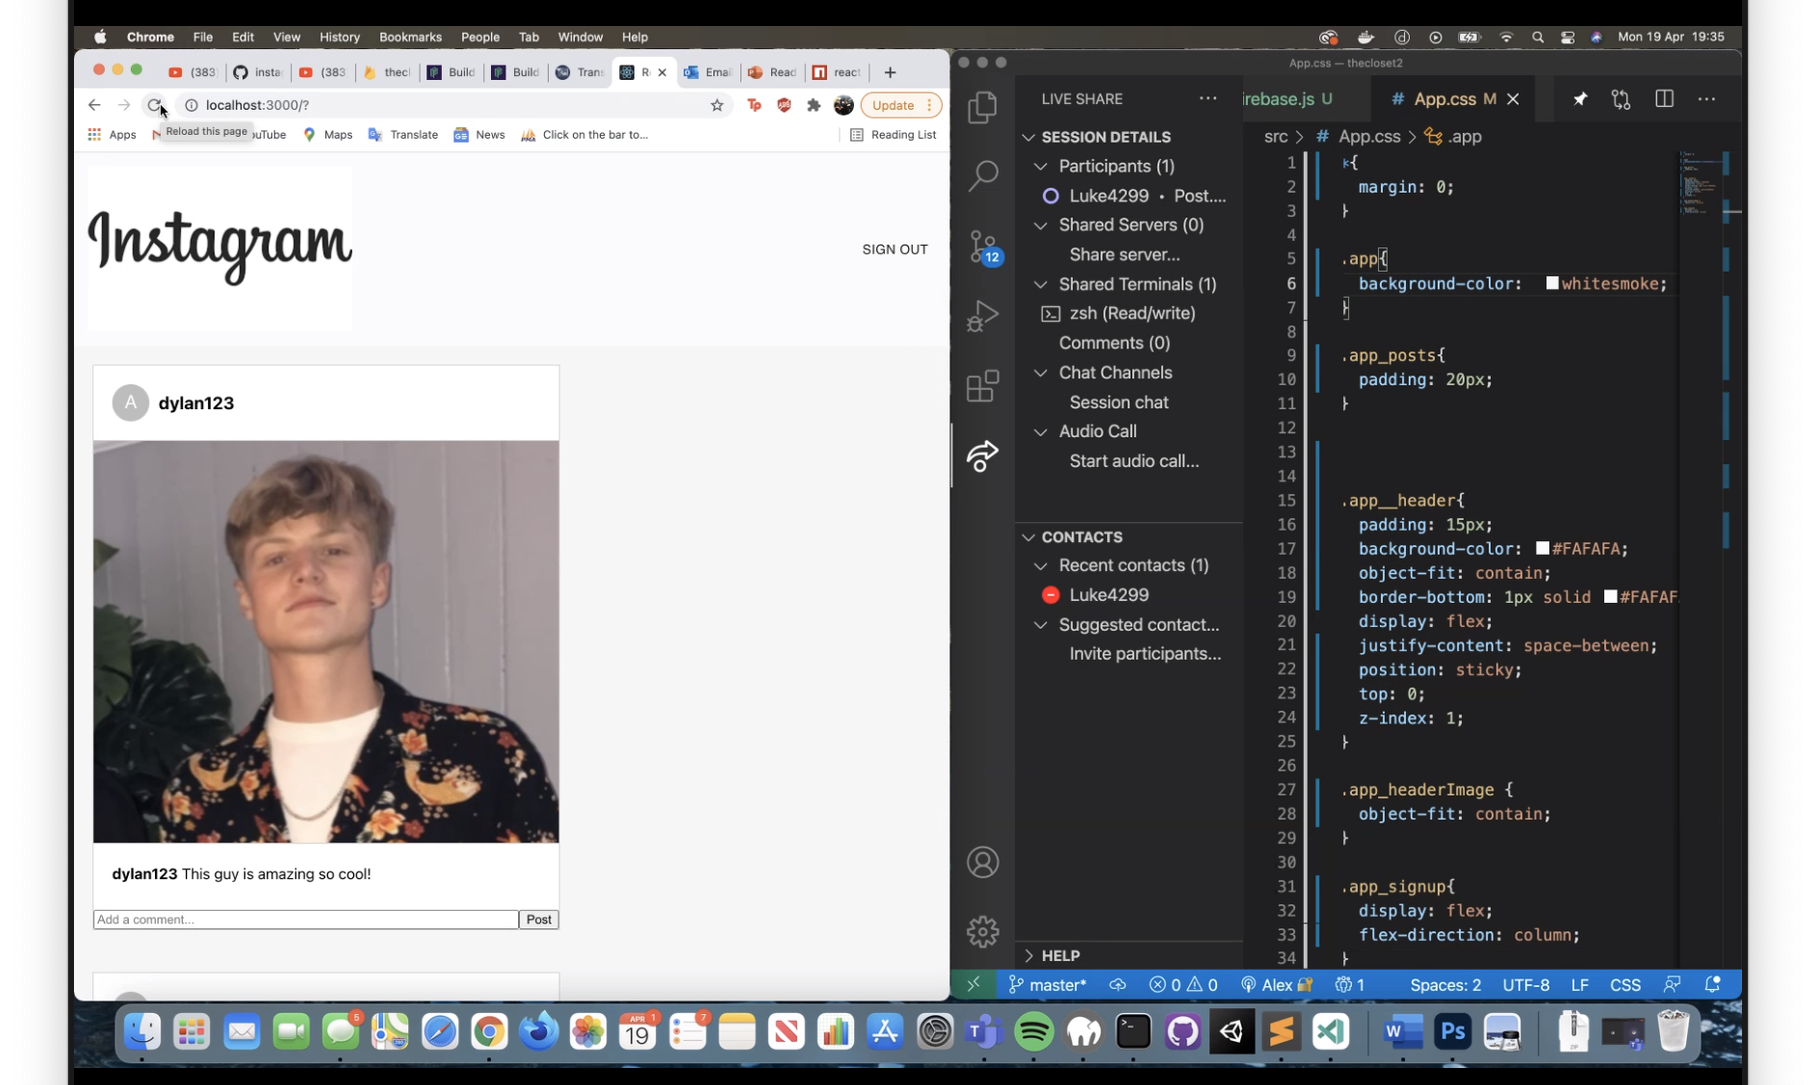
As you can see on the image on the left, the comment box is added with placeholder text inside of it, created by the form.
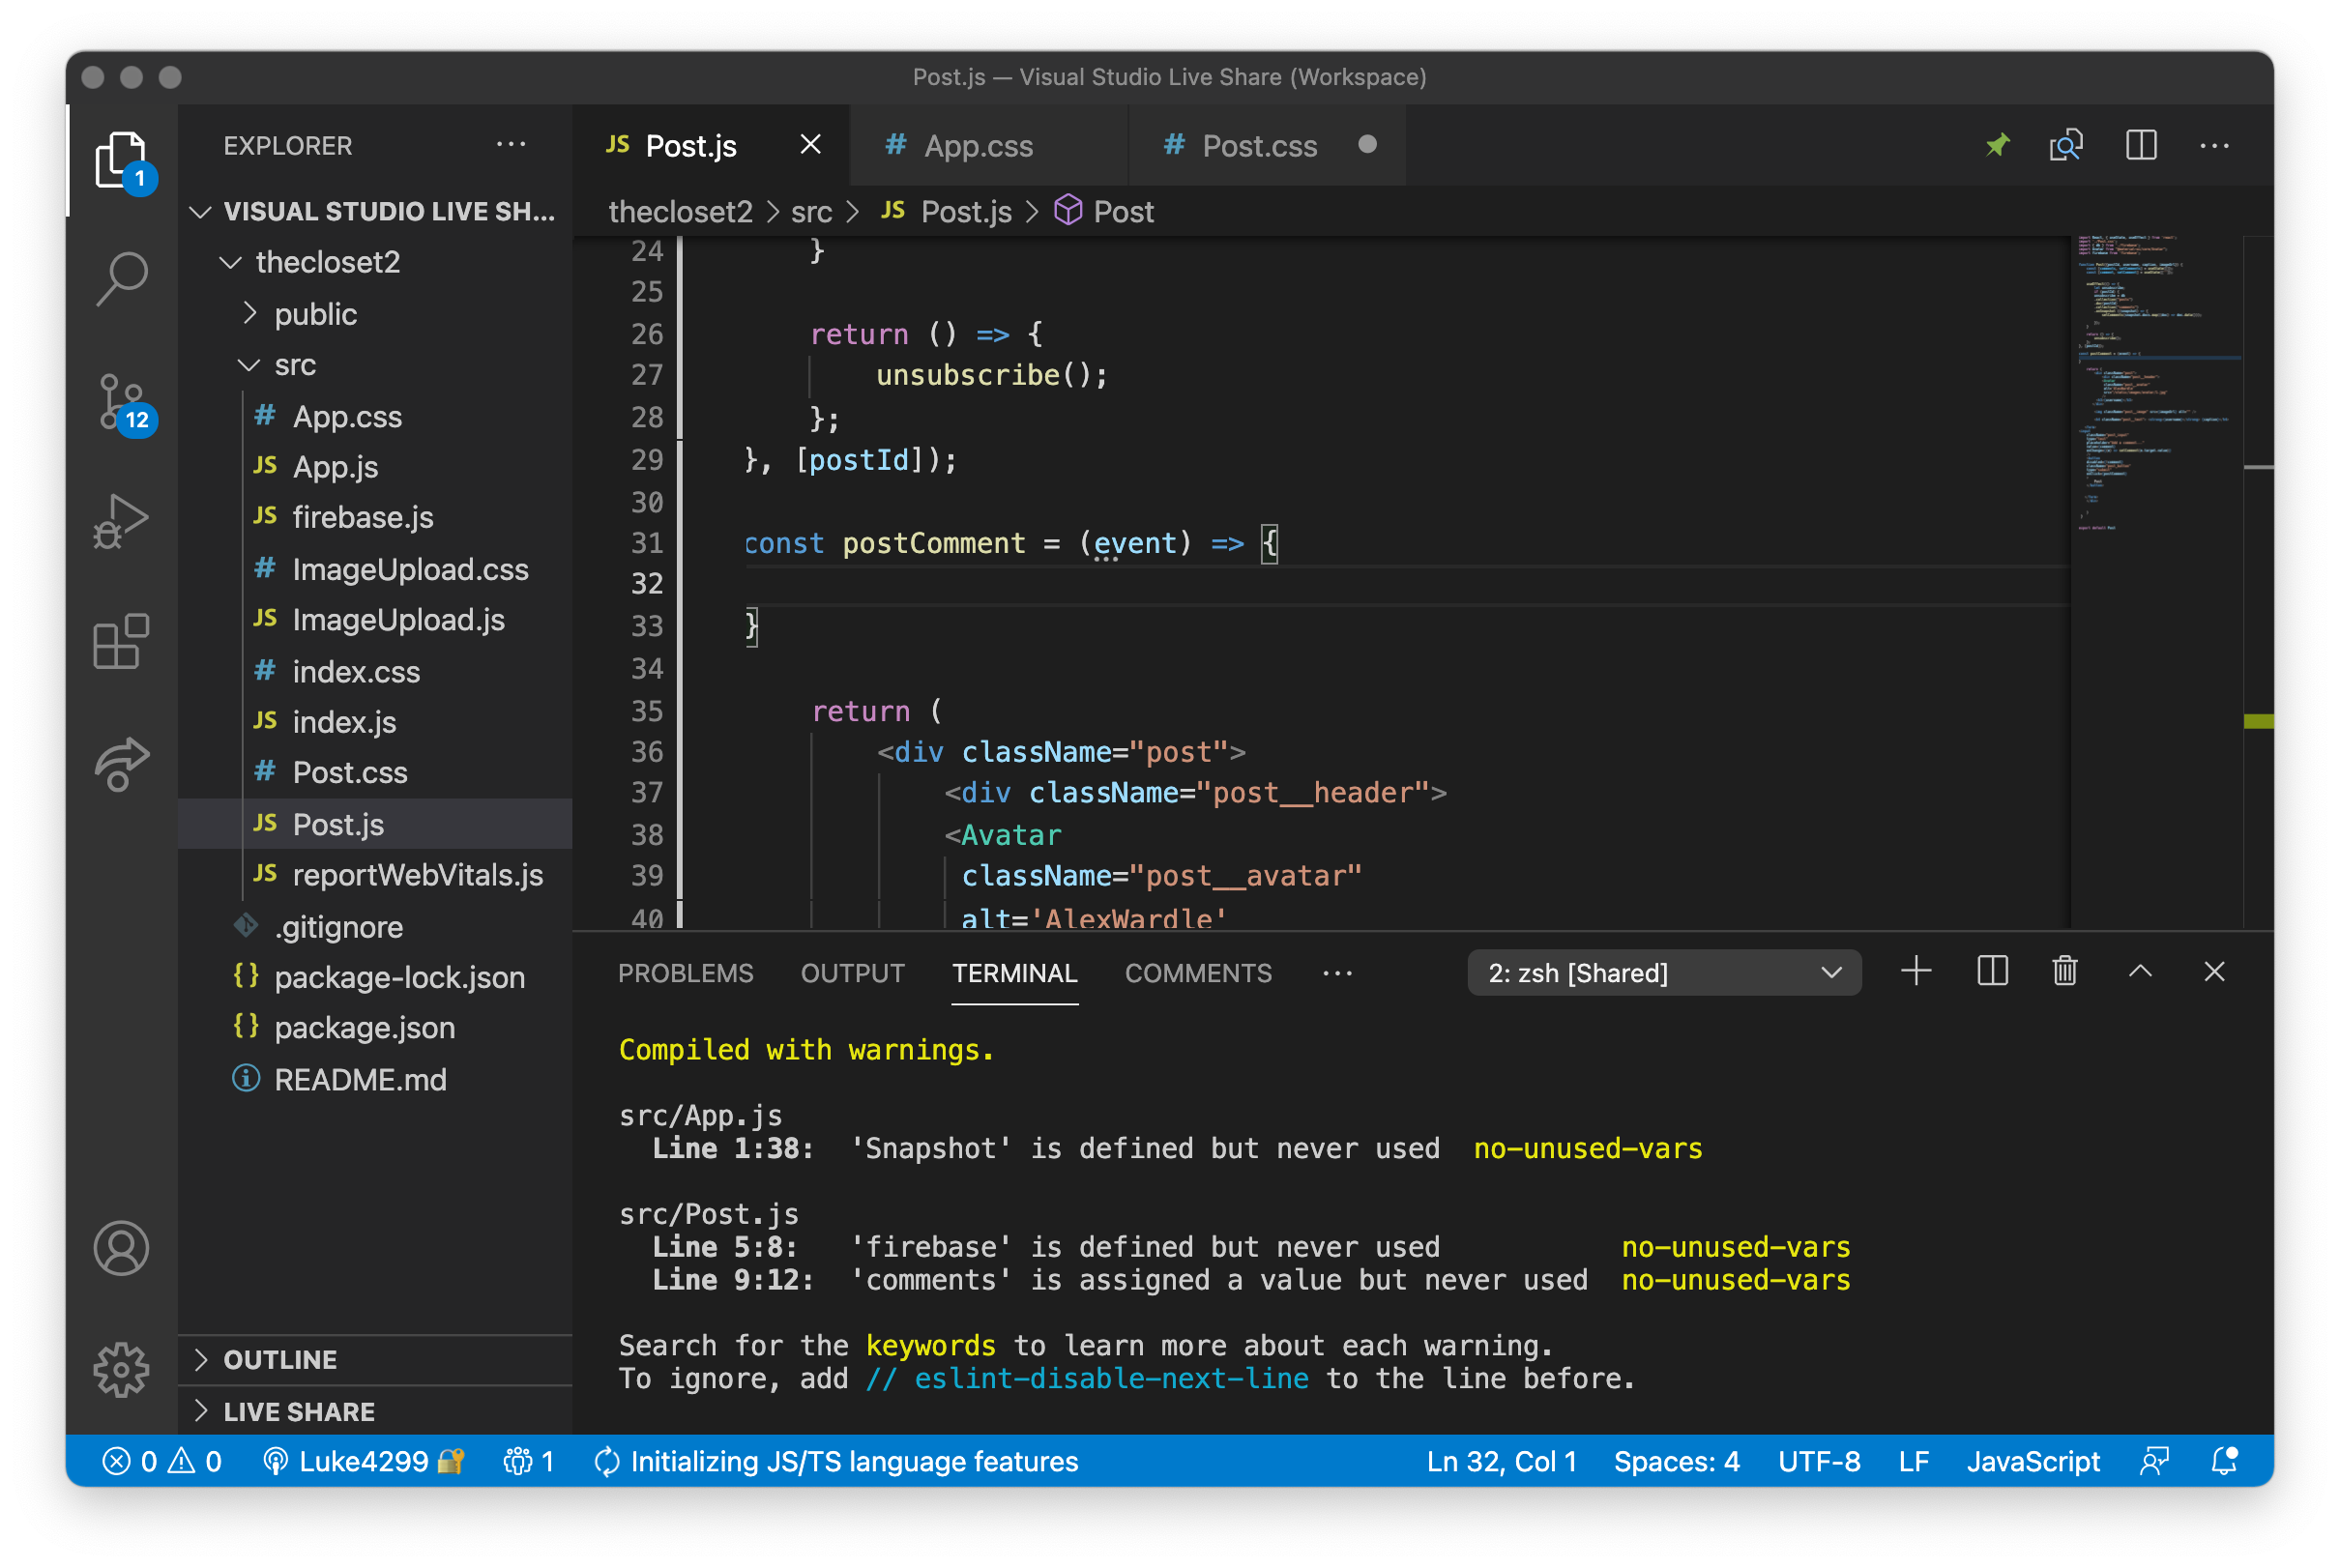
Next I created the button that will enable the user to submit the comment onto the post, otherwise known as post. This will be done on the click the moment the user presses the button.
Next in order for the comment to be submitted to the bit the database I then wrote out to function that submits the comments to the database, on the specific post.
Finally to allow the post comment box to be styled I then gave it a class name within post inside the form.
Section 5- Styling comments
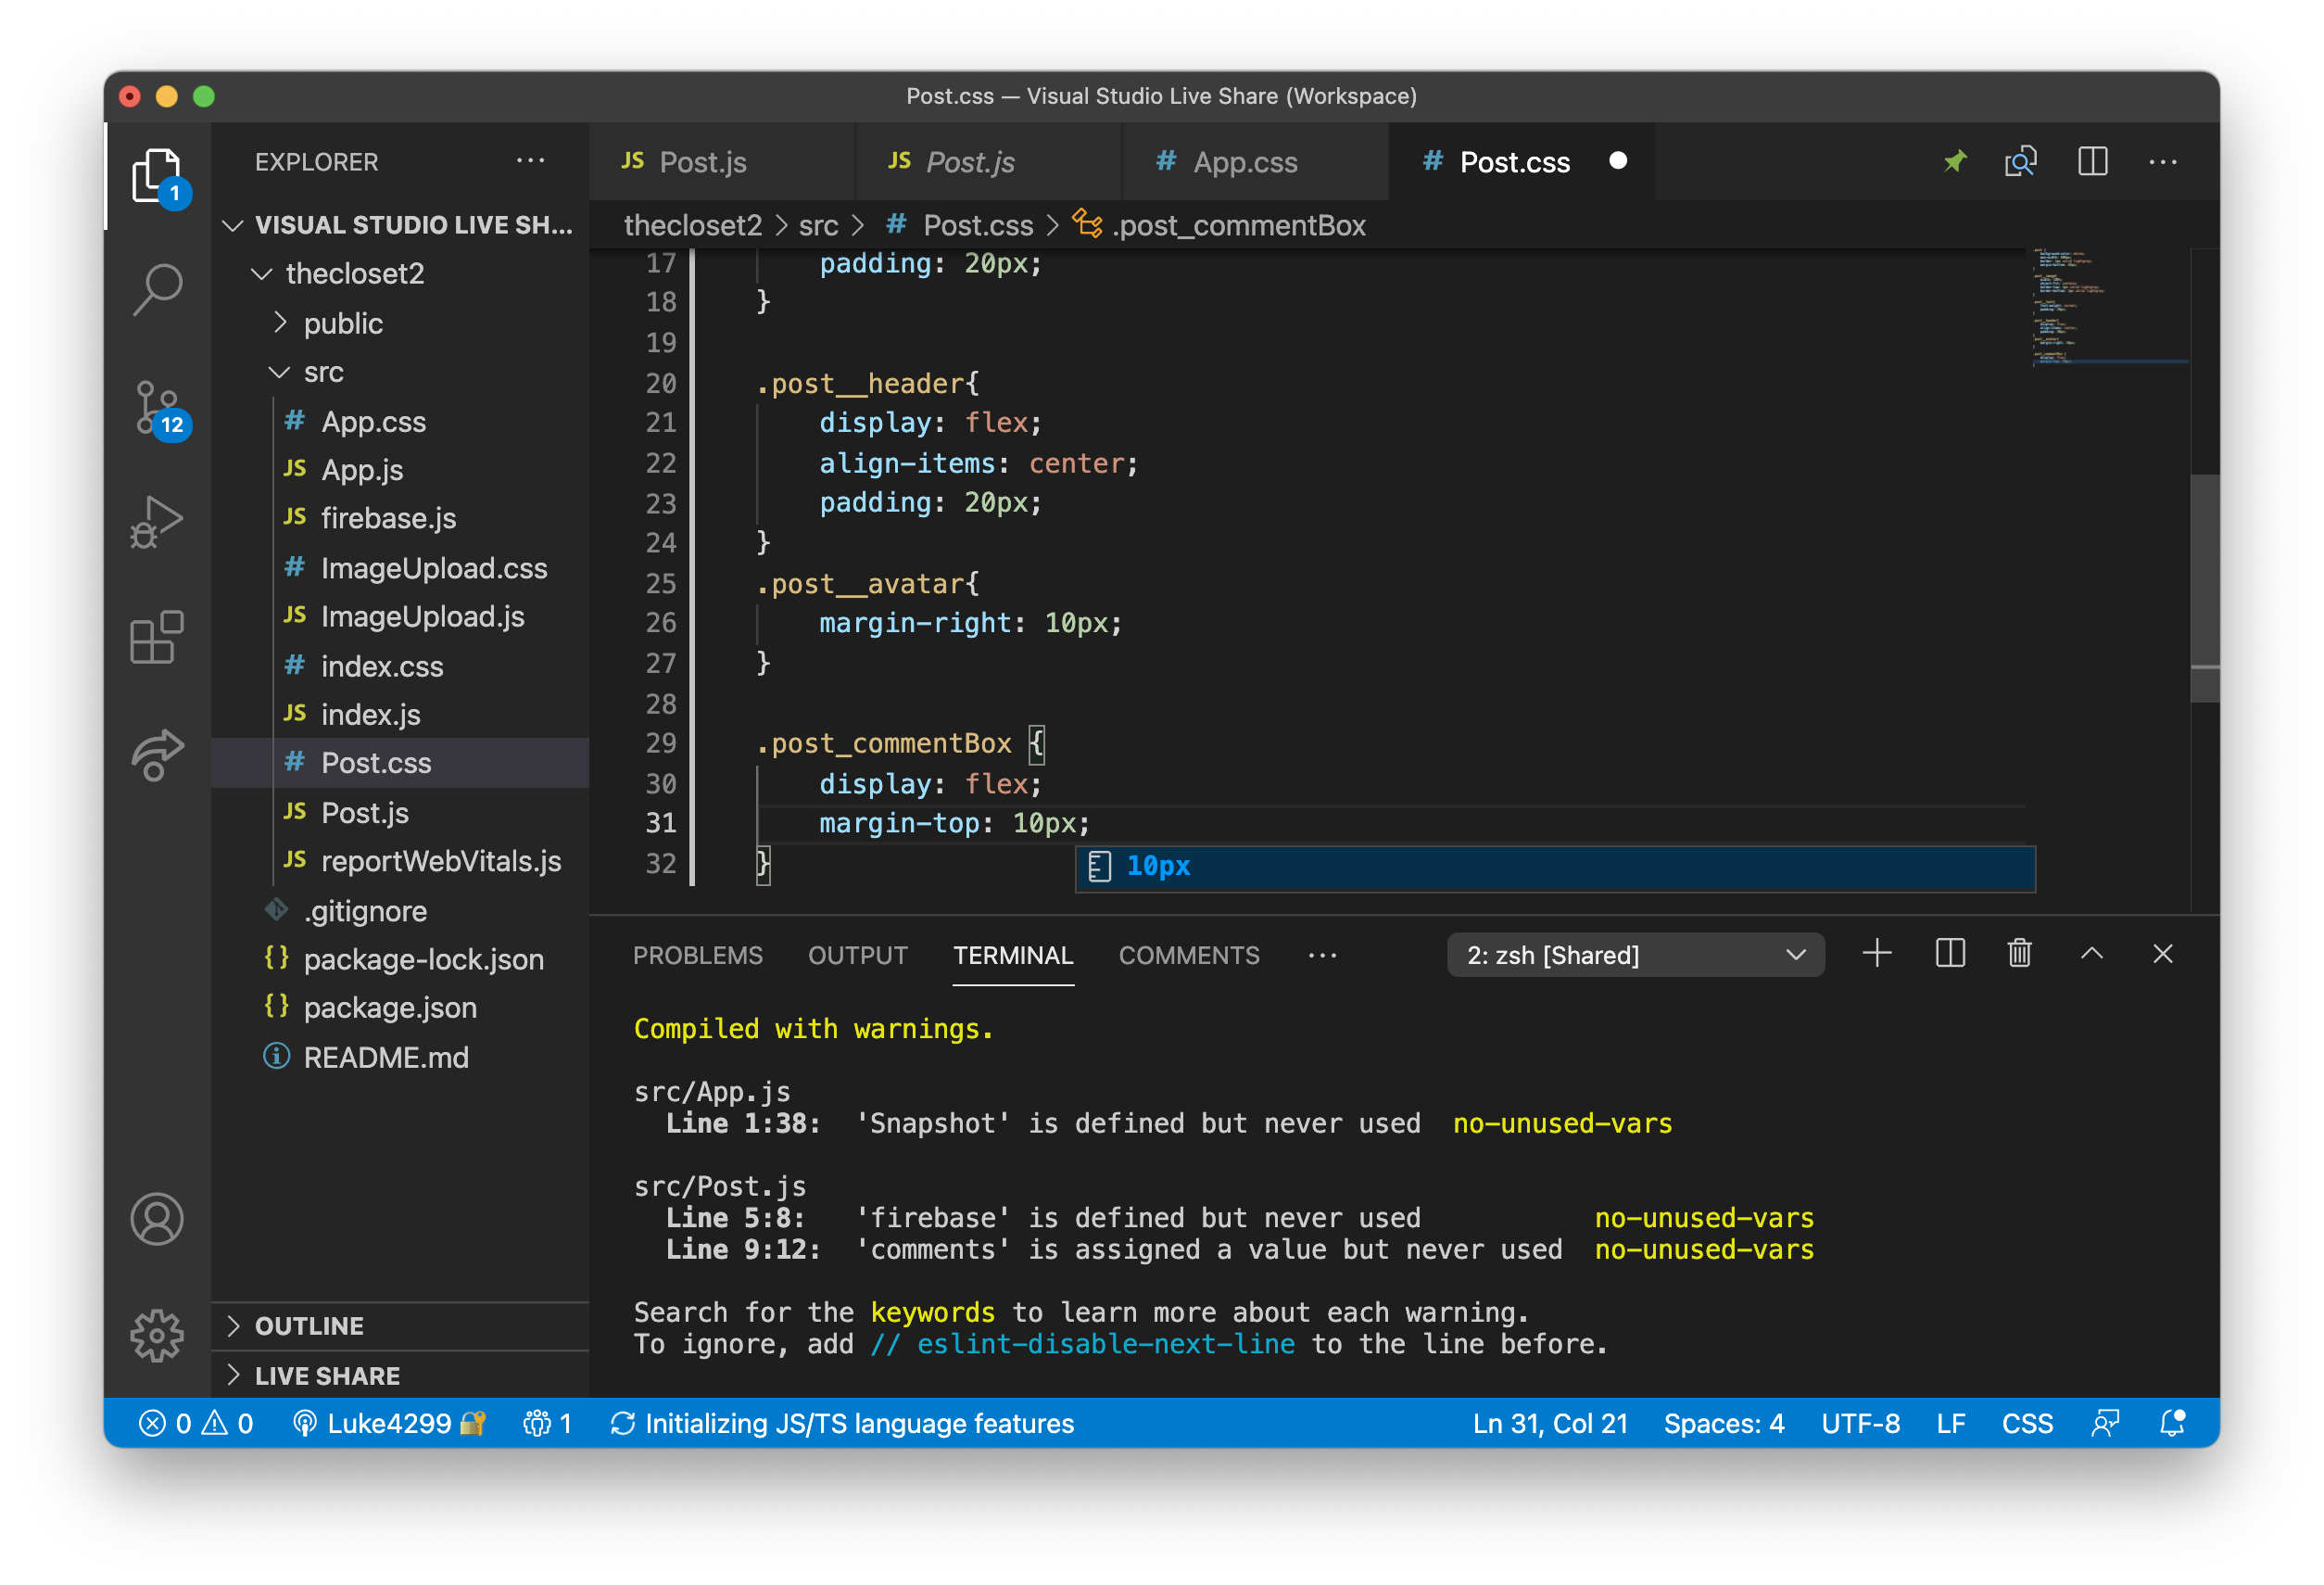
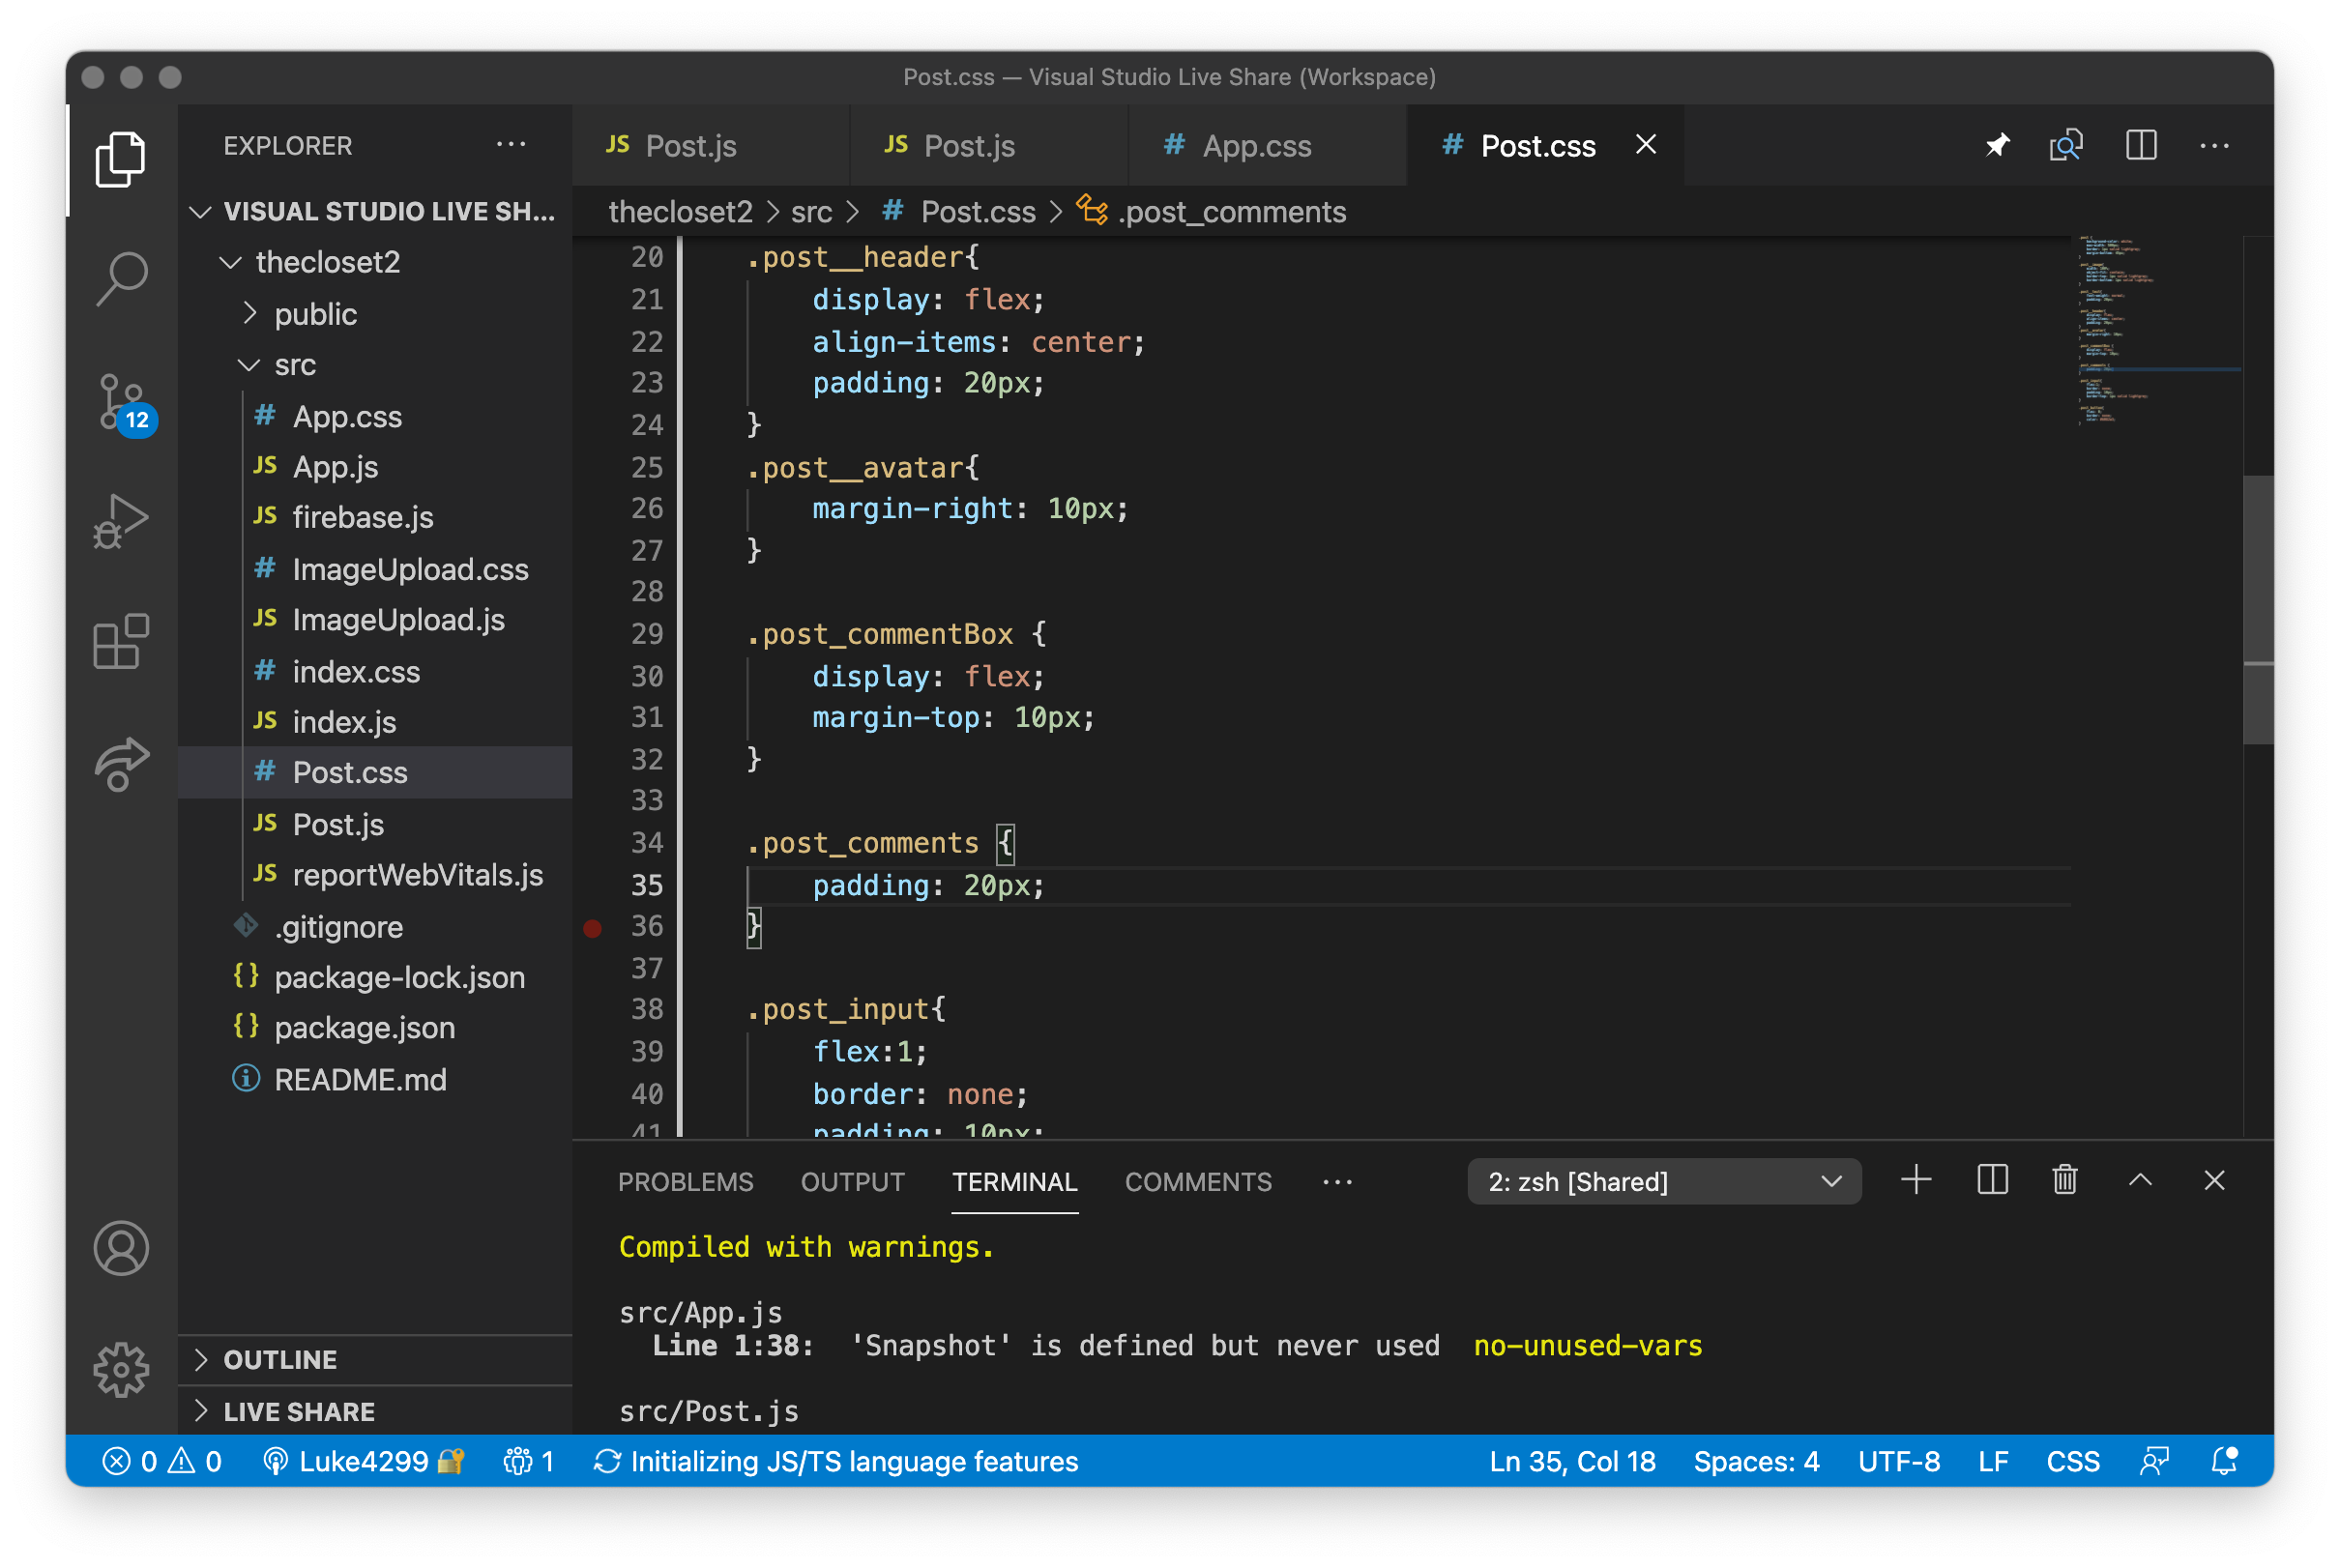
Next I start the CSS of the comment box to make it look more professional and slightly like Instagram's.
Next i changed the colour of the top banner to seperate the difference between the feed and the sign in singout buttons. I also added padding, the flex direction for the top banner and the feed.
Next i started to customise the post_input which is the input box that the user types in. I then wrote in flex:1, which set the precedent on how much space the post input and post button can take up. Flex one enables the post input to take up the majority of the space inside the box.
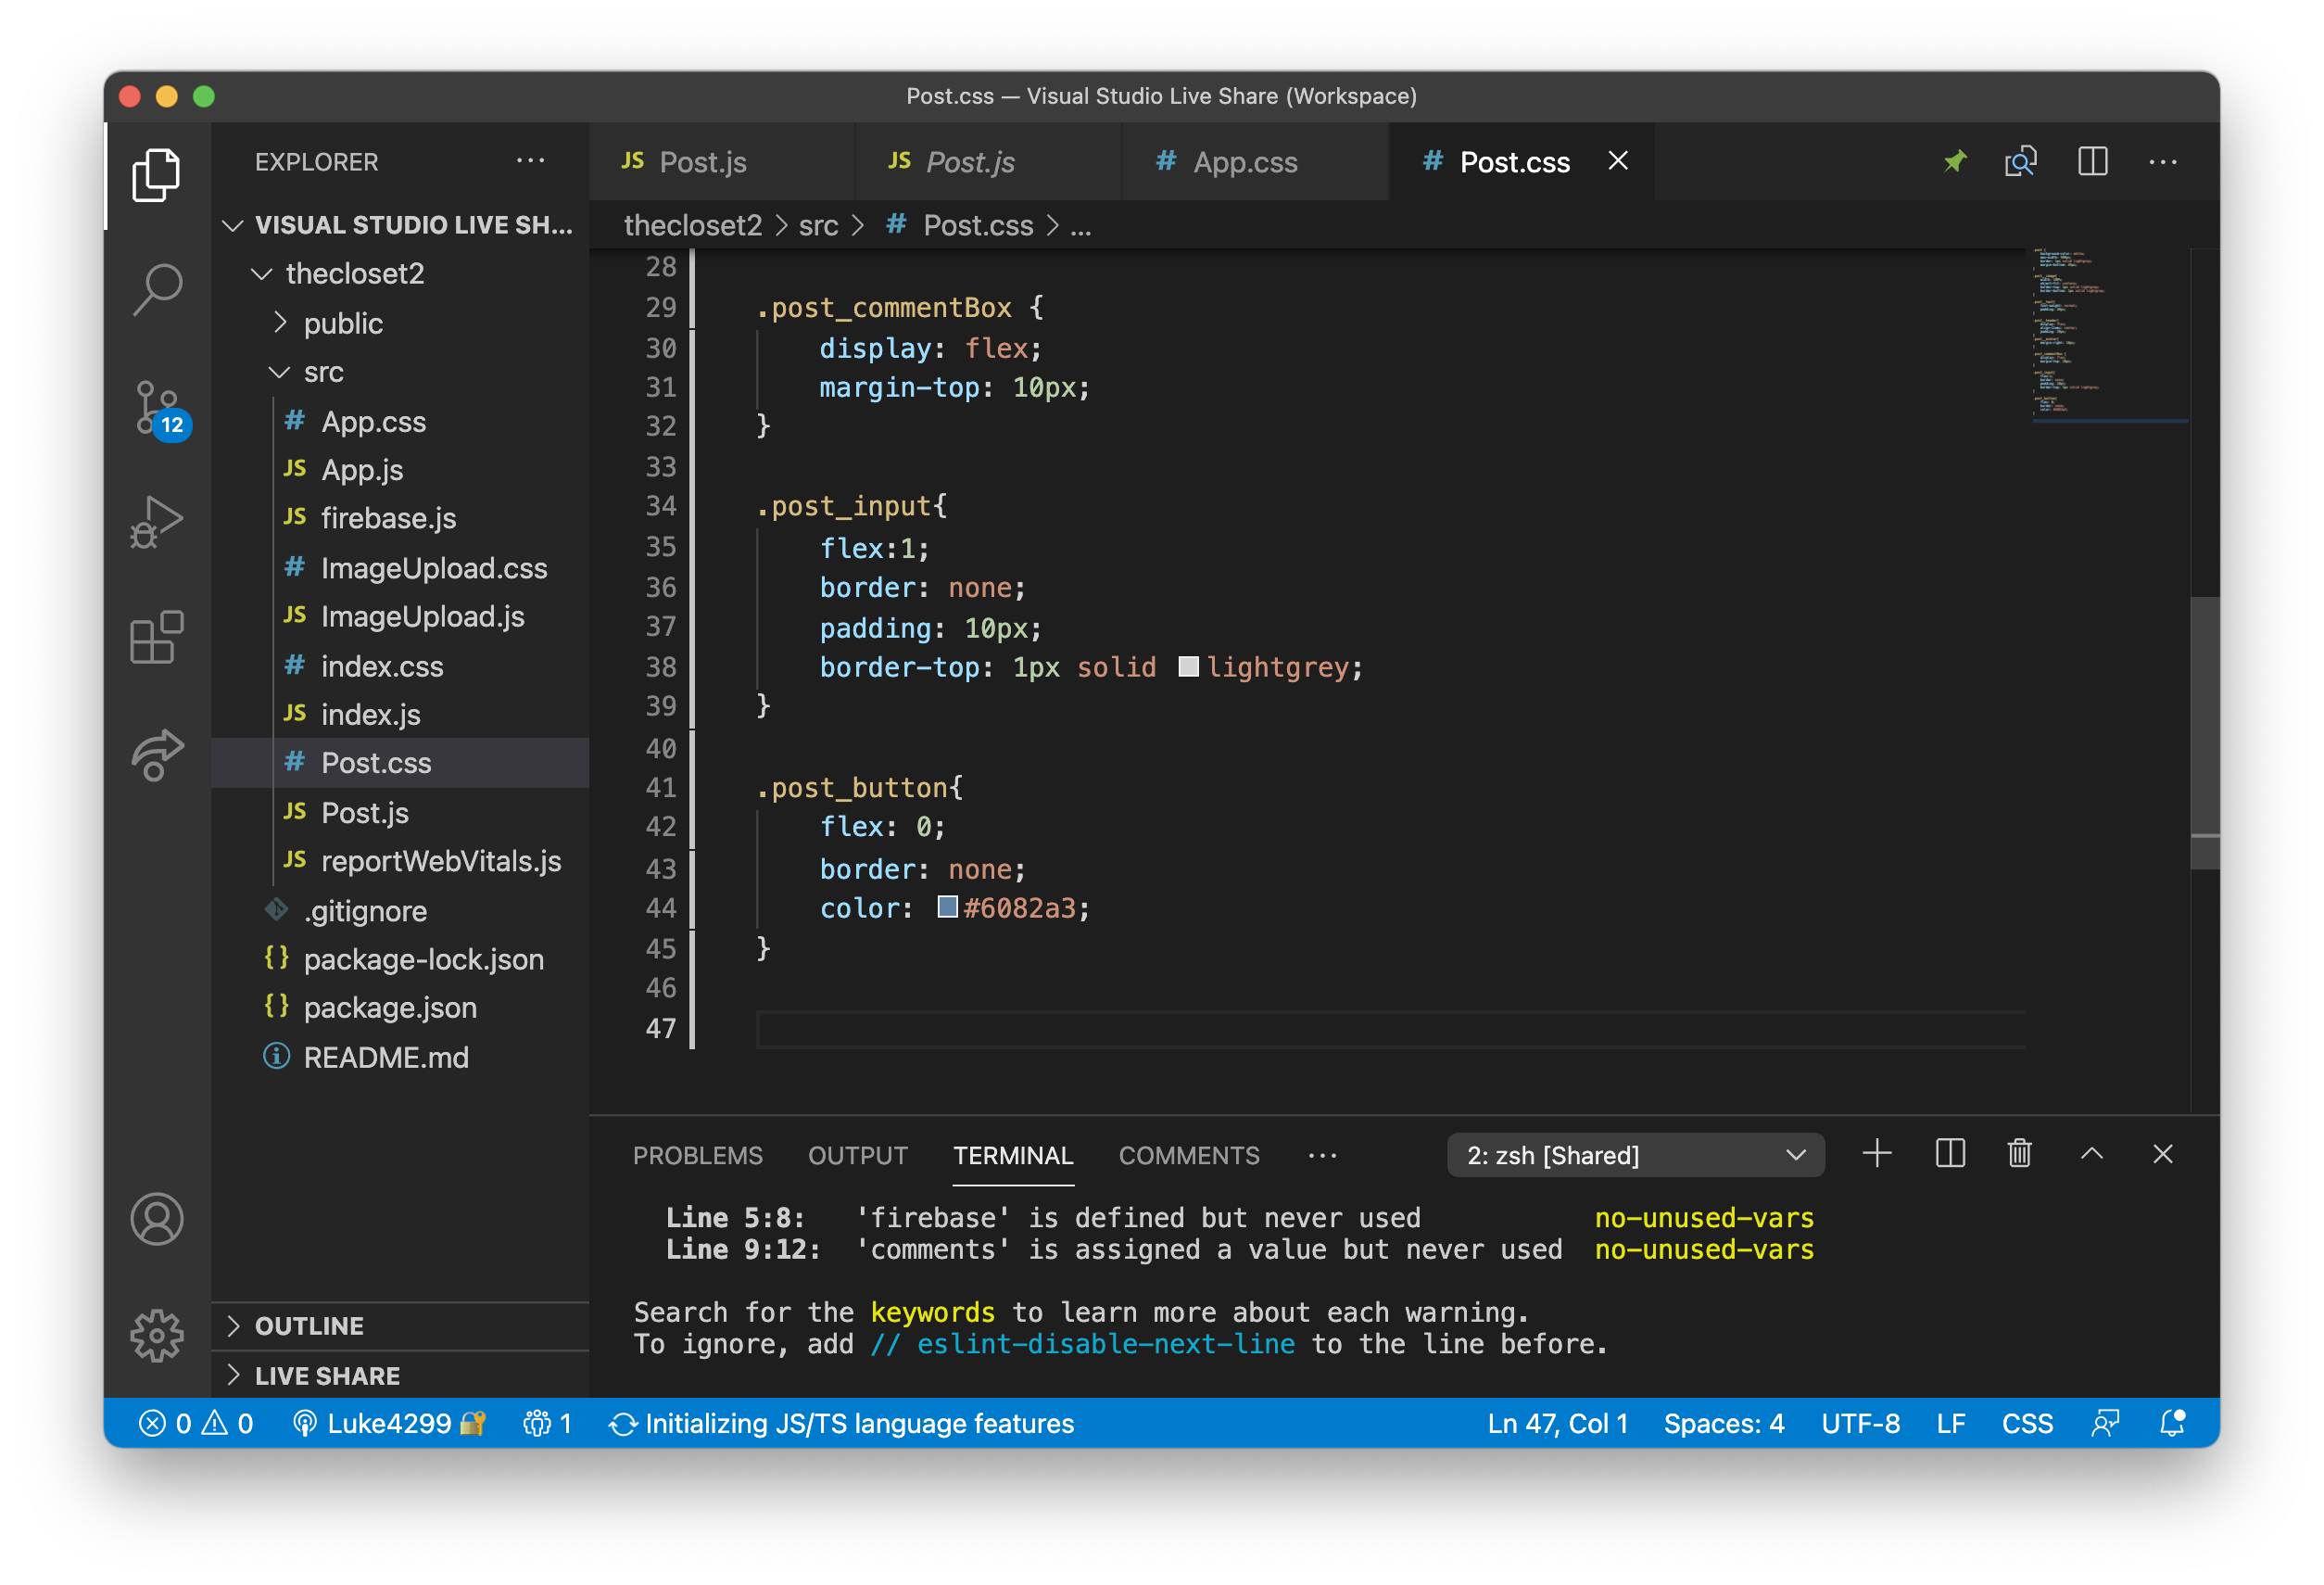
Then I wrote out post_button which and I then wrote flex 0, that allocates a small part of the space to the button.
I also gave a blue colour to the comment box aswell as the post button to give it more of a instagram lookalike feel.

On the left is the three comment box with the blue writing for post as well as the placeholder text saying add a comment. This is very attractive to the user as it showcases what the user should do and gives more of a social media feel to the application.
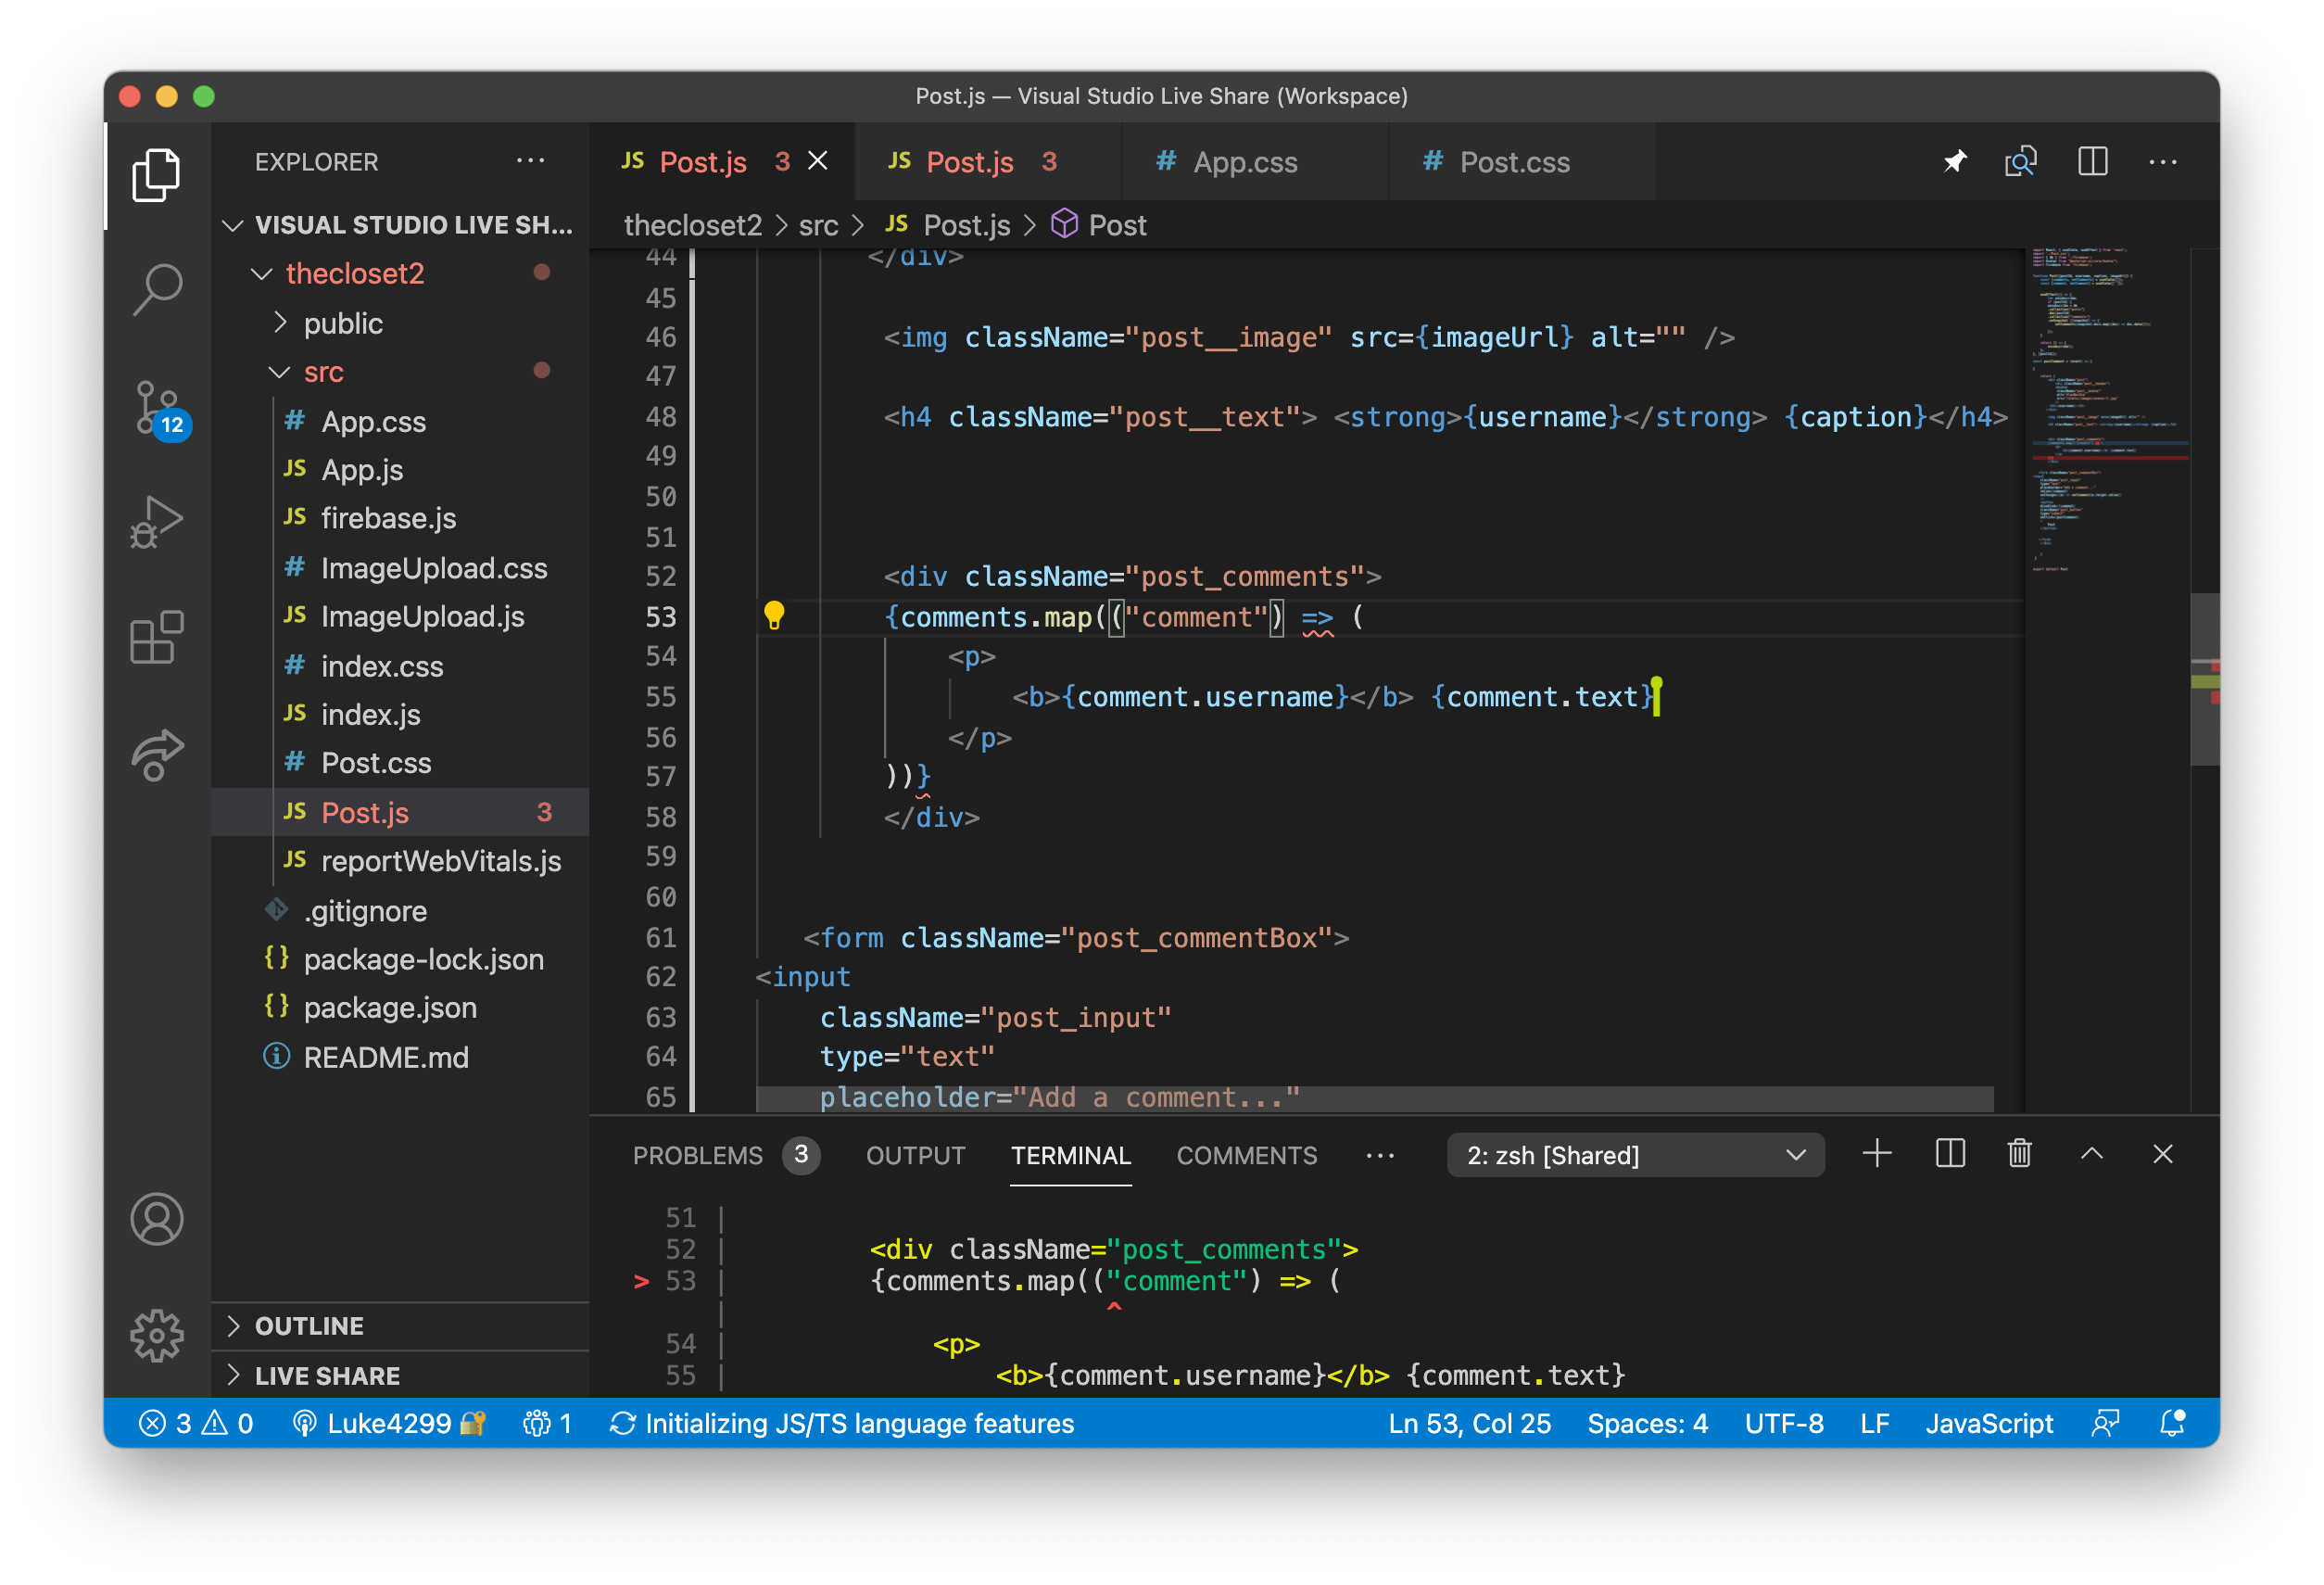
Next i wrote on line 53 comments.map(("comment"), which maps through each comment and converting it to a P tag with the username and the text of that comment. This is the same as the database.
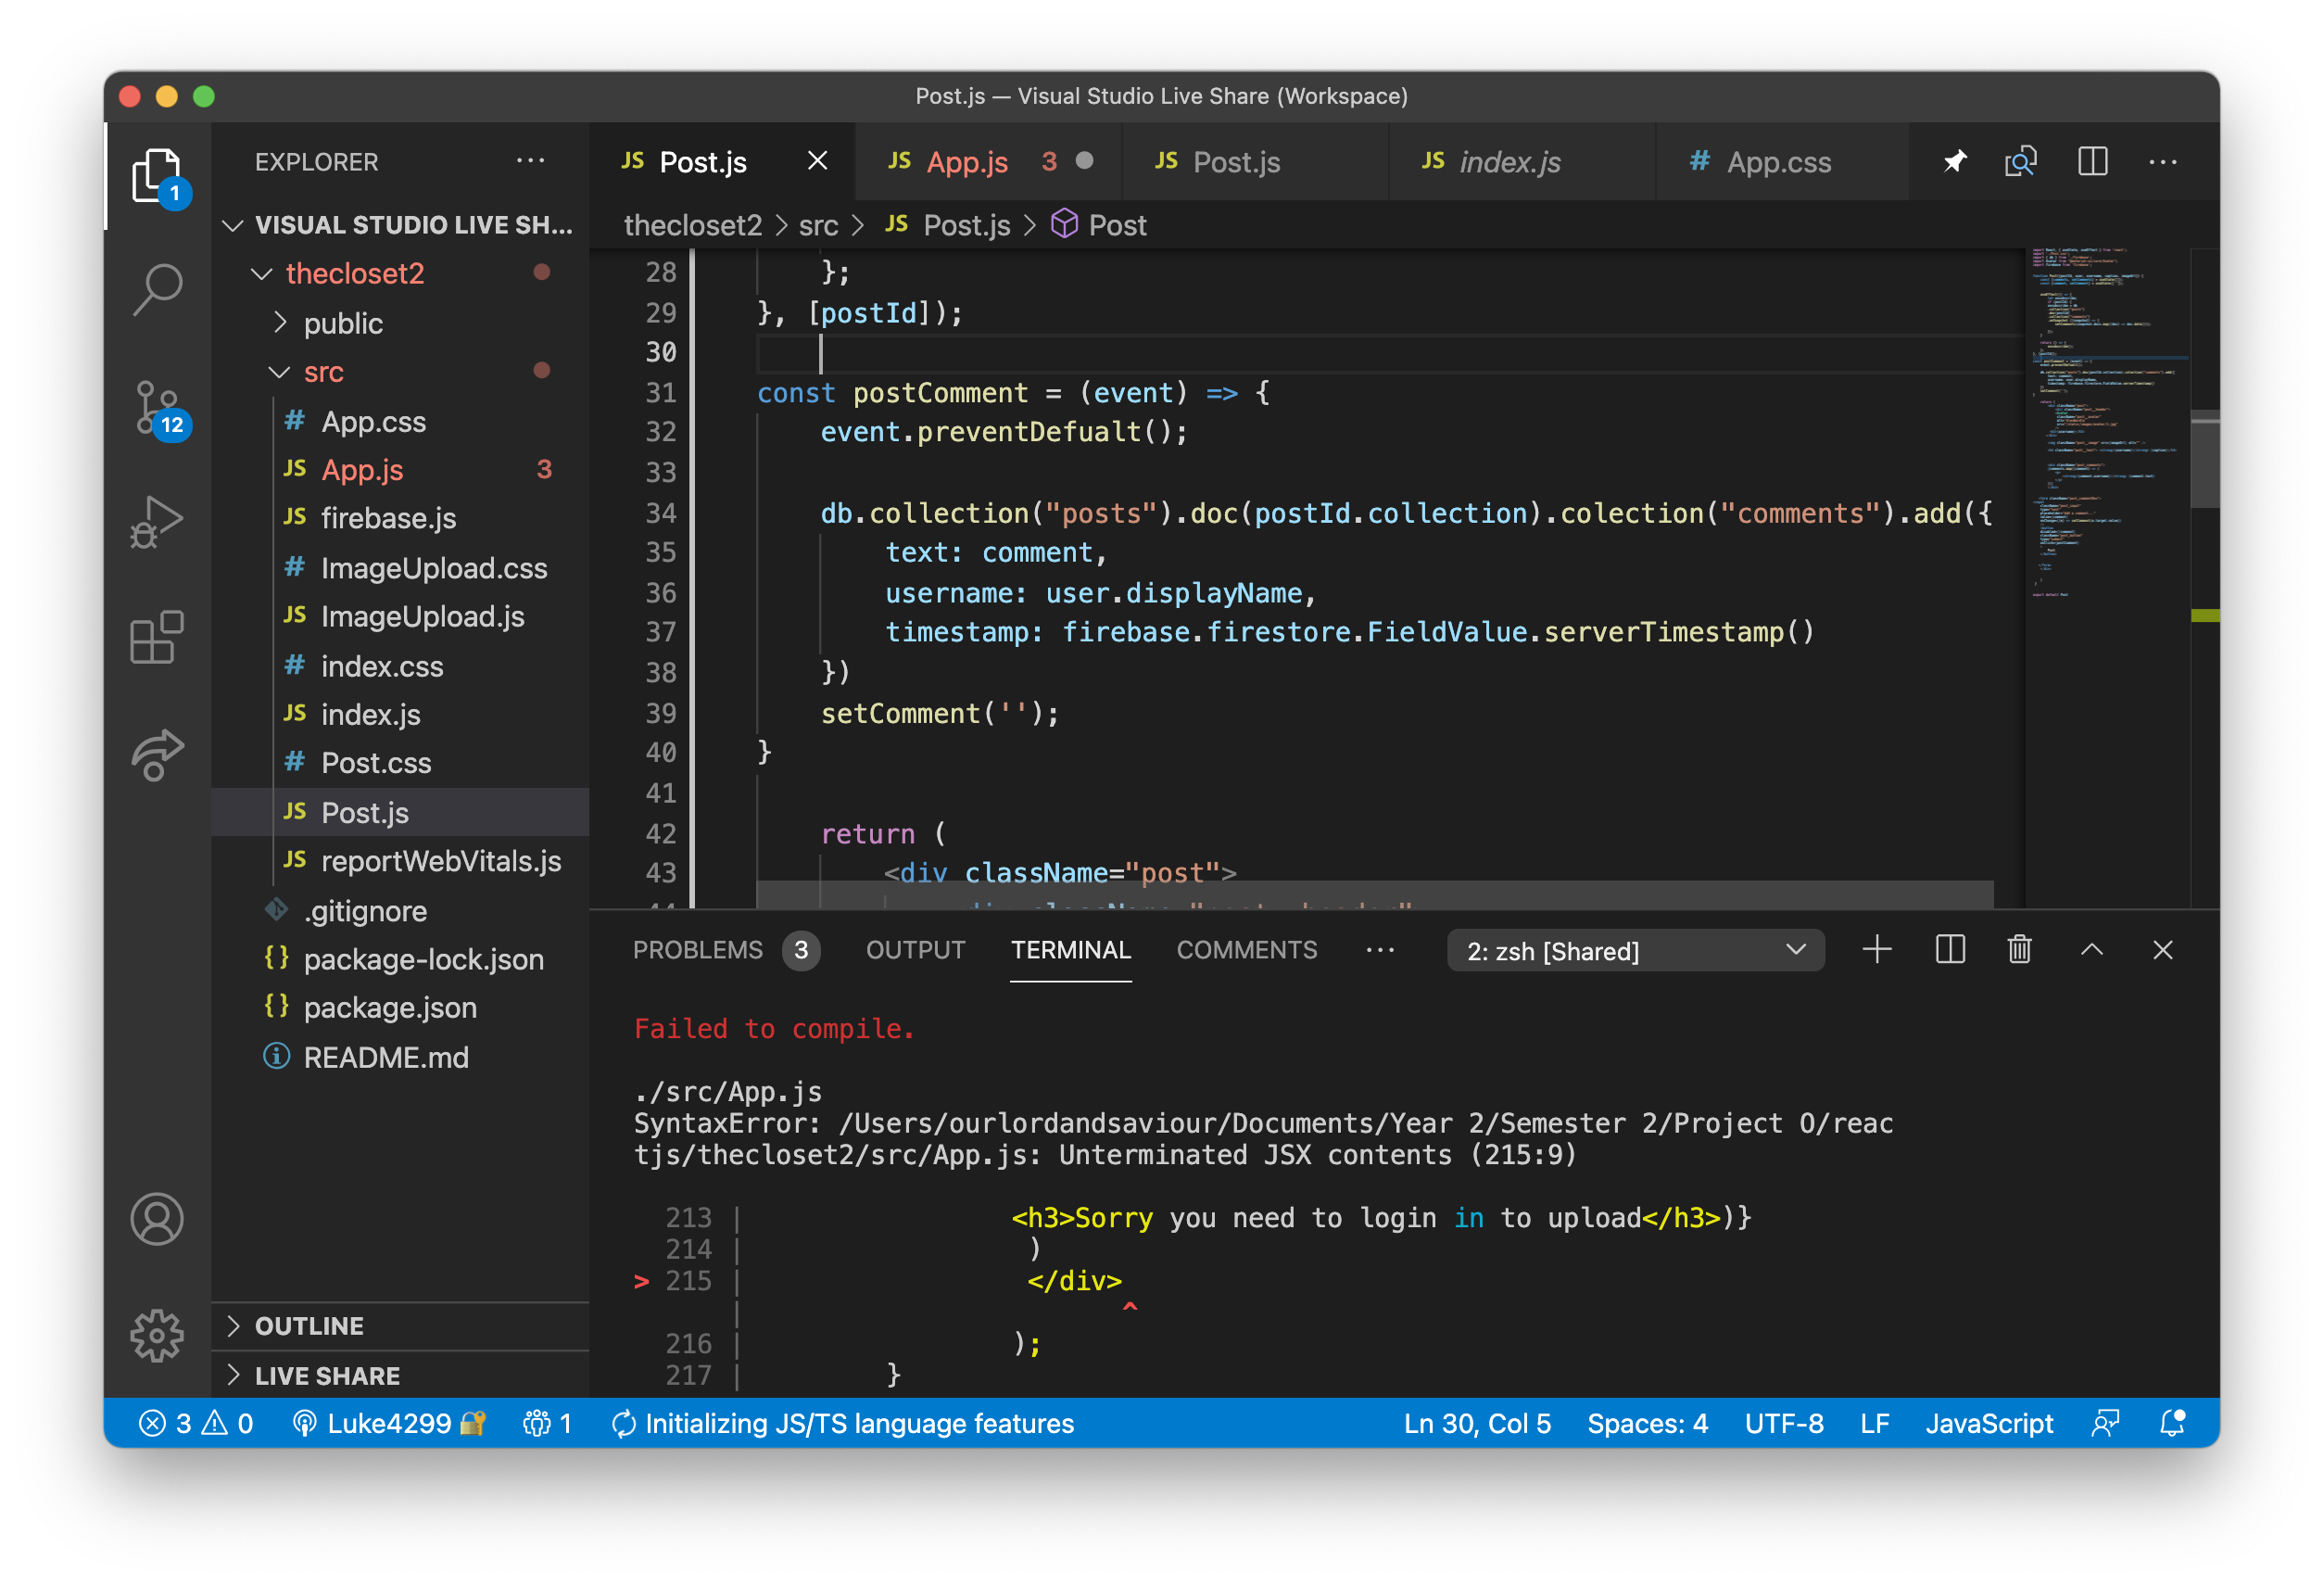
3:18:01 next I went into post.JS to enable the comment to offically post the comment. I therefore wrote event.preventDefault and on line 34 i mapped out the route that to gain access to the infomation with the comments.
db.collection- is tje first step to getting into the databse collection. Then ("posts").doc.(postID)- then gains access to the collection of posts and then finally into the specfic postId.
Then i added in the key value field with the text outputting the user's display name. Finally i wrote setComment('') which clears the comment input box when the comment has been posted.
On line 203 i passed through the user in order to get the user's name who signed in.
I then did the same on post.js to pass through the signed in user. At this point we have passed throught the user that has wrote the post and we have passed through the user that has signed in, as seen on line 9.
Then i added OrderBy('timestamp', 'desc') to enable the comments to be ordered in a descending fashion by the time that they were posted by.
In order for the comments to sorted by timestamp order, i had to re add the collection in the firebase within the comments, that can now automatically push the new comments with timestamps into the database, without having re-add the text and the username that i did last time further above as the comments are auto incremented into the firebase database.
Finished commenting system
After much trial and error, the with trying to make the commenting system operational, the comments were then able to be added to the application!
Section 6- Sidebar intergration
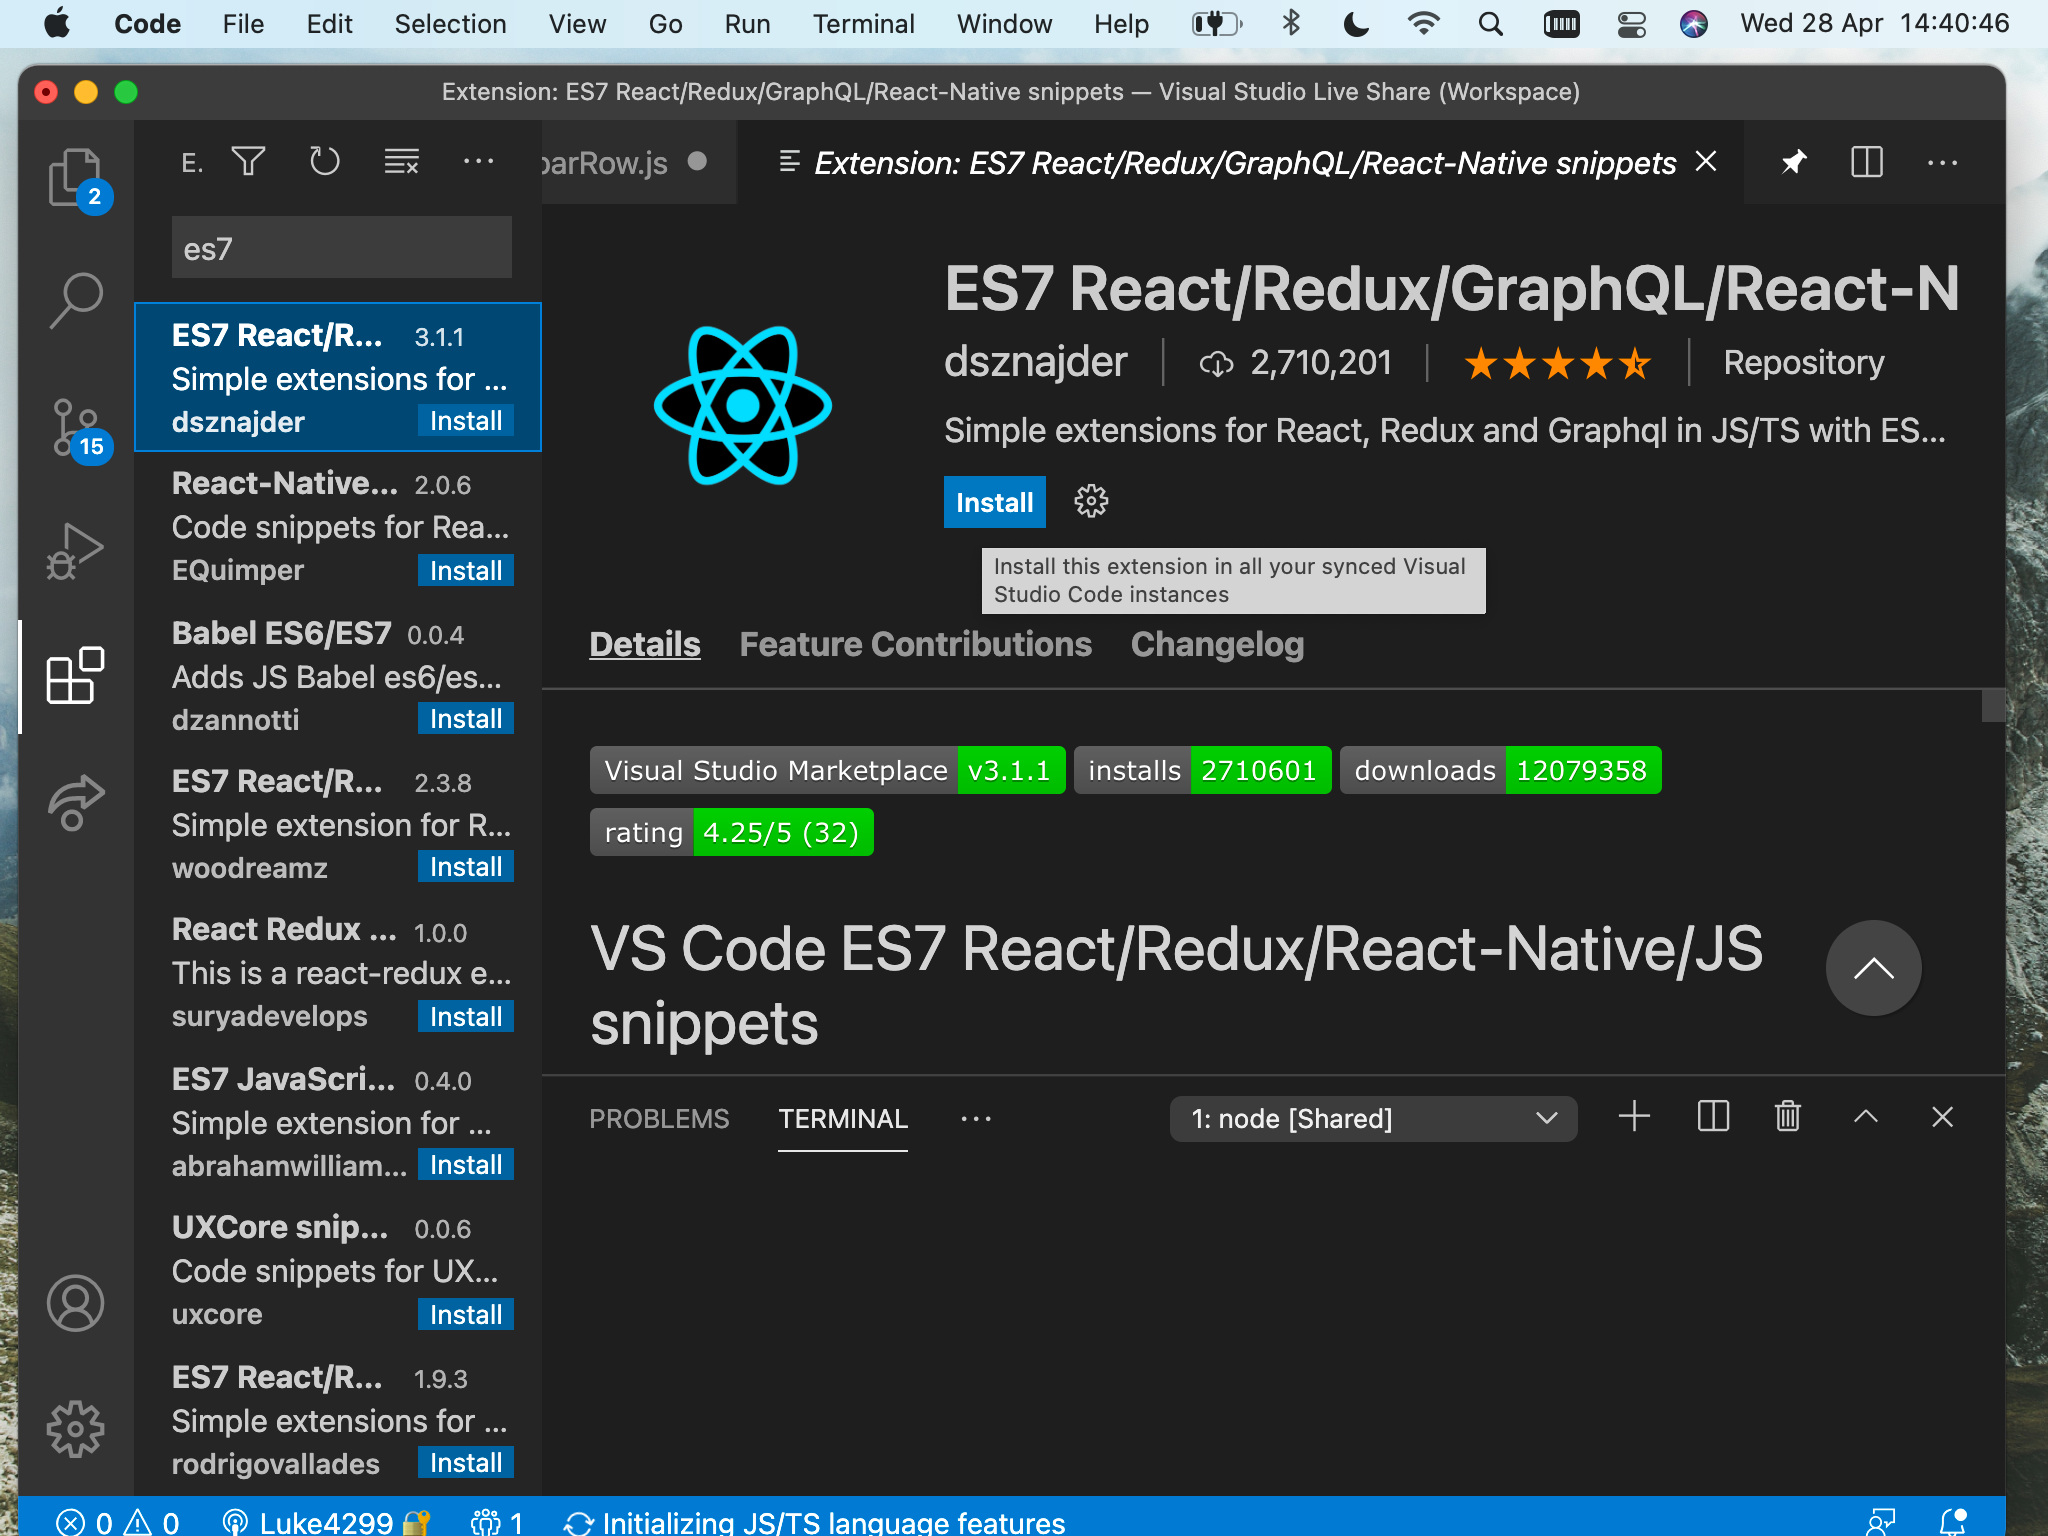
In order to speed up the process of the development of the sidebar, i downloaded ES7 code snippets are code snippets, designed to implement short codes quicker.
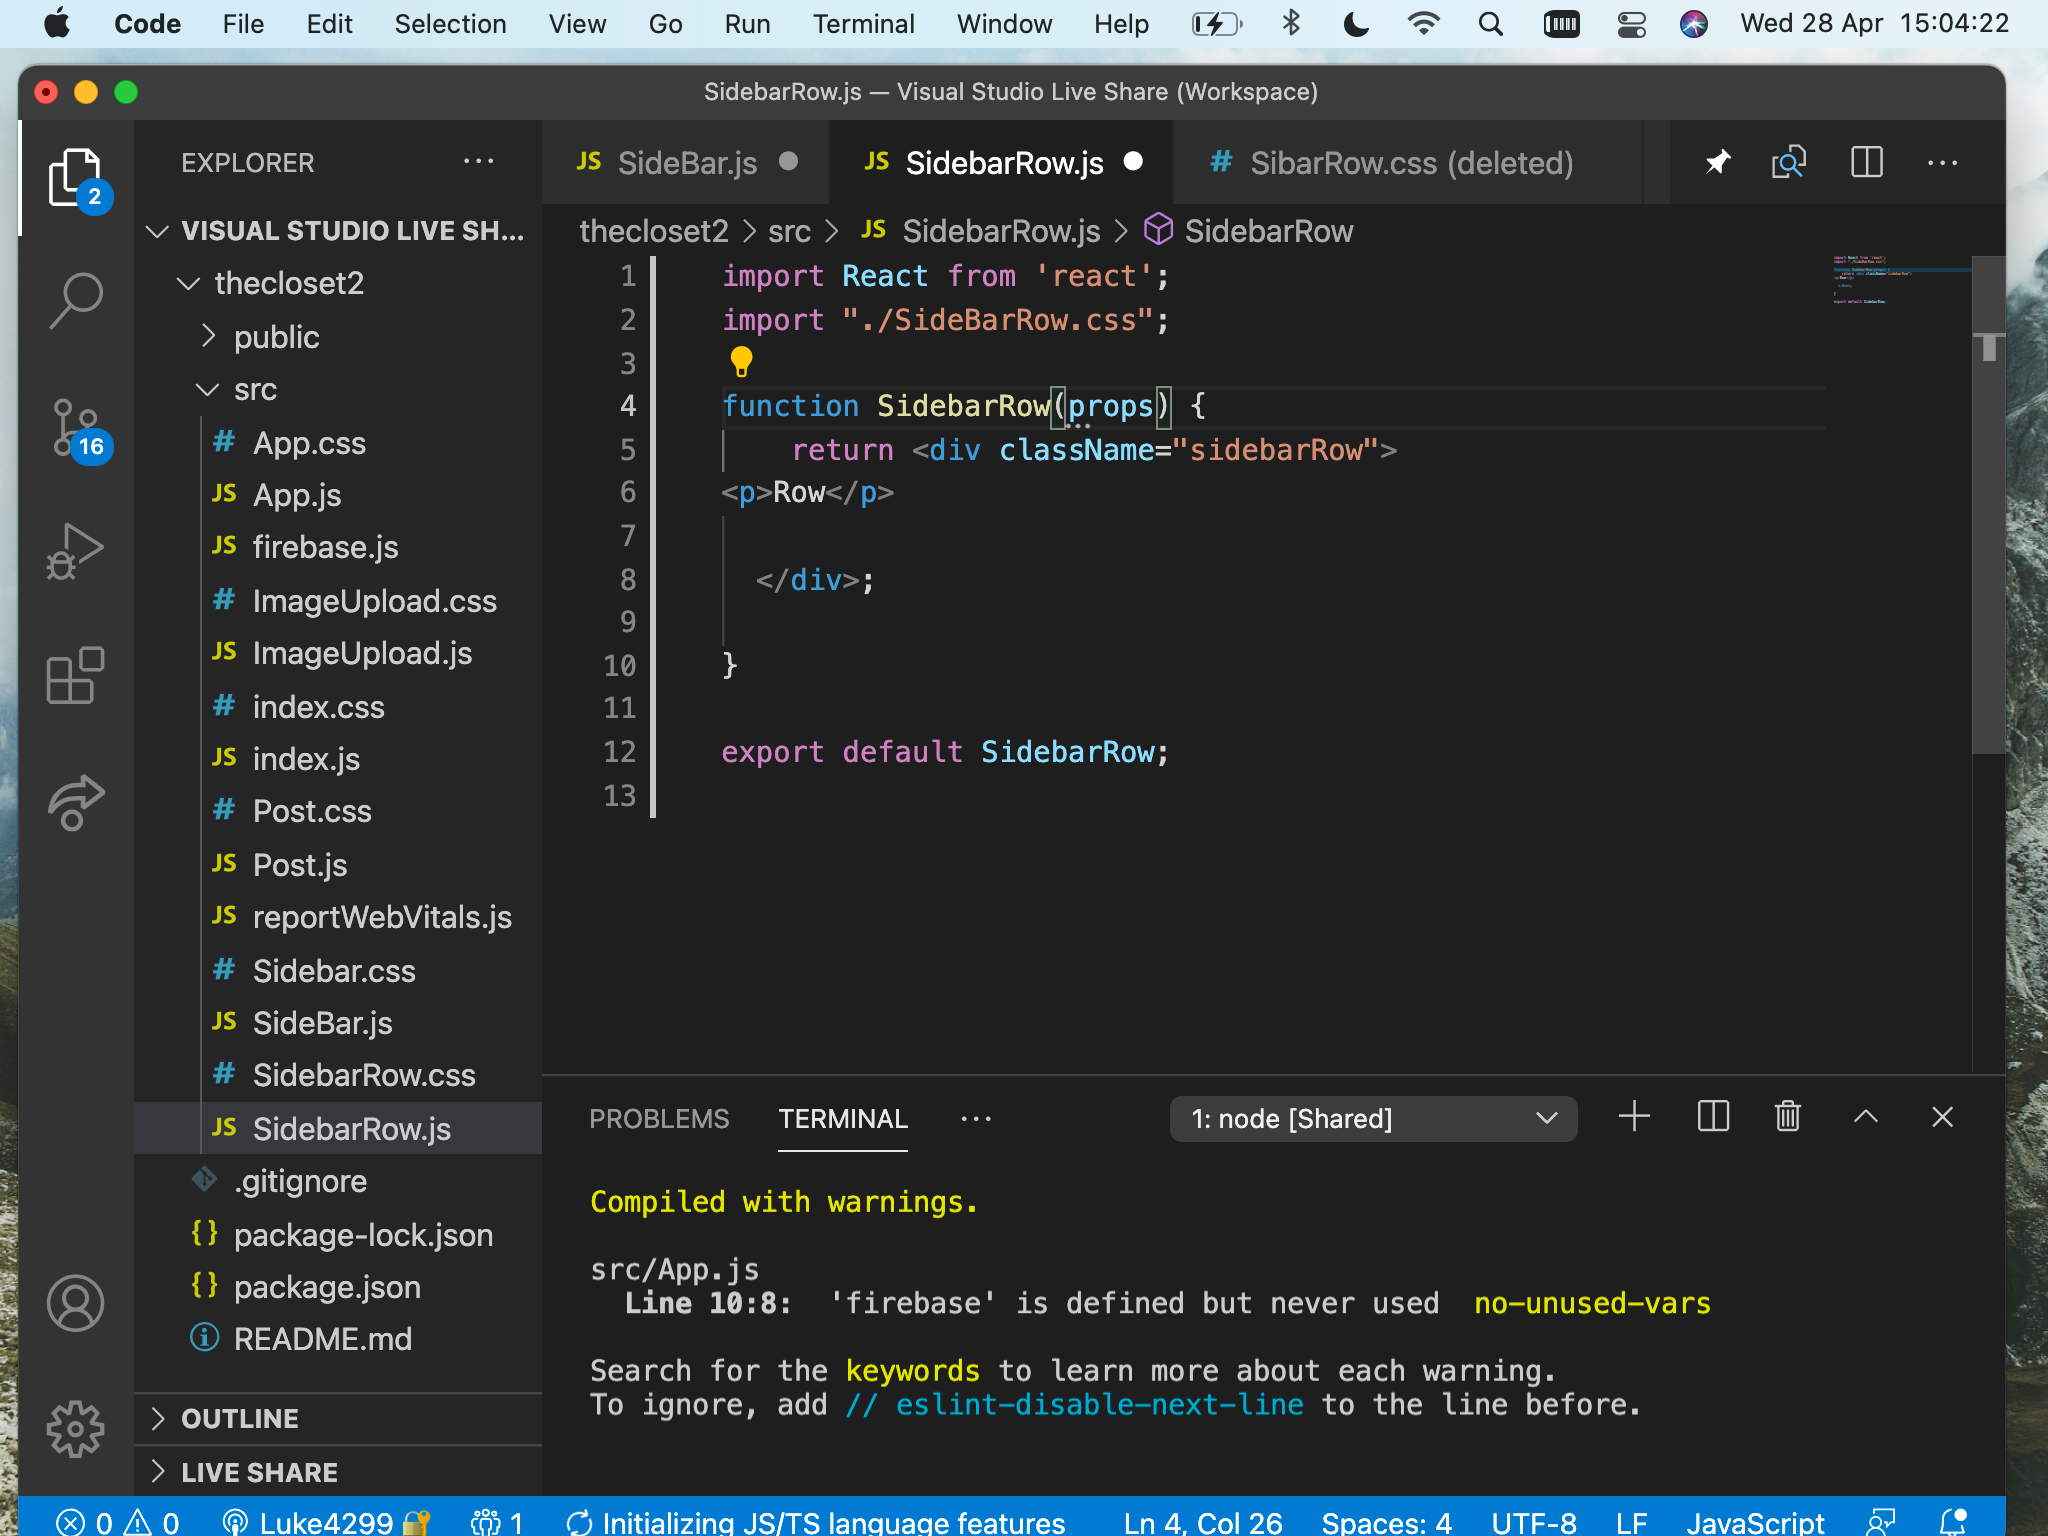
By typing in rfce (create a react function) it automatically adds the layout of the function to the SidebarRow.js. I also did the same when creating sidebar.js
Next i imported SidebarRow.css, to enable the sidebar to be customised, as well as creating a class name called SidebarRow.
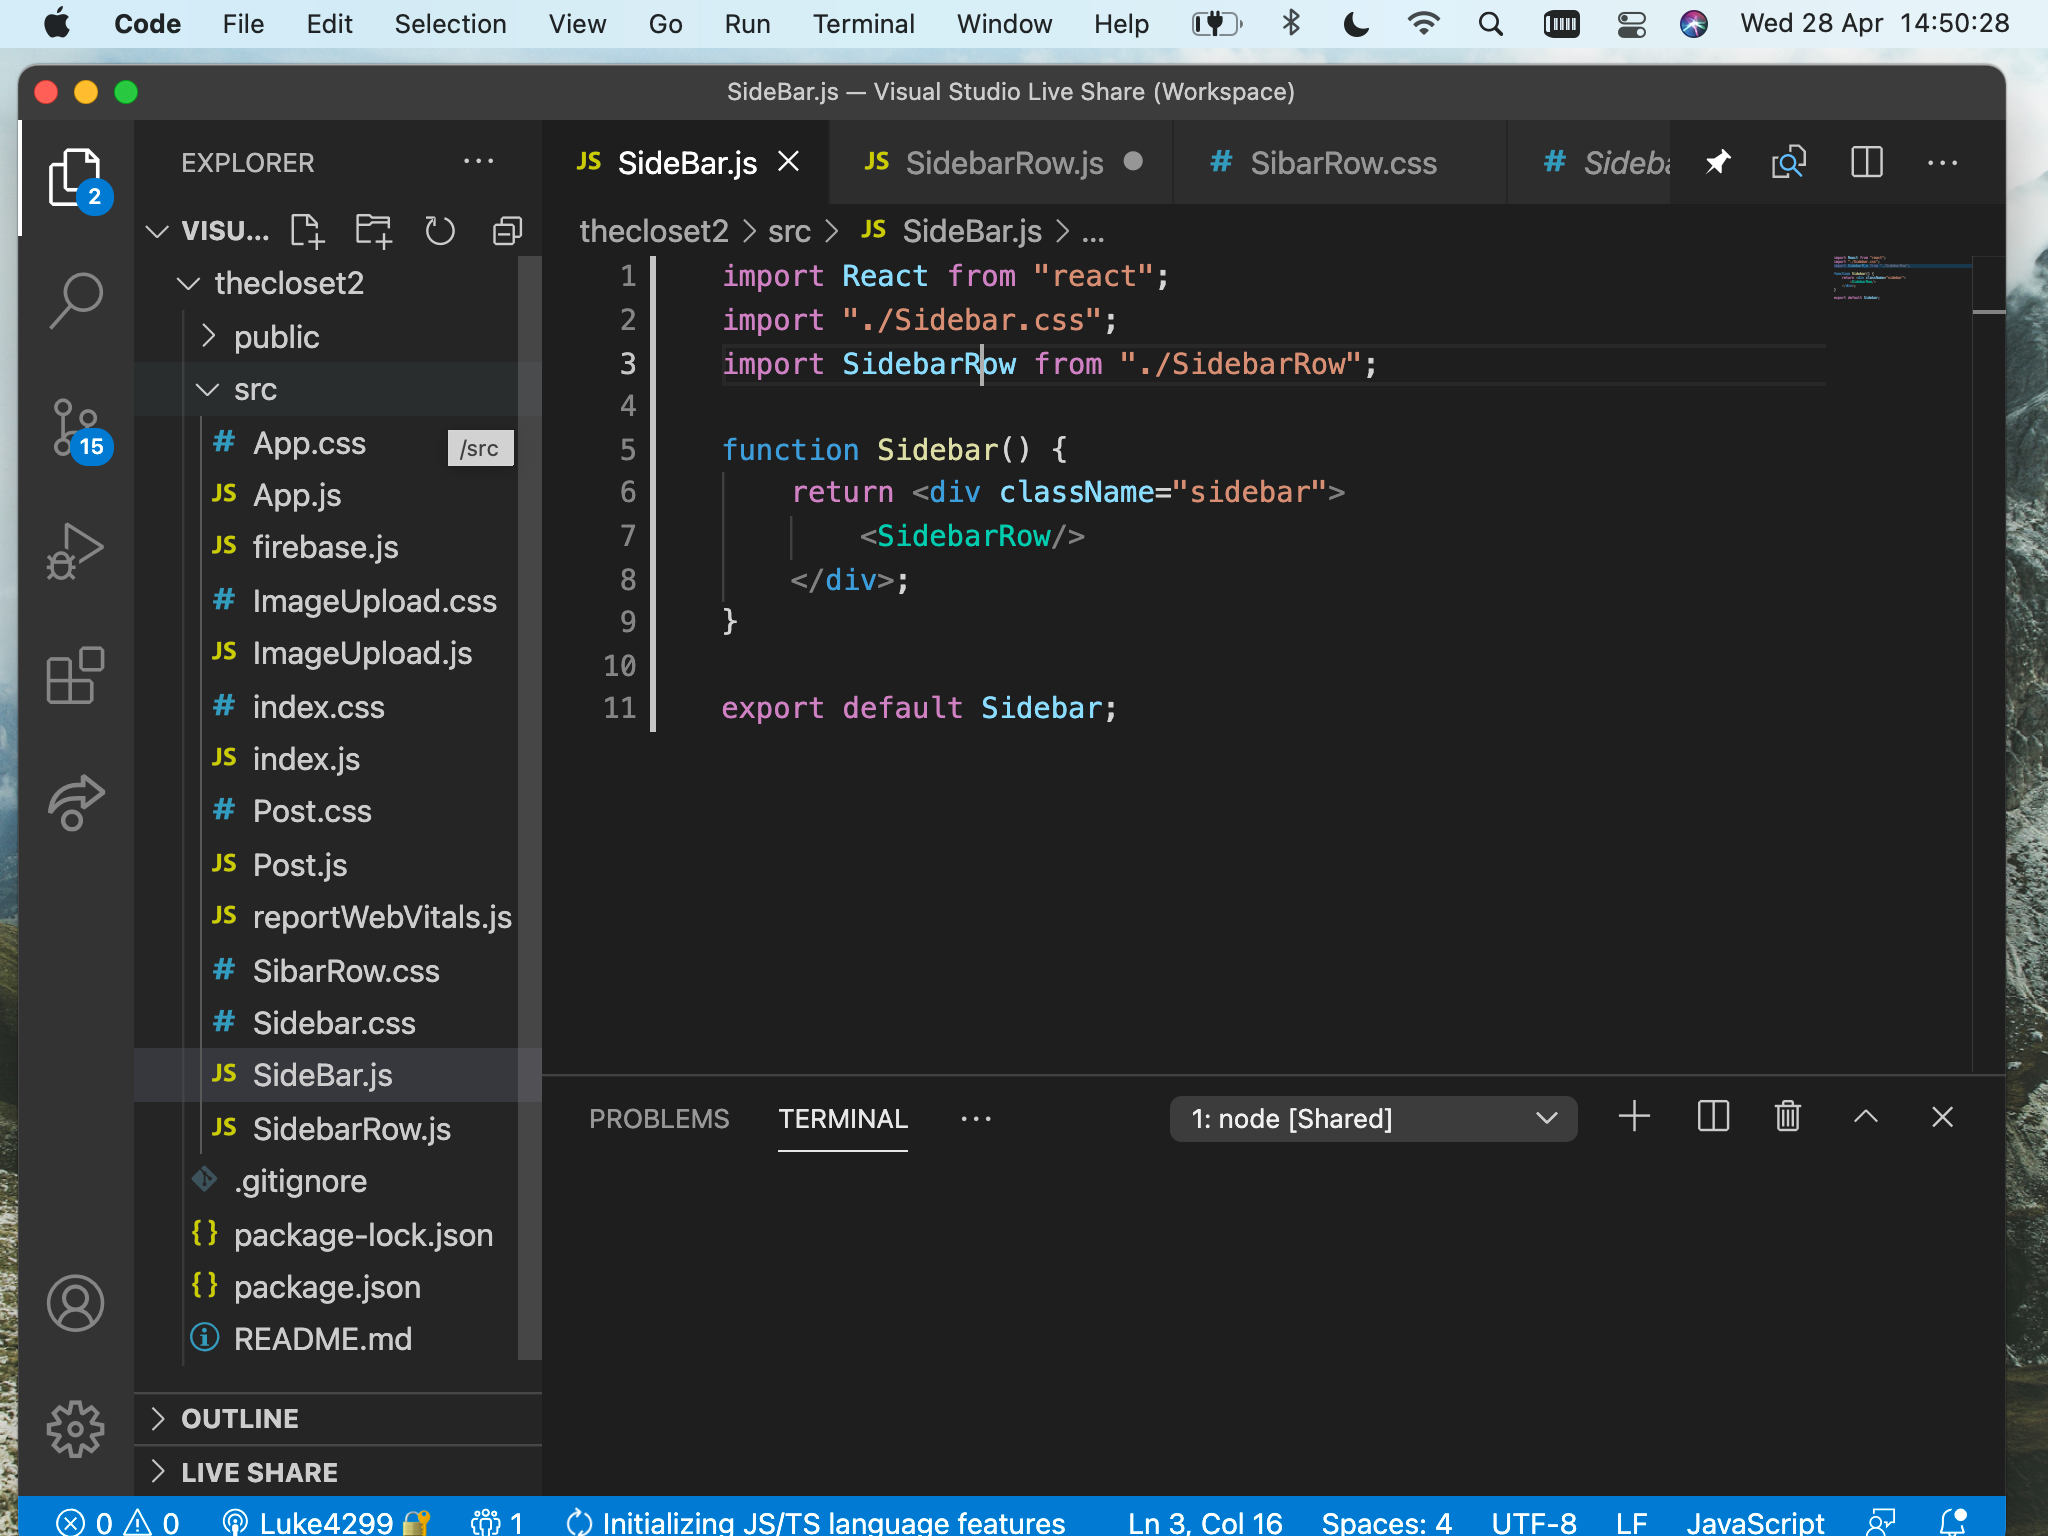
Next in sidebar.js i imported SideBarRow.js in order to incorperate SideBarRow.js's functions. Then in sidebarrow.js, i made a class name called Sidebar and then wrote SidebarROW.
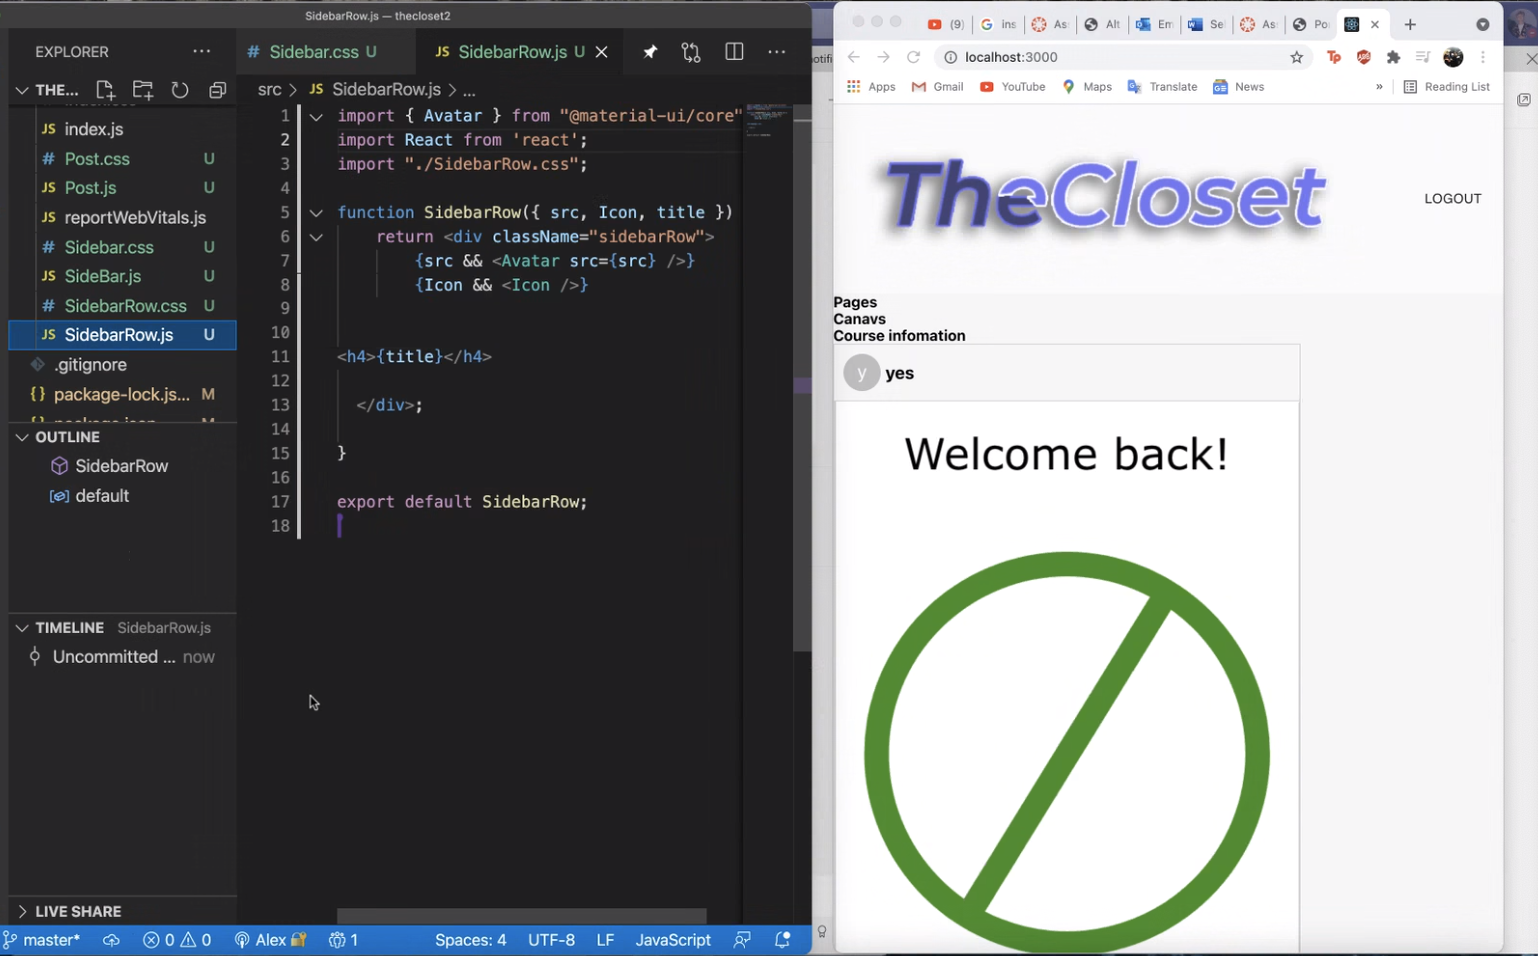
I then went back into SidebarRow.js and made a class called sidebarRow where i wrote out ROW in a p tag.
I then wrote out 'SidebarRow' and copied the SidebarRow multiple times.
Next within app.JSI then imported sidebar JS into the app to enable it to appear within the application.
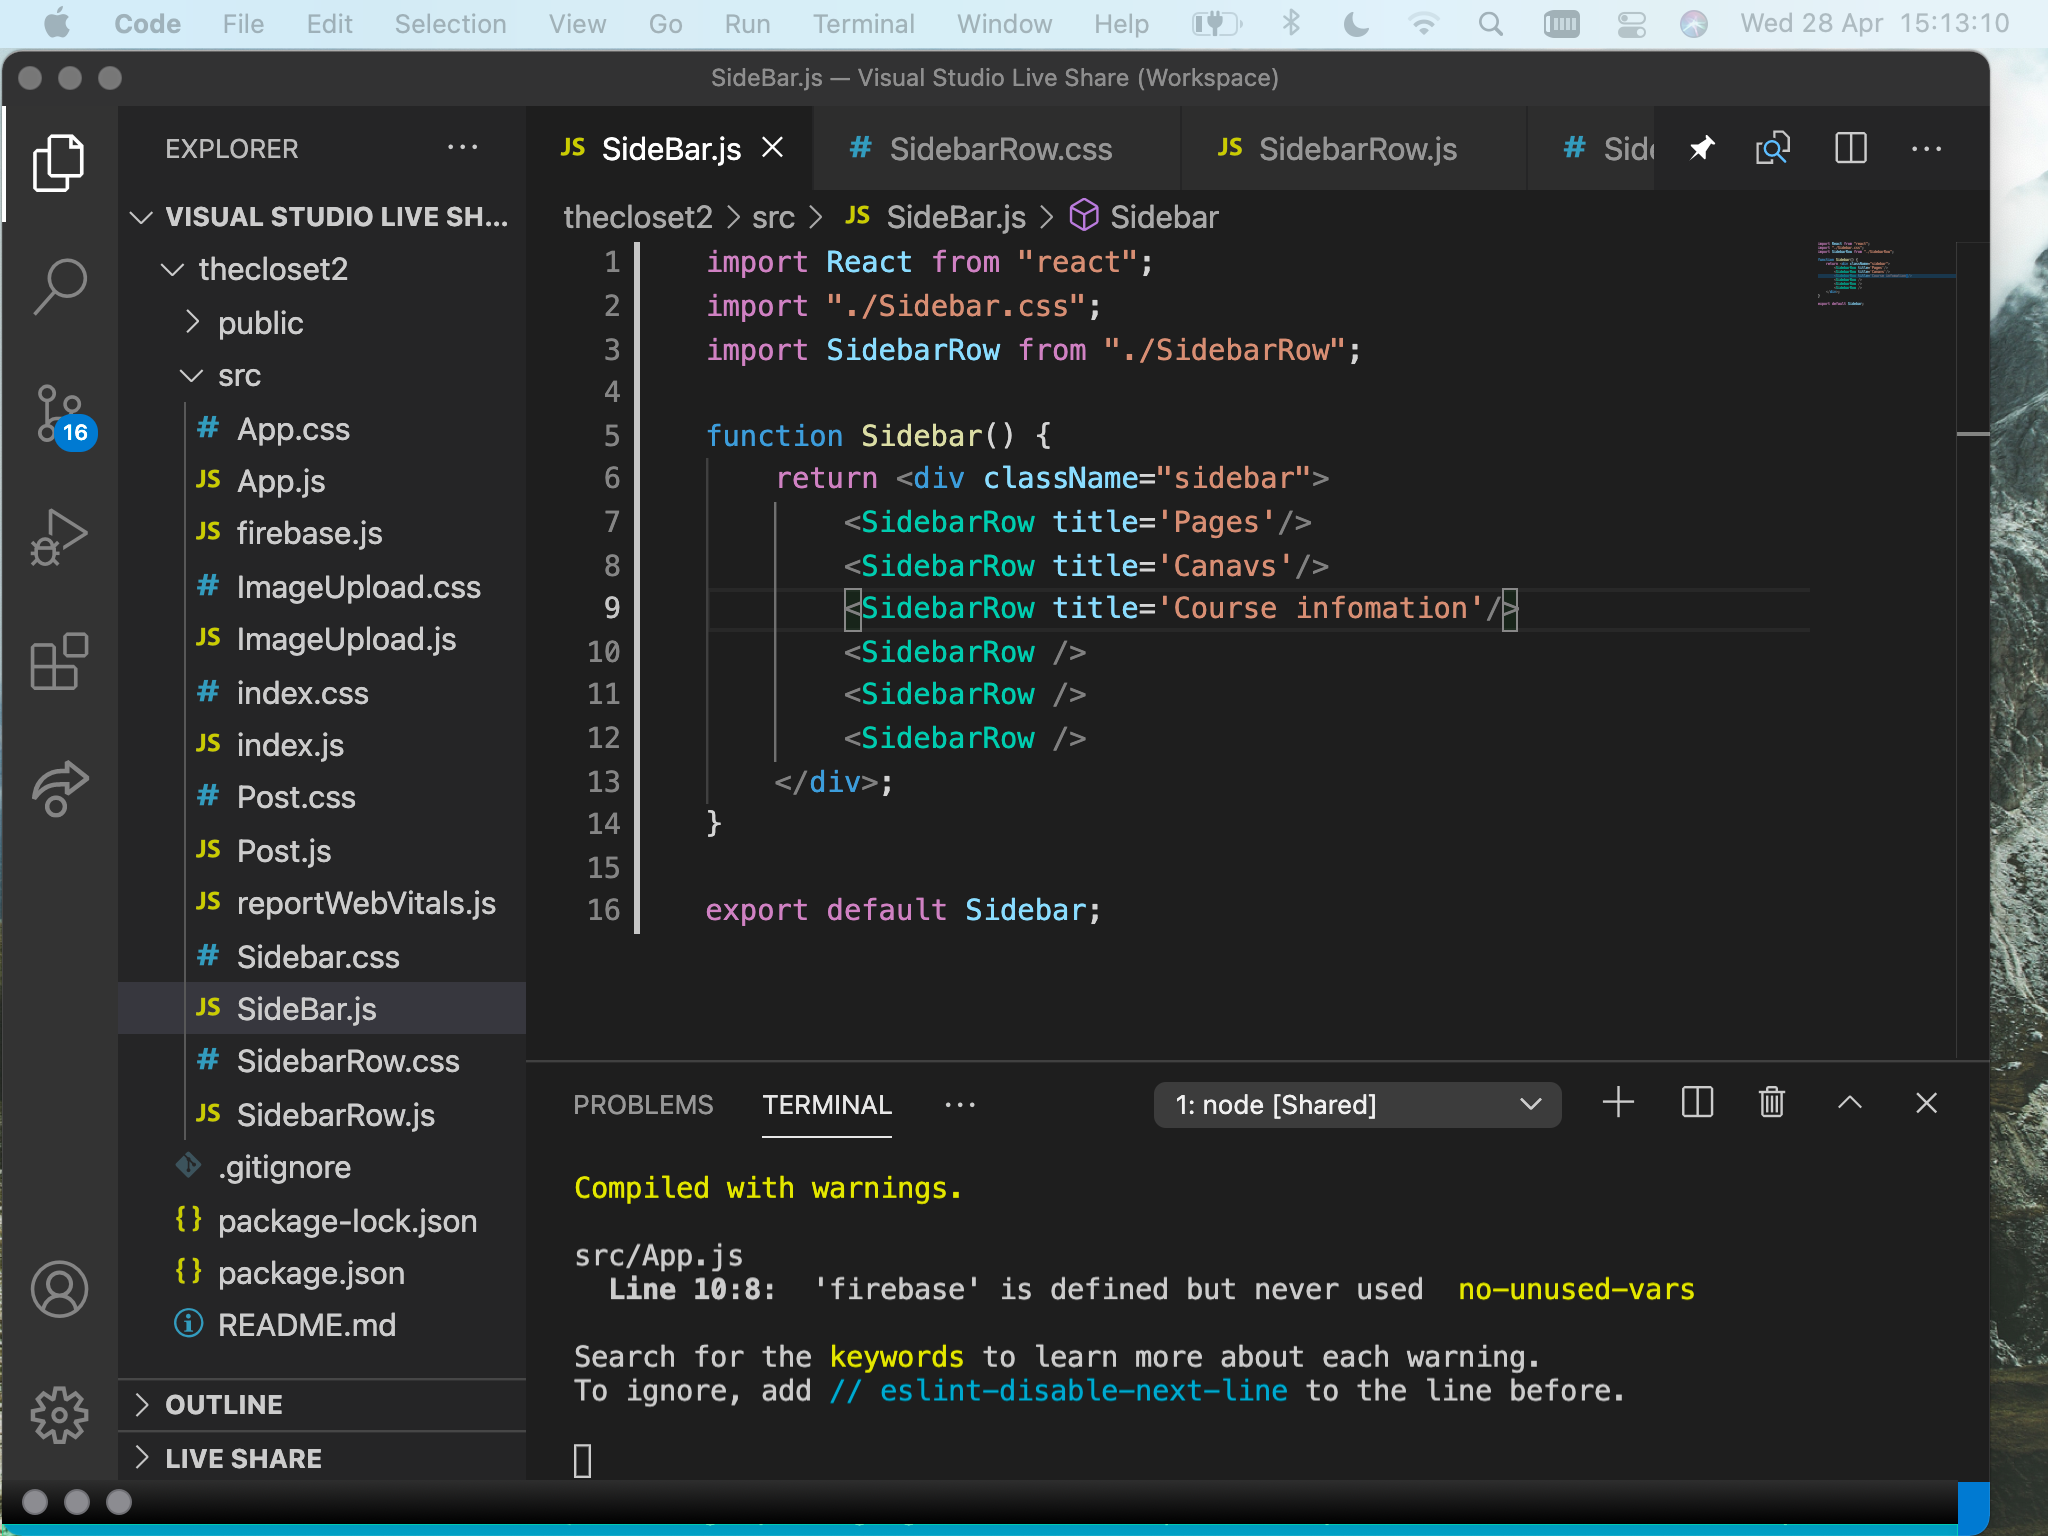
As you can see 'ROW' has been echoed multiple times as i wrote out "SidebarRow" multiple times. Inside sidebar row, i then added props that allows for the attributes to be passed in, such as titles.
I then added the attributes into the side borrow as titles such as pages canvas and course information, as these are titles that we would expect to see on an application focused on design students.
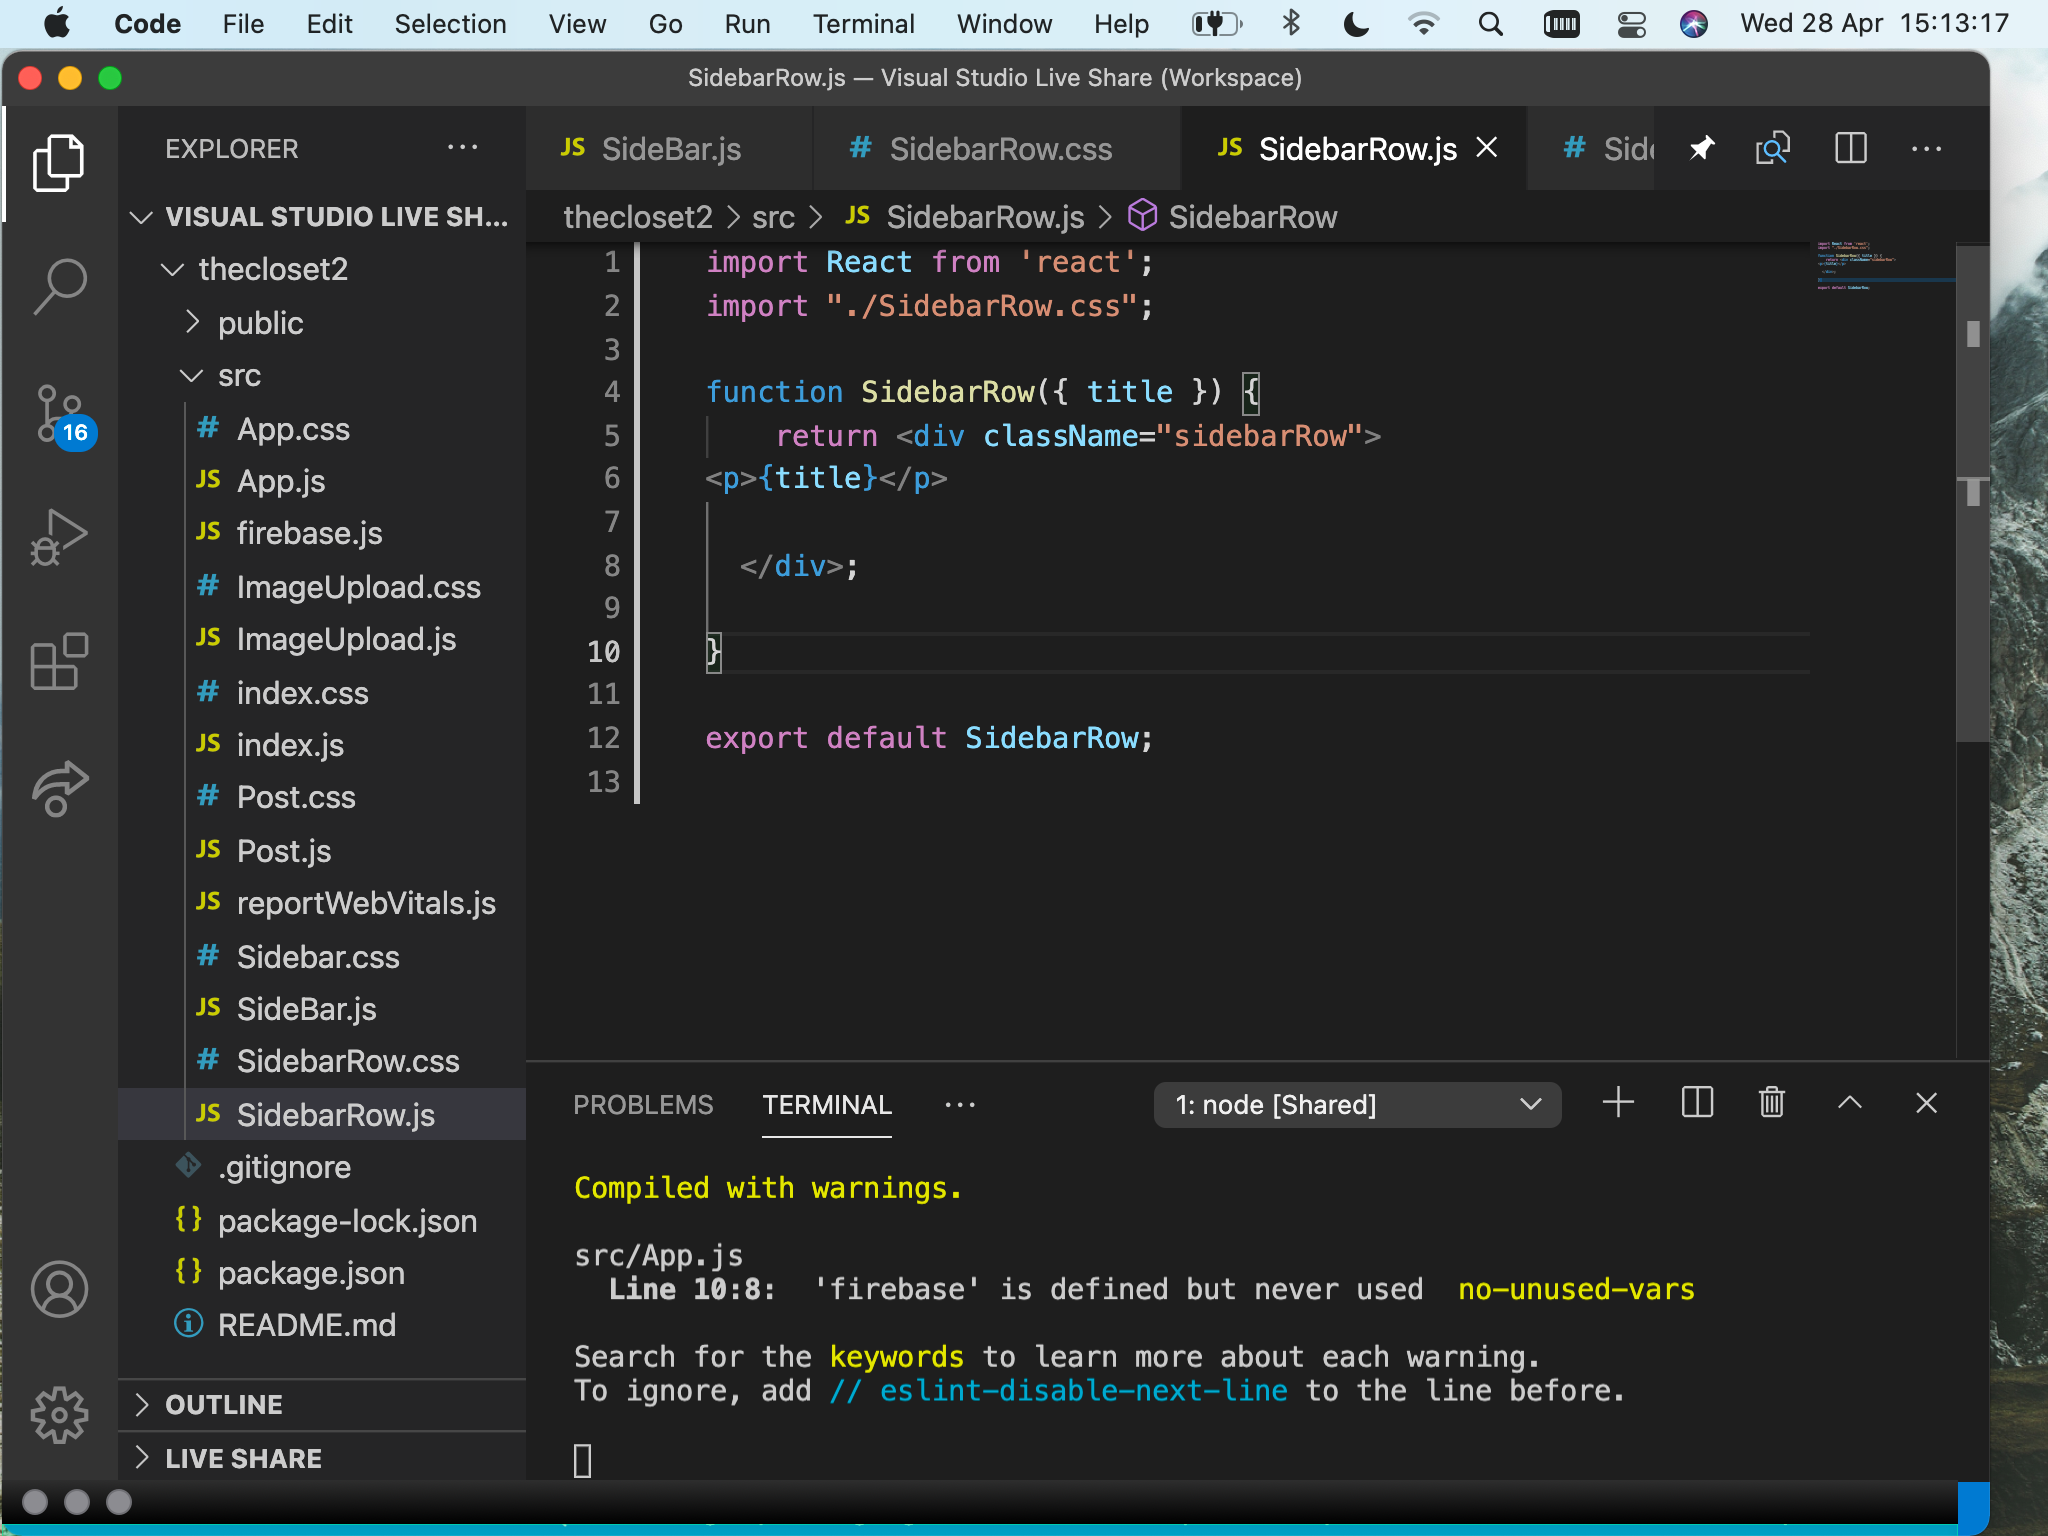
To smarten up the application i destructured the app (as this uses ES6) i can pull out the title on line 4 and add it to line 7 where the title is echoed.
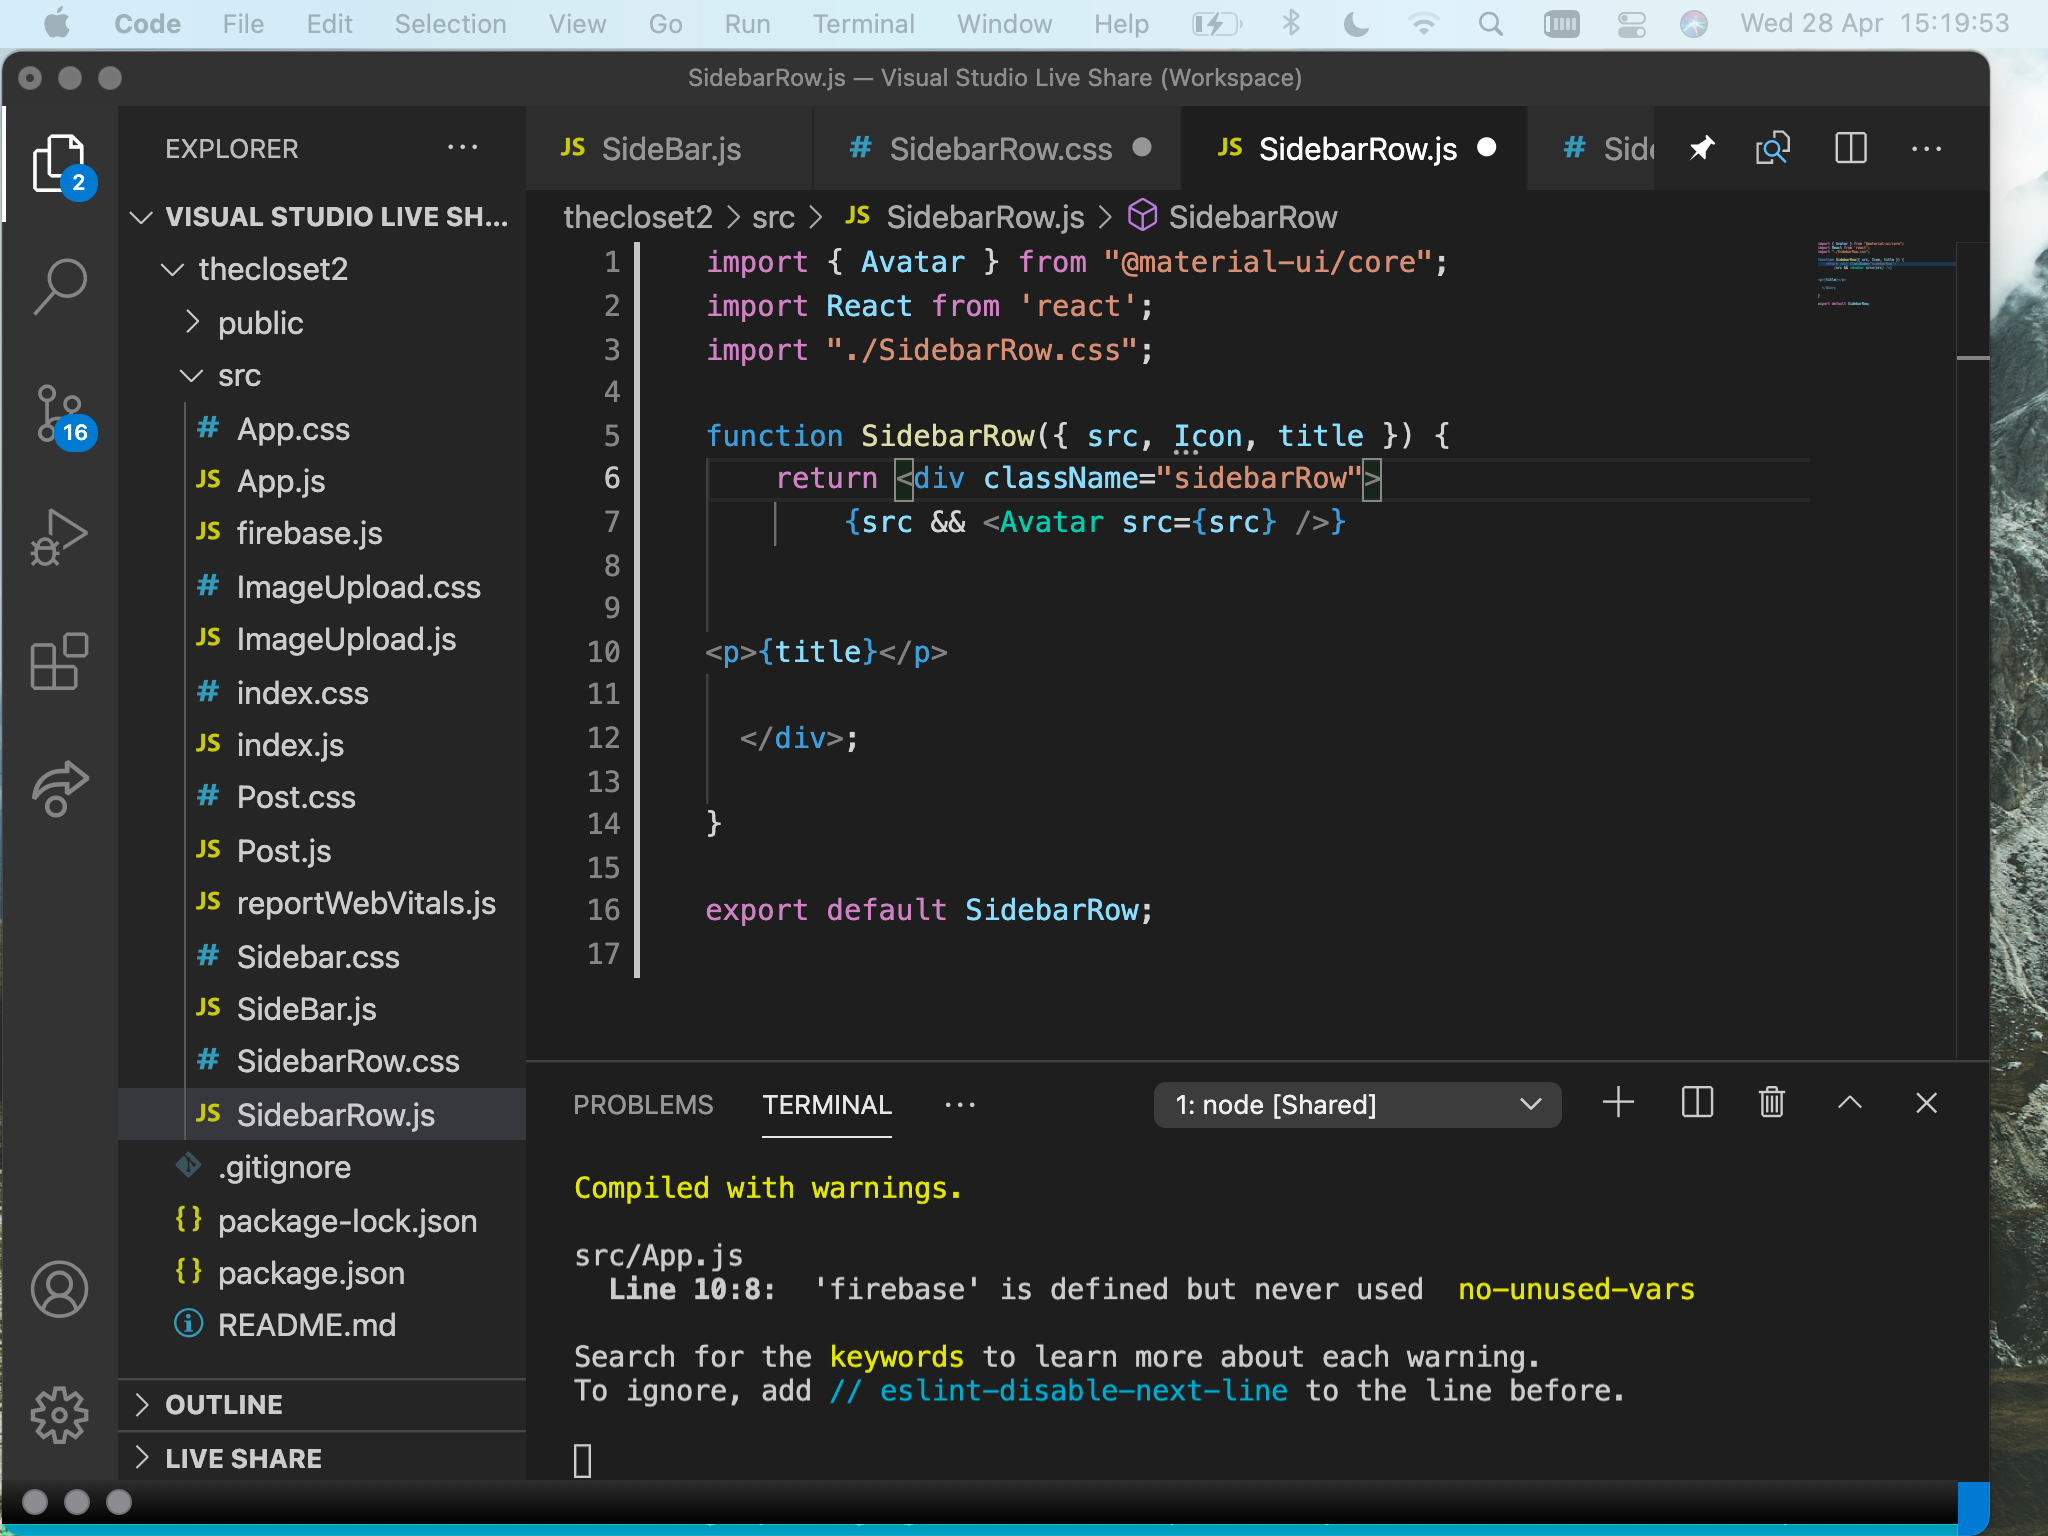
I then upgraded the component to intergrate more additions such as icons and sources.
Next in order to render icons and sources I pass them through on line seven and eight. In order for the avatar to be passed through I imported it above on line one. Icons on the other hand being a component aren't imported, but they are passed through as a prop. This is done by 'Icon' starting with a captial letter as it is a convention inside react, which is alsowhy the filename components start in captital letters.
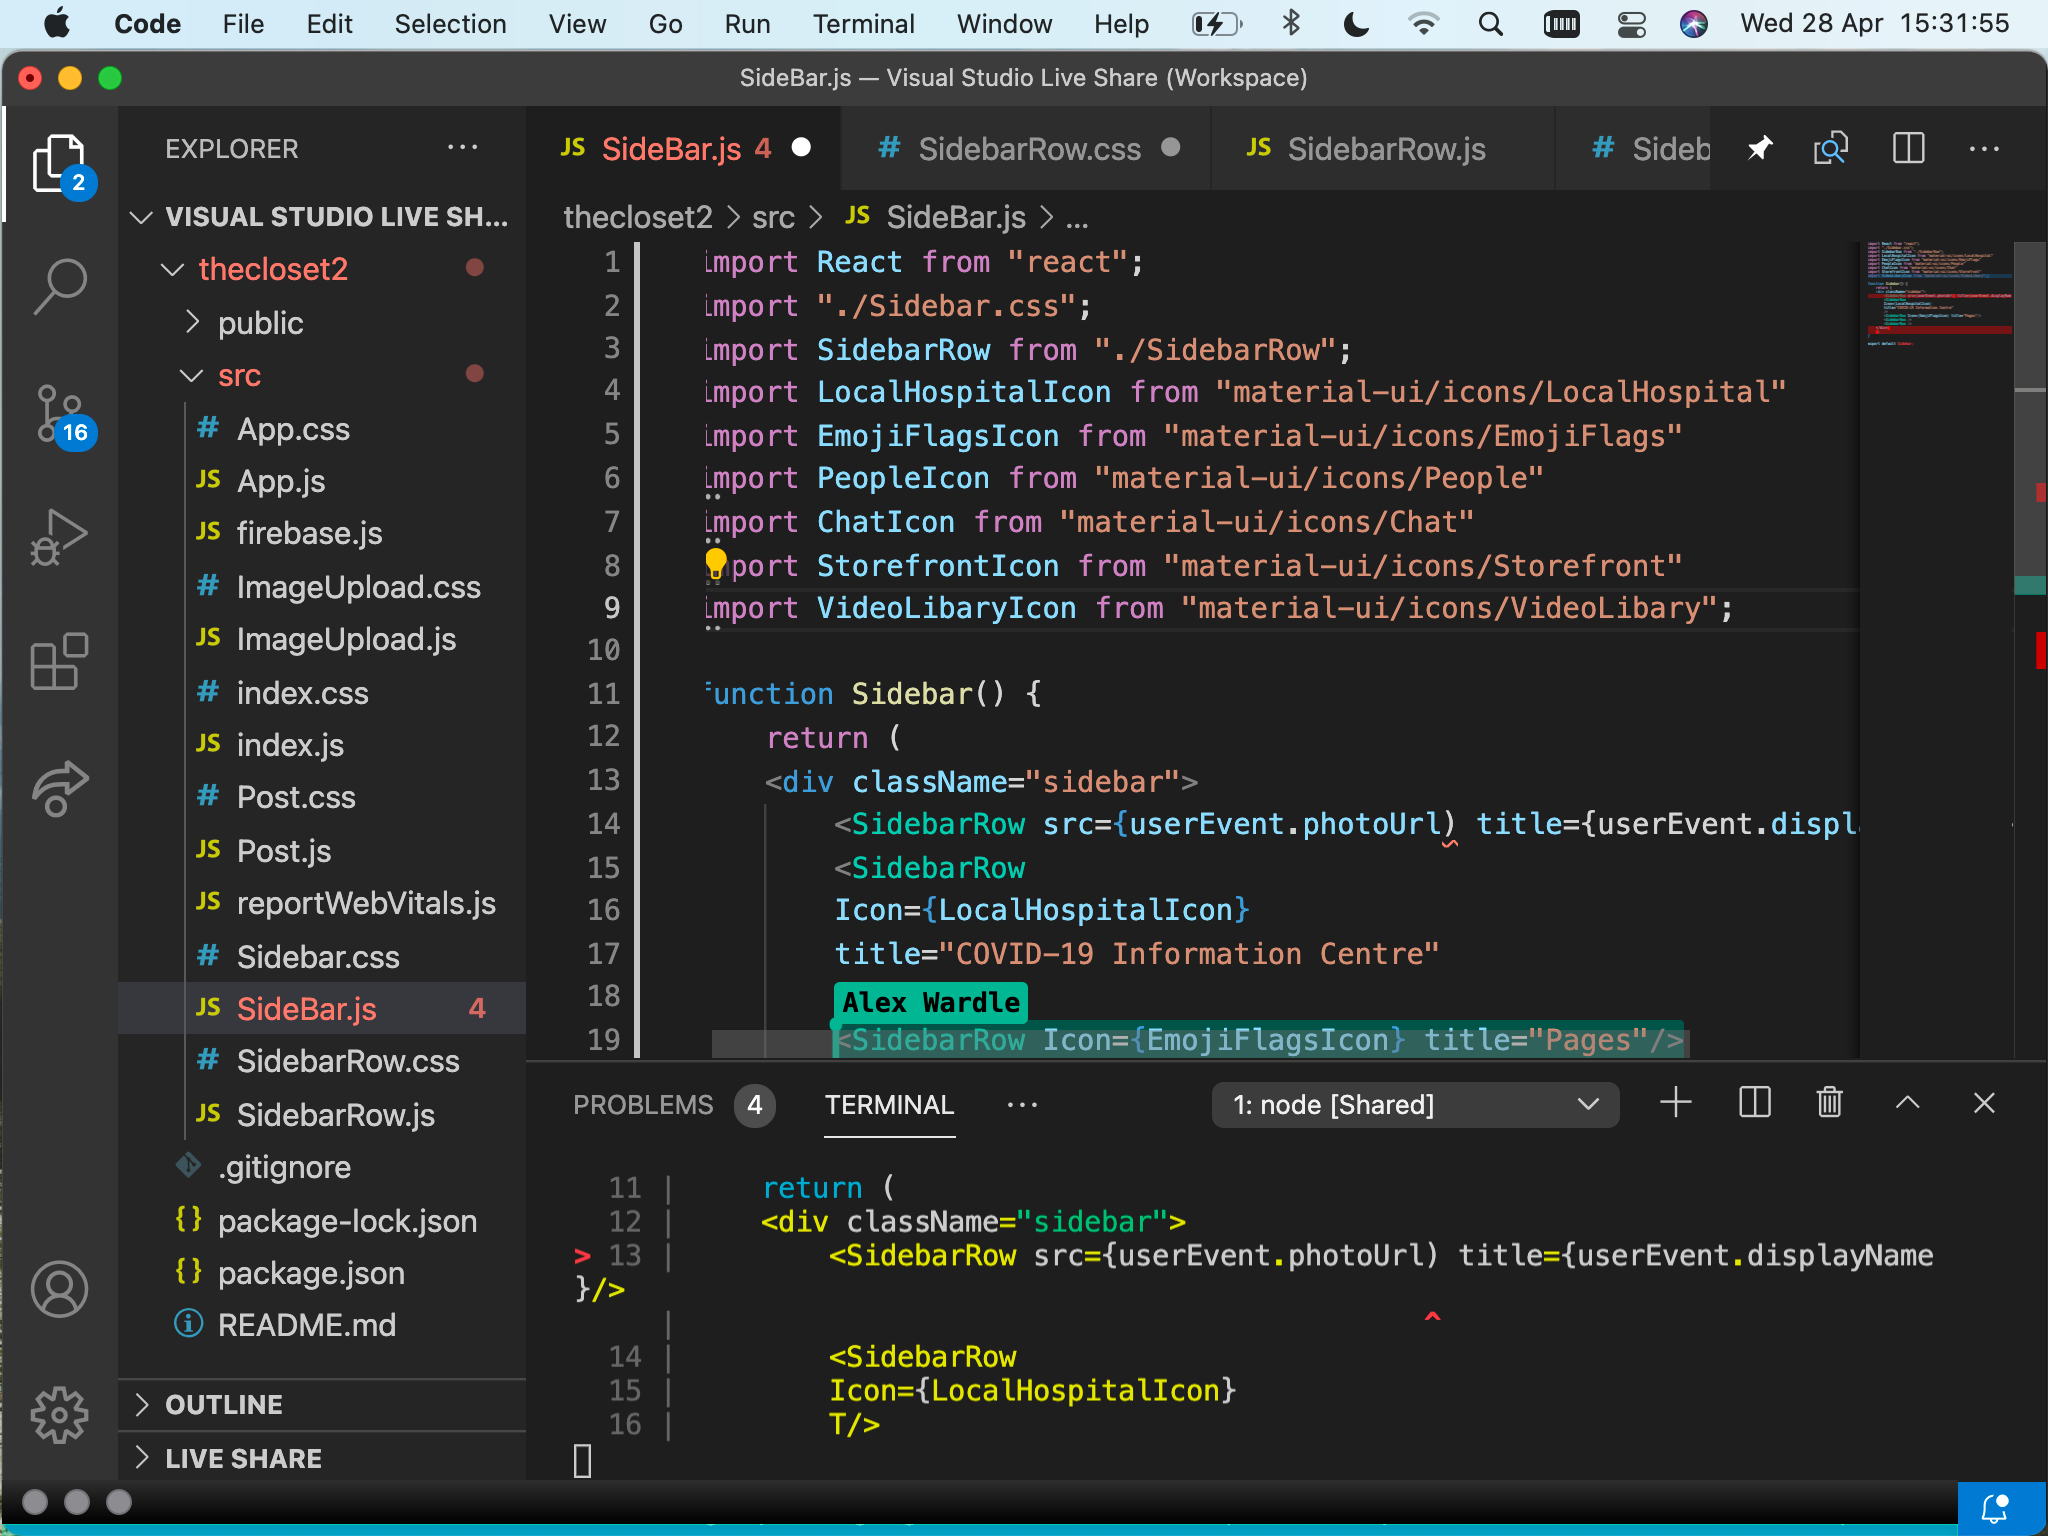
Then used a h4 tag instead of a p tag to make the apperance of the links bolder.
Next I imported the icons into sidebar.JS in order for them to show in thesidebar. As they are linked together successfully.
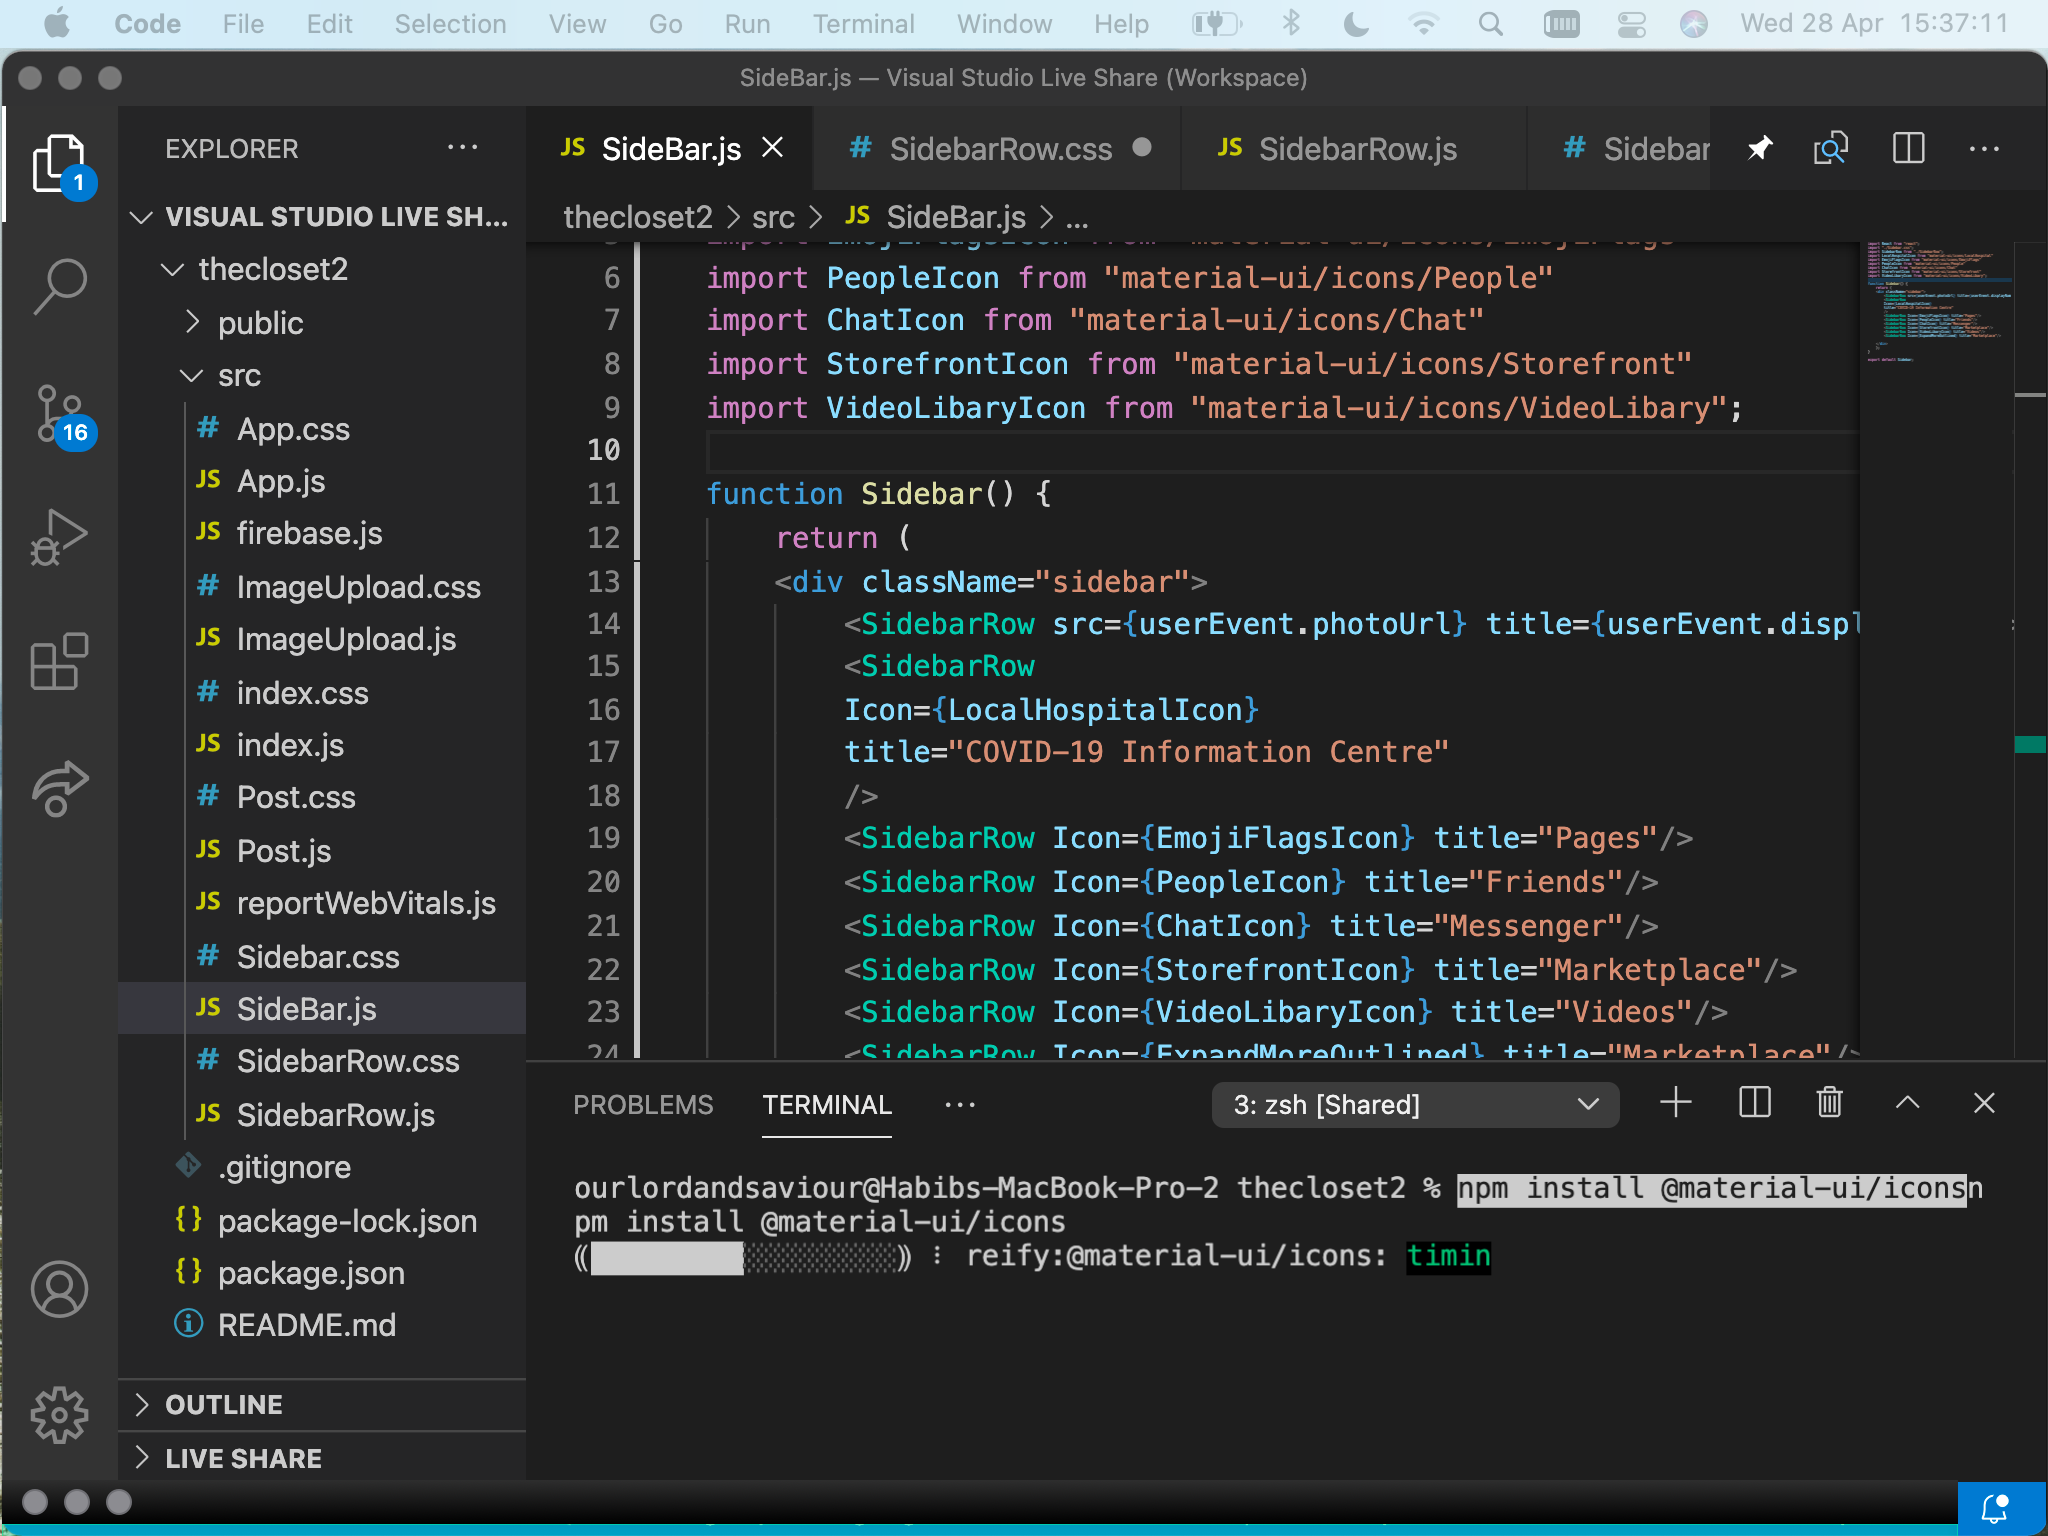
I then dowloaded a new icon pack as you can see on the terminal. I then started to label the icons and the titles such as covid infomation centre on line 17.
Section 7- CSS icons sidebar
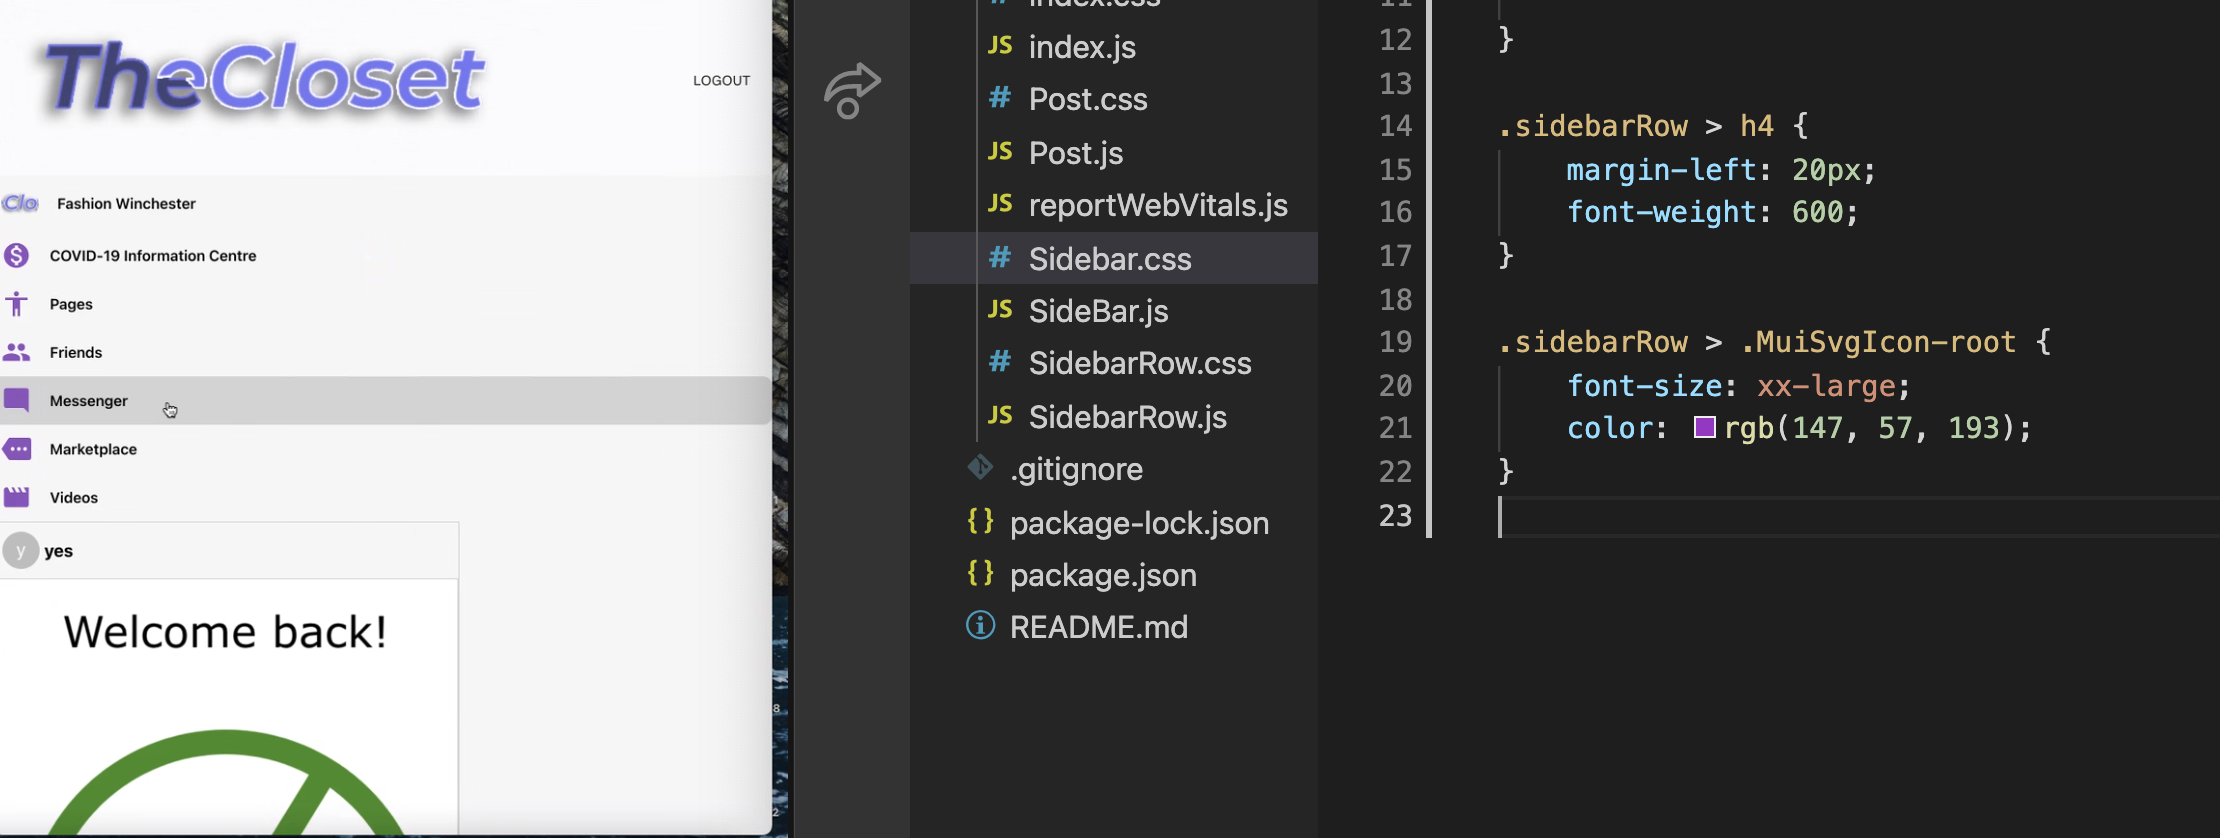
In order to customise the sidebar icons within sidebarow, i made a css page and started to implement to colour codes from my designer. I also added a text hover option. On line 14 i targeted the marginleft and the font weight.
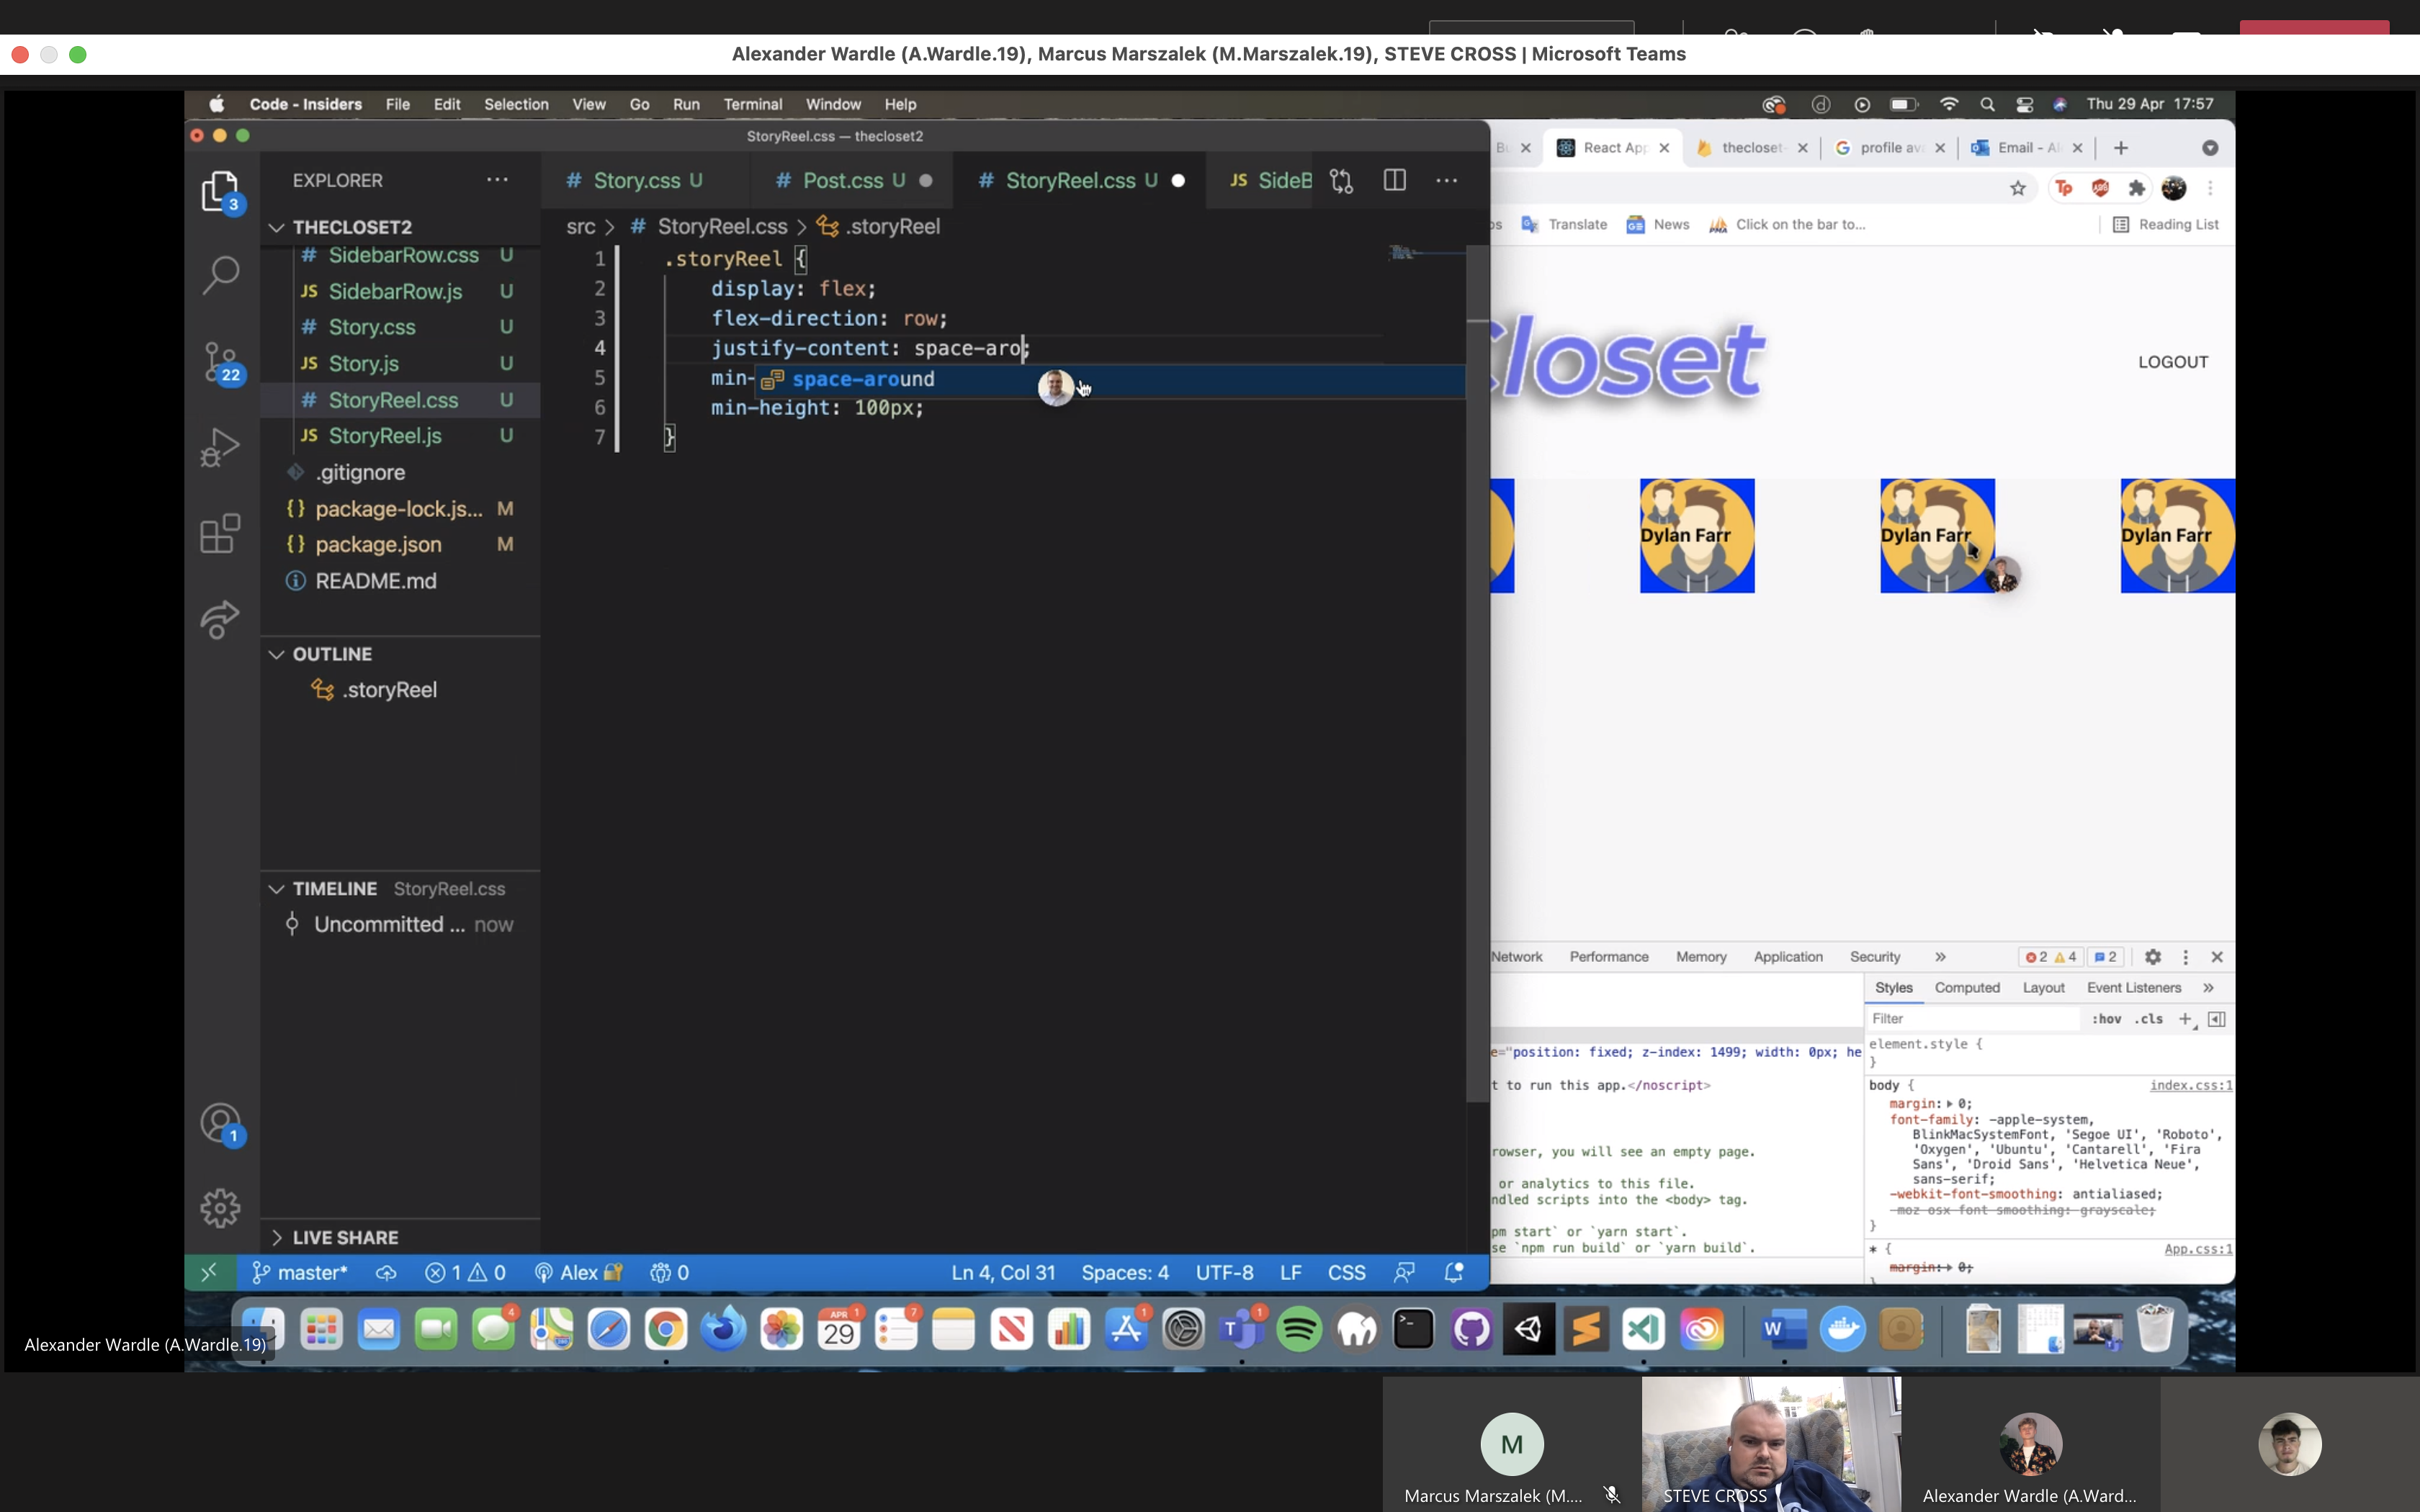
Finally it was time to implement the story reels that Alex had been working on to build out the application. Unfortunately we had issues trying to combine the story components into the application as the layout side bar and the story component.
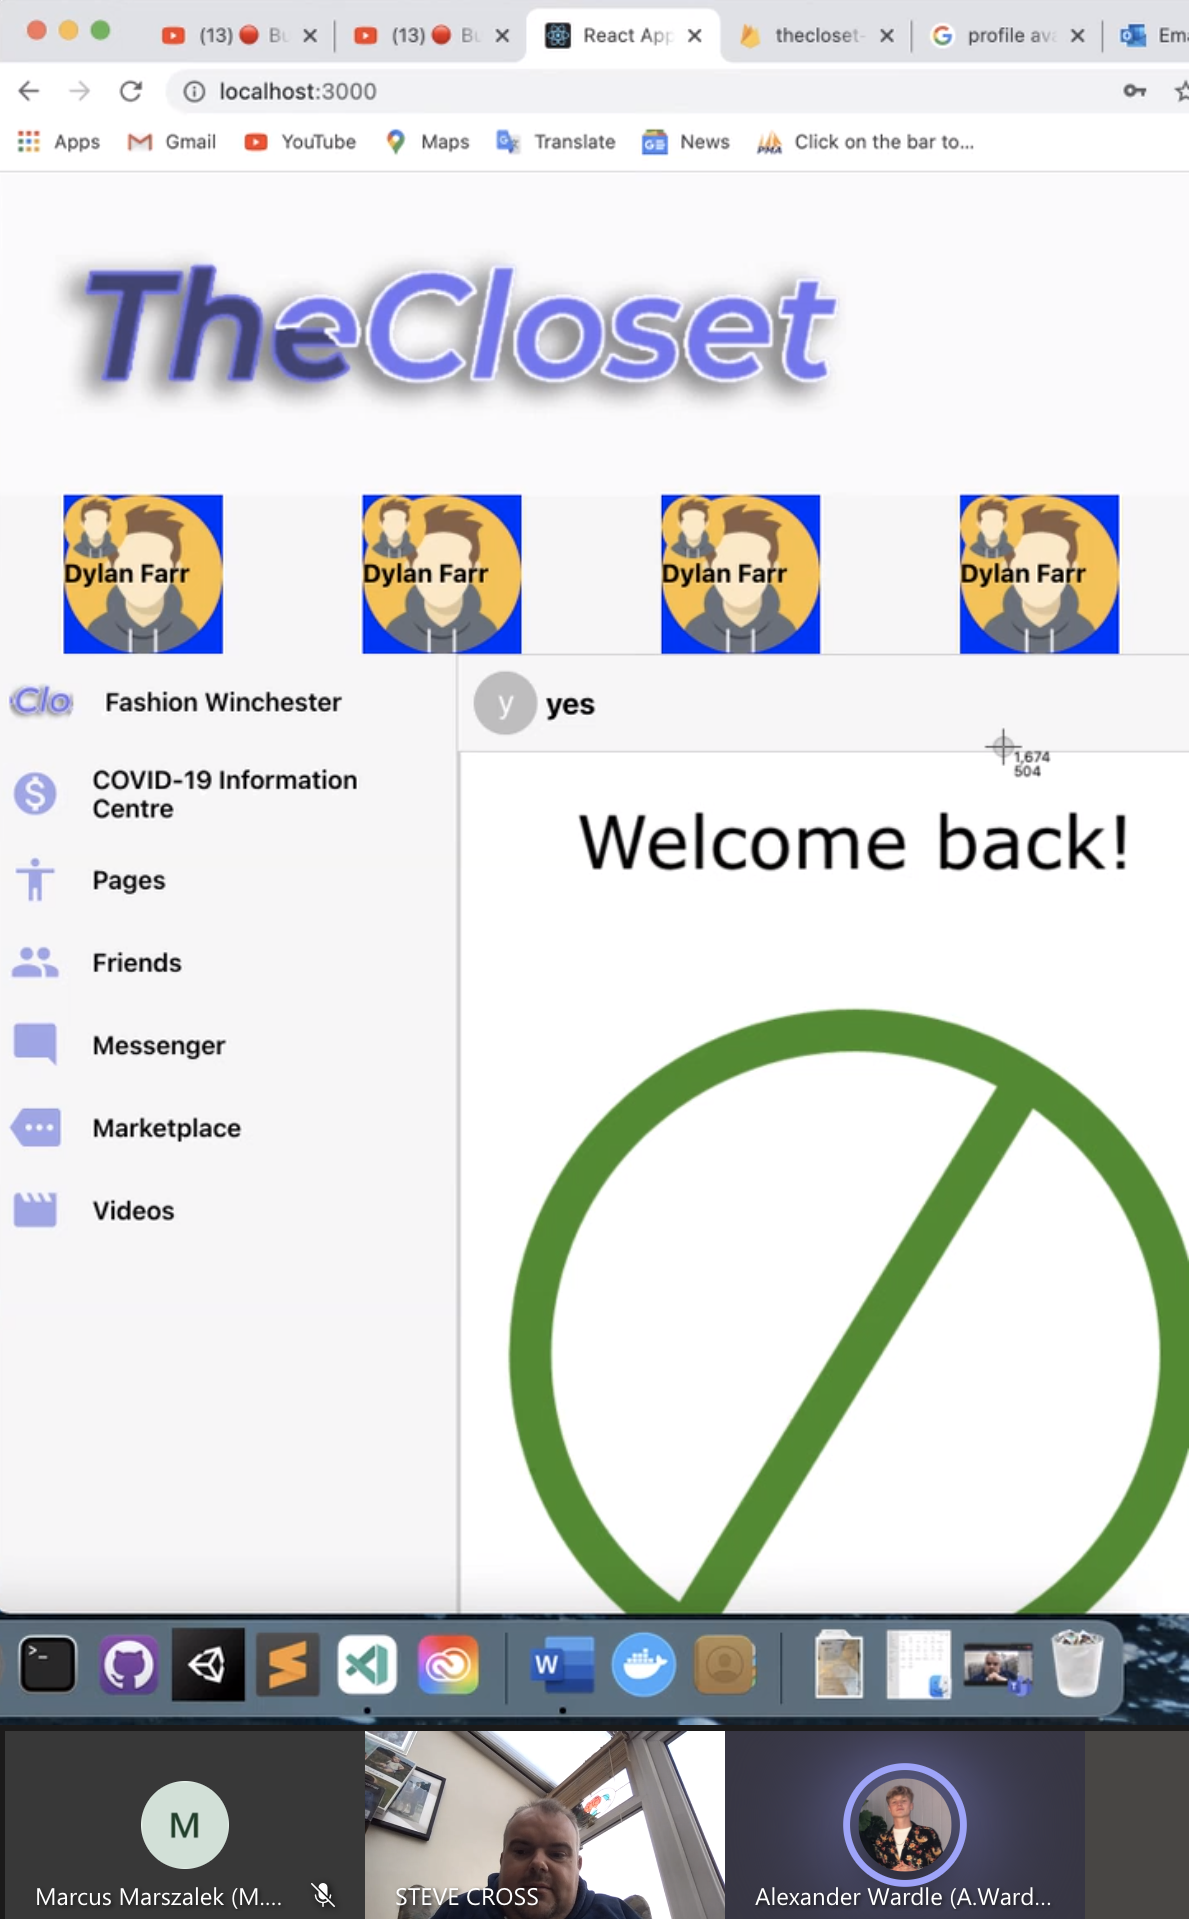
After Steve was able to fix the layout of the application, we were then able to view the entirety of the application in it's full working order.
Section 12- Handover document:
Documentation
Section 13- Conclusion and final thoughts.
This project has been a huge learning curve, devleopment of coding skills and project managment for me thoughout the last 8 weeks. I have encountered plently of setbacks, throughout the project as we built the app on three different applications with humhub, wordpress and react frame work, where Alex and I have delt with client/ lecturer critiques and problems which have turned into soultions by taking on new challenges from those three projects mentioned without any prior knowledge to the softare. This has been fascinating experience as we have had to use our ingenuity to decide to start from scratch with the project on three seperate occasions, and have ended up with a working final soultion with an application that matches our client's breif